Tabata Workouts: Is 4 Minutes a Day too Good to be True?

Tabata Workouts: Is 4 Minutes a Day too Good to be True?

If you are like me, the first time you heard the word Tabata you thought it was some form of martial arts. Back then, I honestly had no clue what it meant and frankly did not care to know. For those of you who are familiar with Tabata workouts, you know that it is not martial arts but actually a version of HIIT (High Intensity Interval Training) workouts.

It was actually named after the professor Izumi Tabata who was studying higher intensity interval training using Olympic speedskaters who were performing the study on a stationary bike. This was back in 1996. It has now become one the more popularized methods of interval training out there today. But what separates Tabata as a style of HIIT. What makes it so special?

Wait, if you aren’t even sure what HIIT is you should read about HIIT. It lays the foundation for everything you are about to read.

DEFINING TABATA WORKOUTS

The parameters of the original study involved the athletes doing 20 seconds of high intensity and 10 seconds of rest. During the high intensity part of the workout your VO2 max is going to be at 170%. Recall here that VO2 max is the volume of oxygen that is being transferred and utilized within the body during exercises. This 20 seconds on, 10 seconds off was done for 4 minutes.

Through the study, they found that with this method, they were able to achieve similar increases in VO2 max and aerobic capacity as a longer duration of cardio at a steady intensity. They also were able gain anaerobic capacities as well! Exciting results that explain why intervals are used to improve athletic performance.

So, yes, this falls within the umbrella of HIIT training due to its nature of having a section of high intensity, followed by low intensity. However, this one is only for 4 minutes! I mean come on, working out has never been easier right!?

LET’S GET REAL

Alright so Tabata workouts sound like a dream. 4 minutes a day. And you get the same benefits as someone who worked out for an hour? SIGN ME UP.

Sorry to burst your bubble, but this is not entirely the case. Let’s look at the facts here. The benefits from the study were based off of a VO2 max of 170%. Although we cannot accurately measure this at home, let’s compare to the other HIIT workouts we have done. They require you to only be at 90%.  We have already talked about how much effort needed to get there and how difficult it is.

And looking at the Tabata study, they were using Olympic athletes. Chances are, if you are reading this article then you are not training for the Olympics. I mean, if you are then I am honored (I’m looking at you Gabby Douglas). Most of us will probably never come near that level of maximal effort, let alone in the 20 second range. Not to mentioned this was in a lab under very controlled conditions. So really we will probably not be able to do a TRUE Tabata workout.

CAN I STILL GET RESULTS FROM MY TABATA WORKOUTS?

Now that I have just told you none of you are actually doing Tabata workouts, I do want to give you a bit of hope here. You can still do a Tabata-inspired workout! This is just going to fall into the category of HIIT using 20 seconds on and 10 seconds off. You just aren’t going to be operating at that 170% VO2 max effort.

The bigger focus here, as with HIIT, is giving that maximal effort that you have for those twenty seconds of work. If you are able to do that, you will still be able to get a great workout in those four minutes! You can measure this level of effort through your heart rate. Due to the popularity of fitness trackers and the growth in technology this is easier than ever.

I use an apple watch as my preferred choice due to the easy pairing with my other devices and the ability to track different types of activities (including a setting for HIIT).

These are affiliate links. While there is no cost to you when you order through them, I do make a commission. Your support, by ordering through them, is greatly appreciated!

Other options include a fit bit or a polar watch, depending on what look and function you are looking for! Here are links to both.

The benefits here are going to mimic that of HIIT workouts, because as we explained earlier, Tabata workouts are under the umbrella of HIIT. Other benefits include it being so short! Only 4 minutes for a Tabata workout!

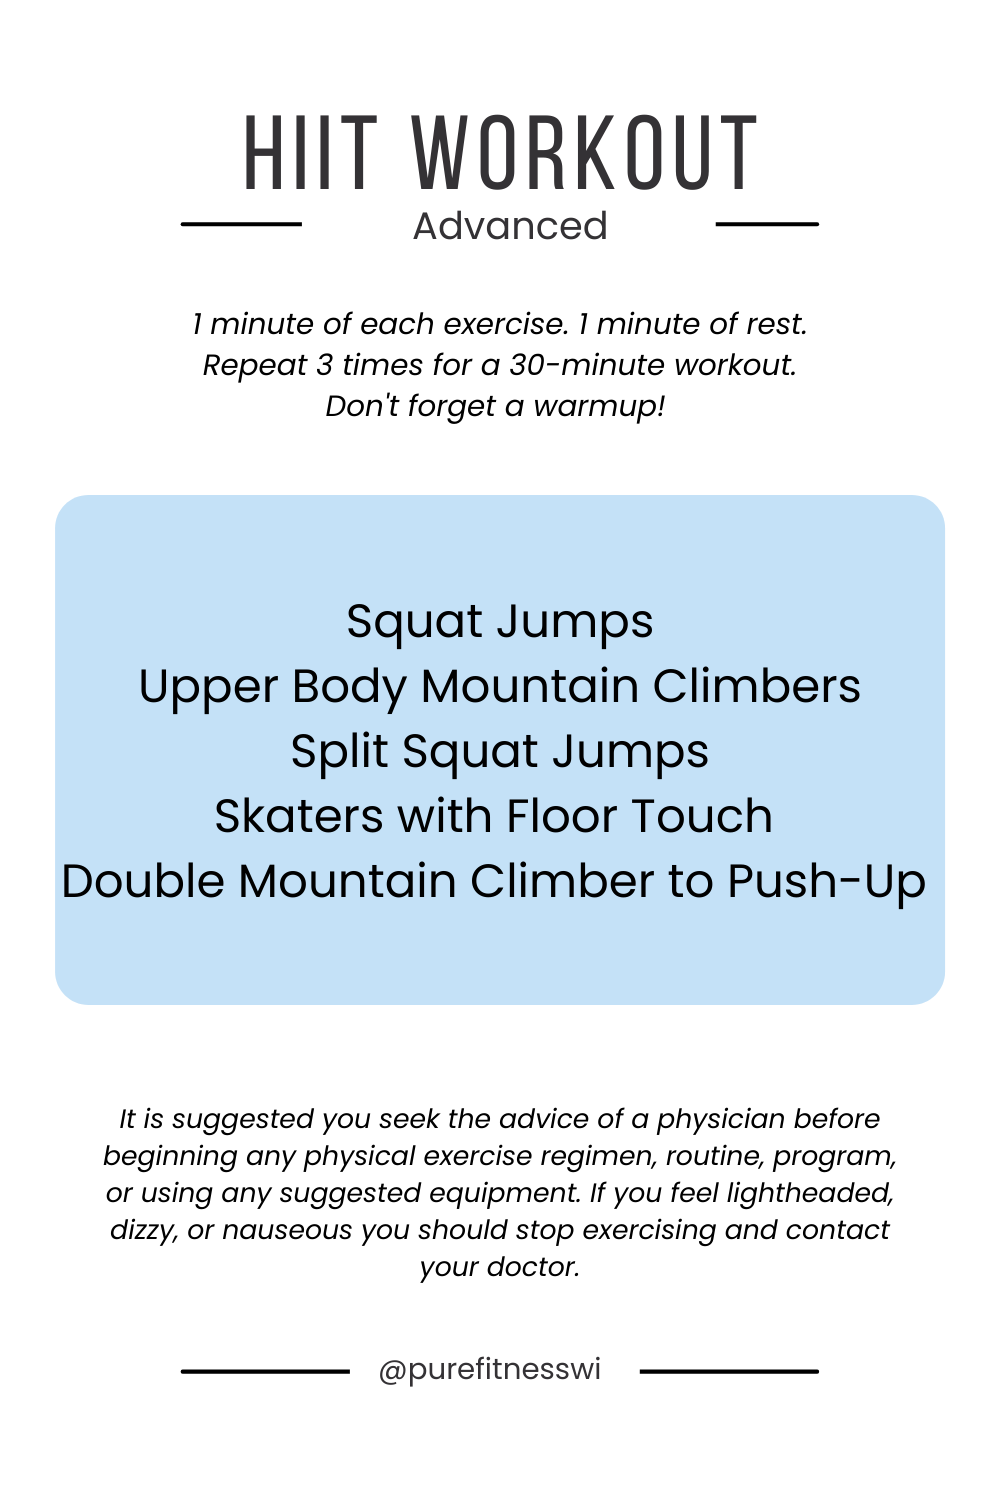
HOW CAN I DO “TABATA” WORKOUTS AT HOME?

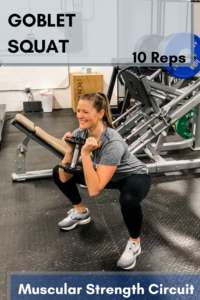
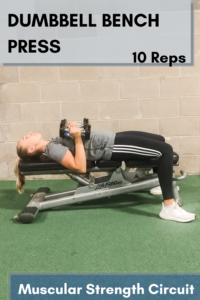
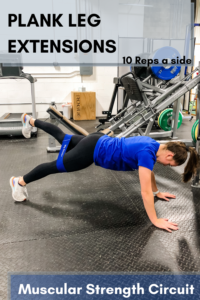
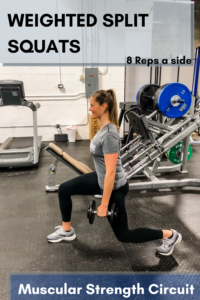
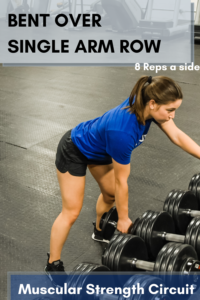
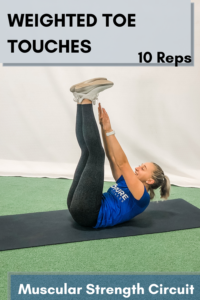
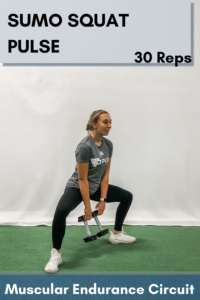
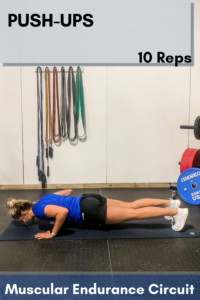
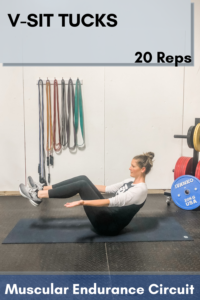
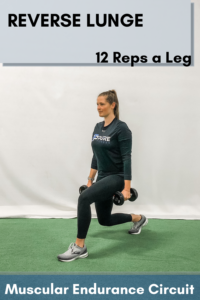
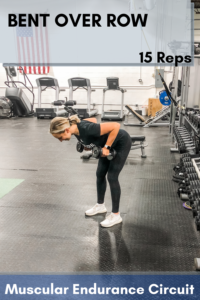
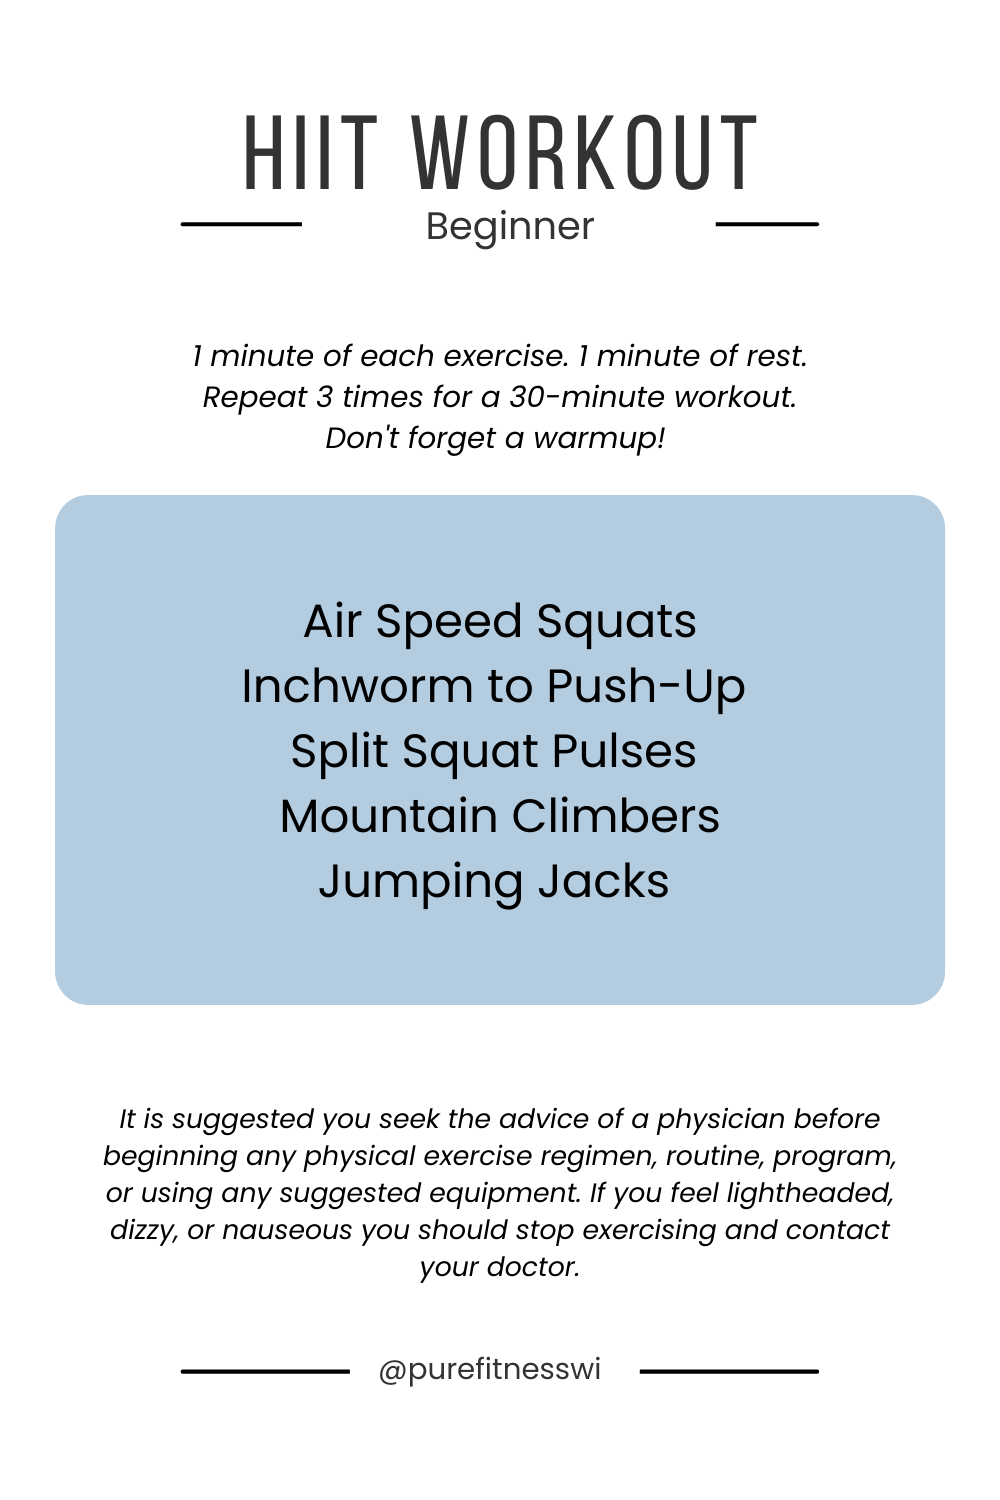
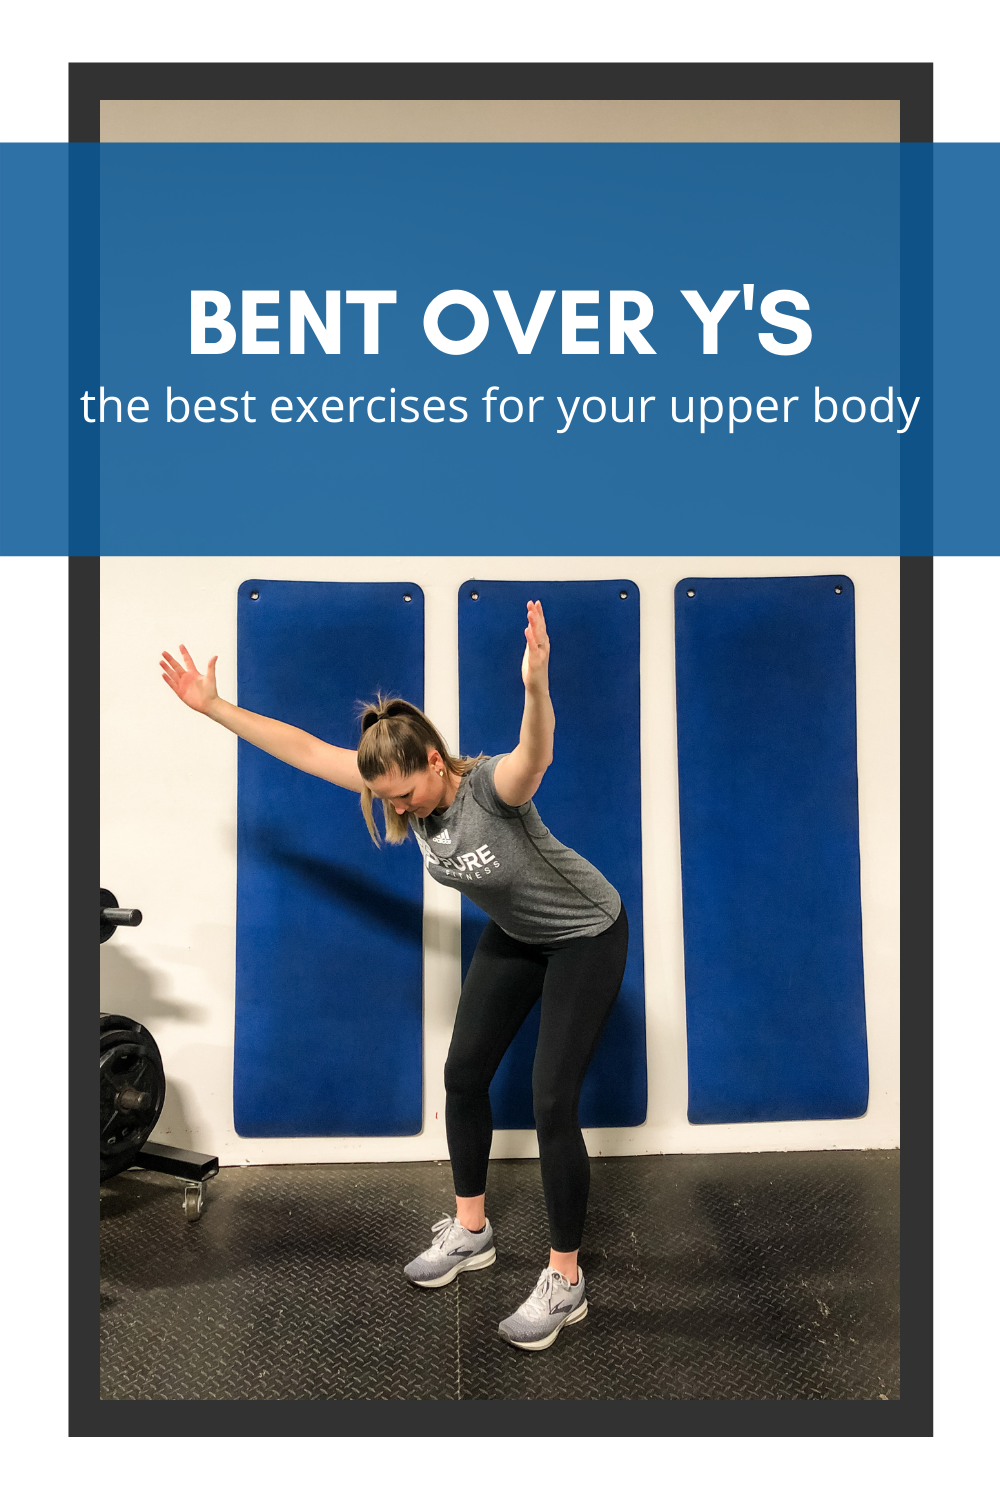
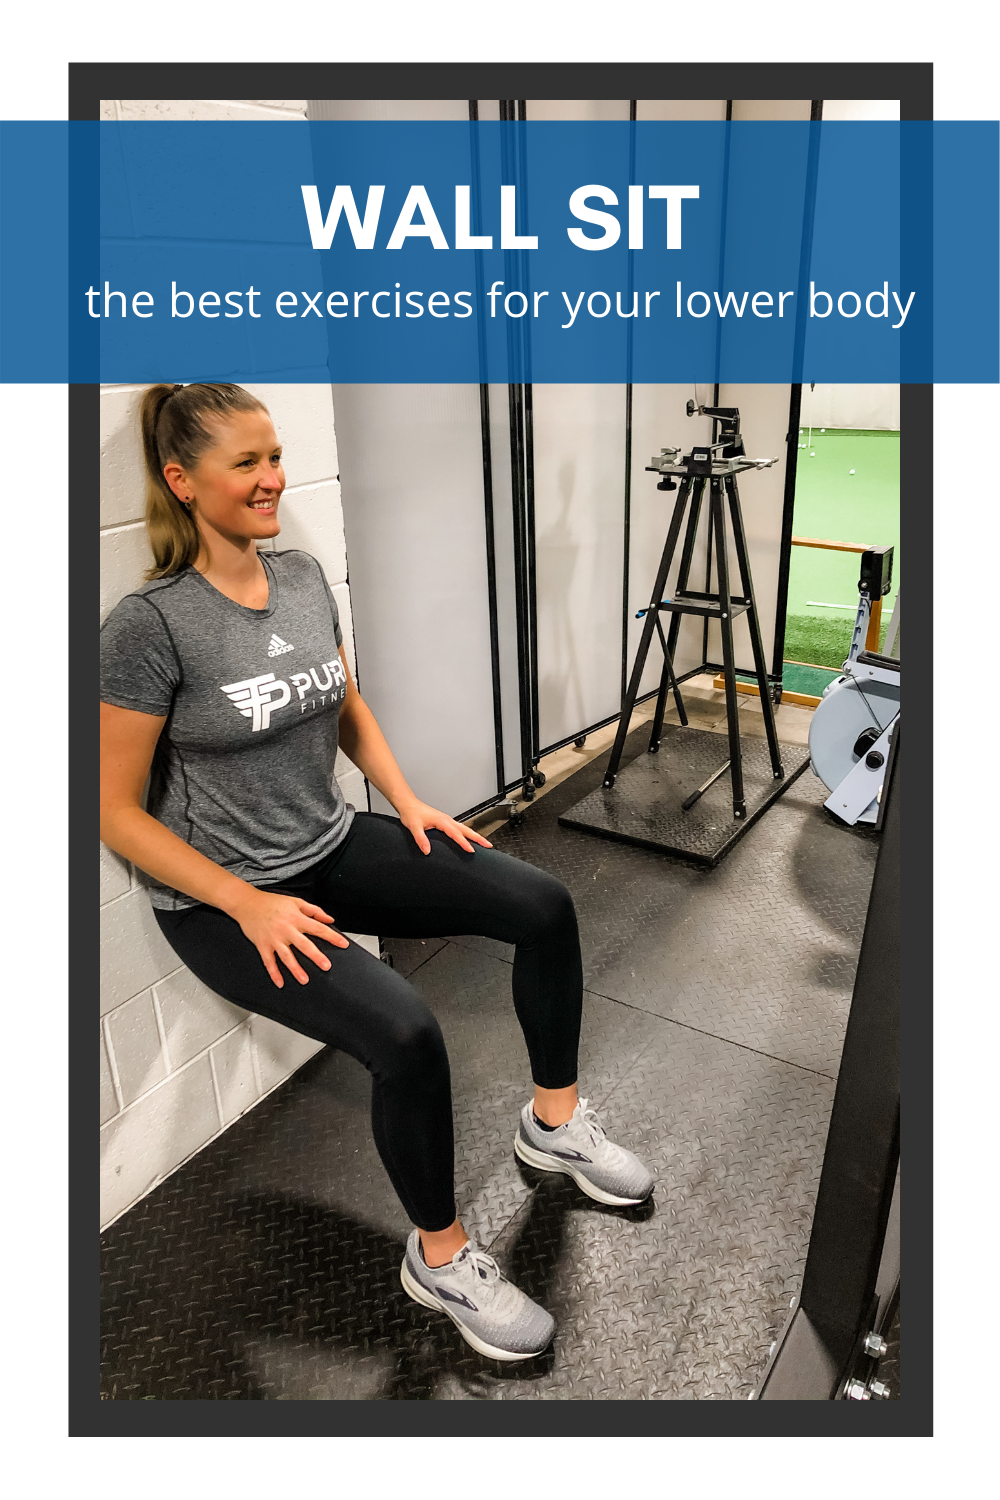
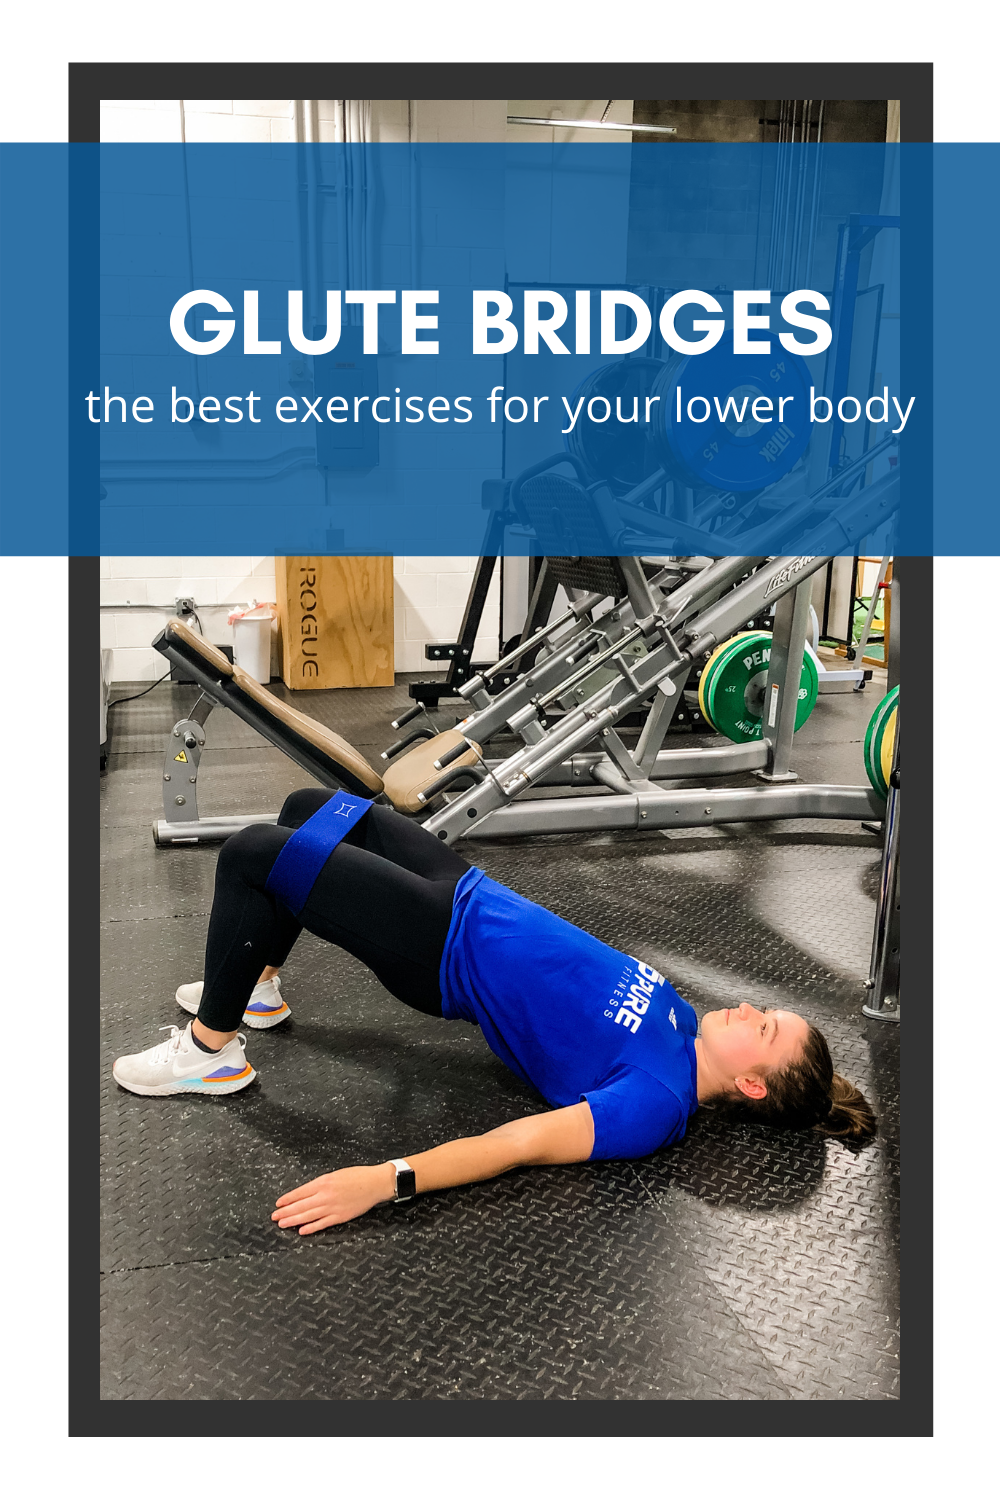
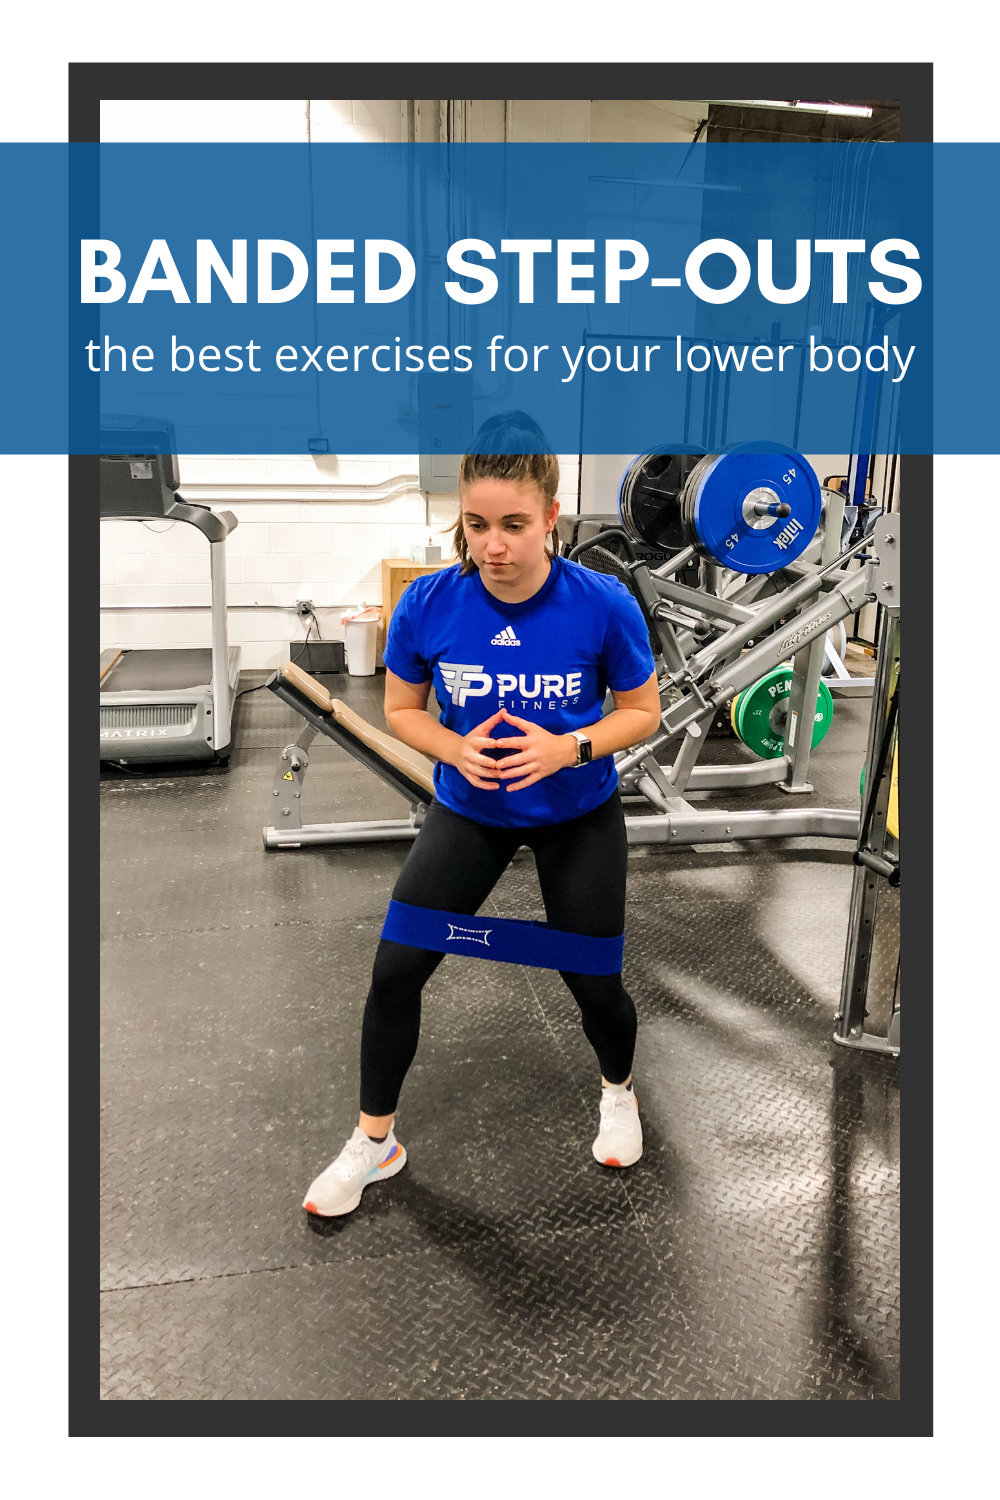
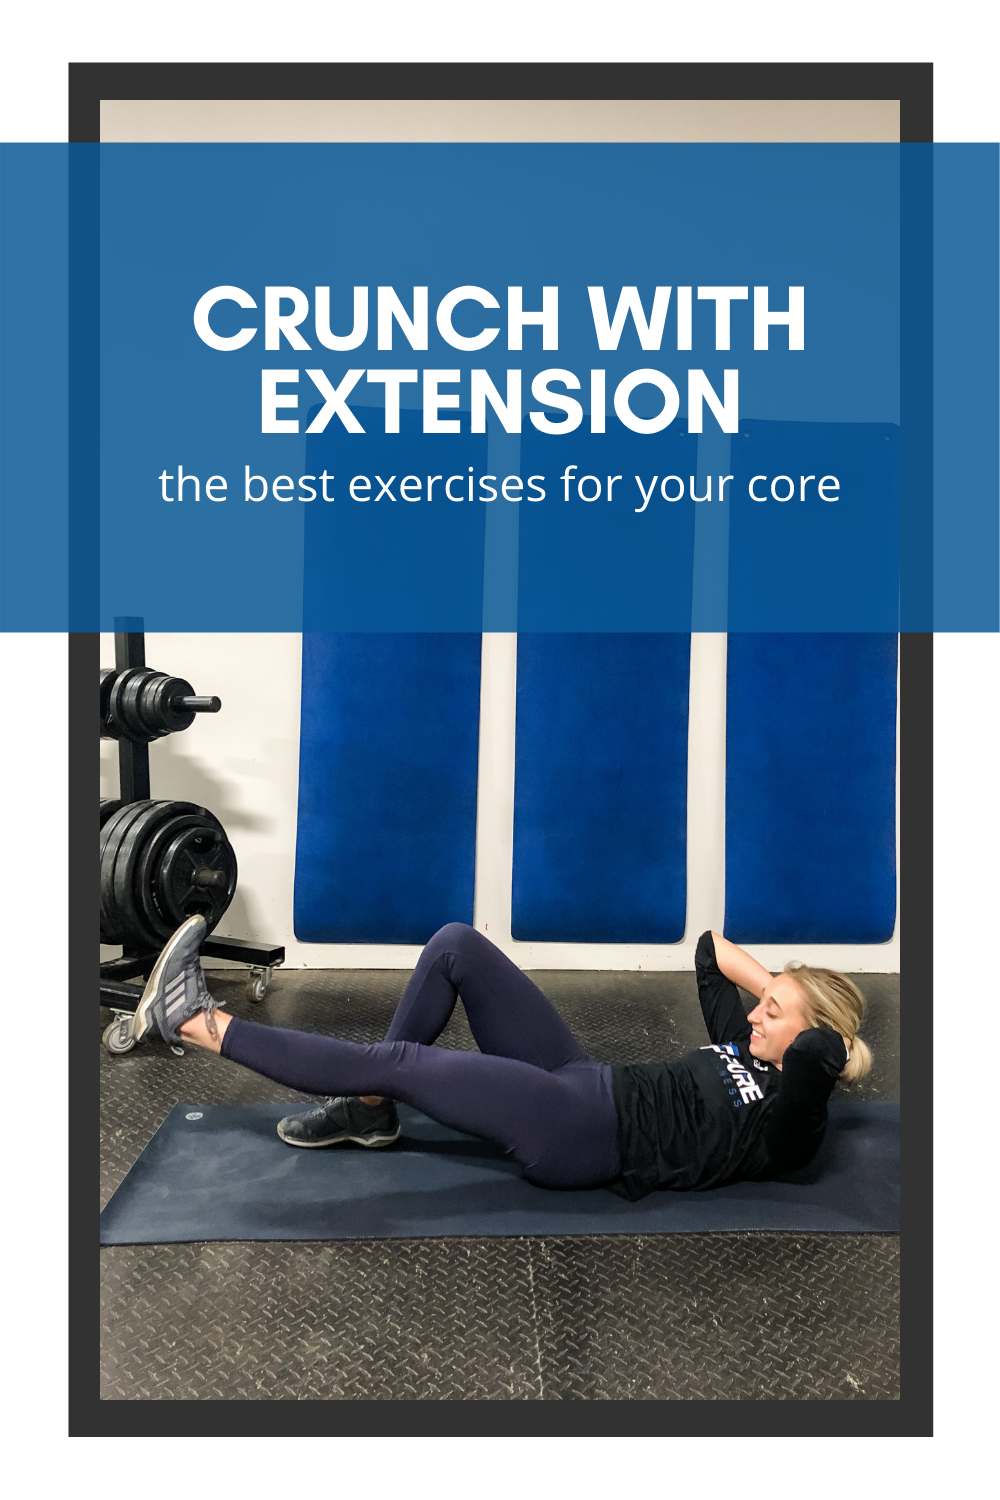
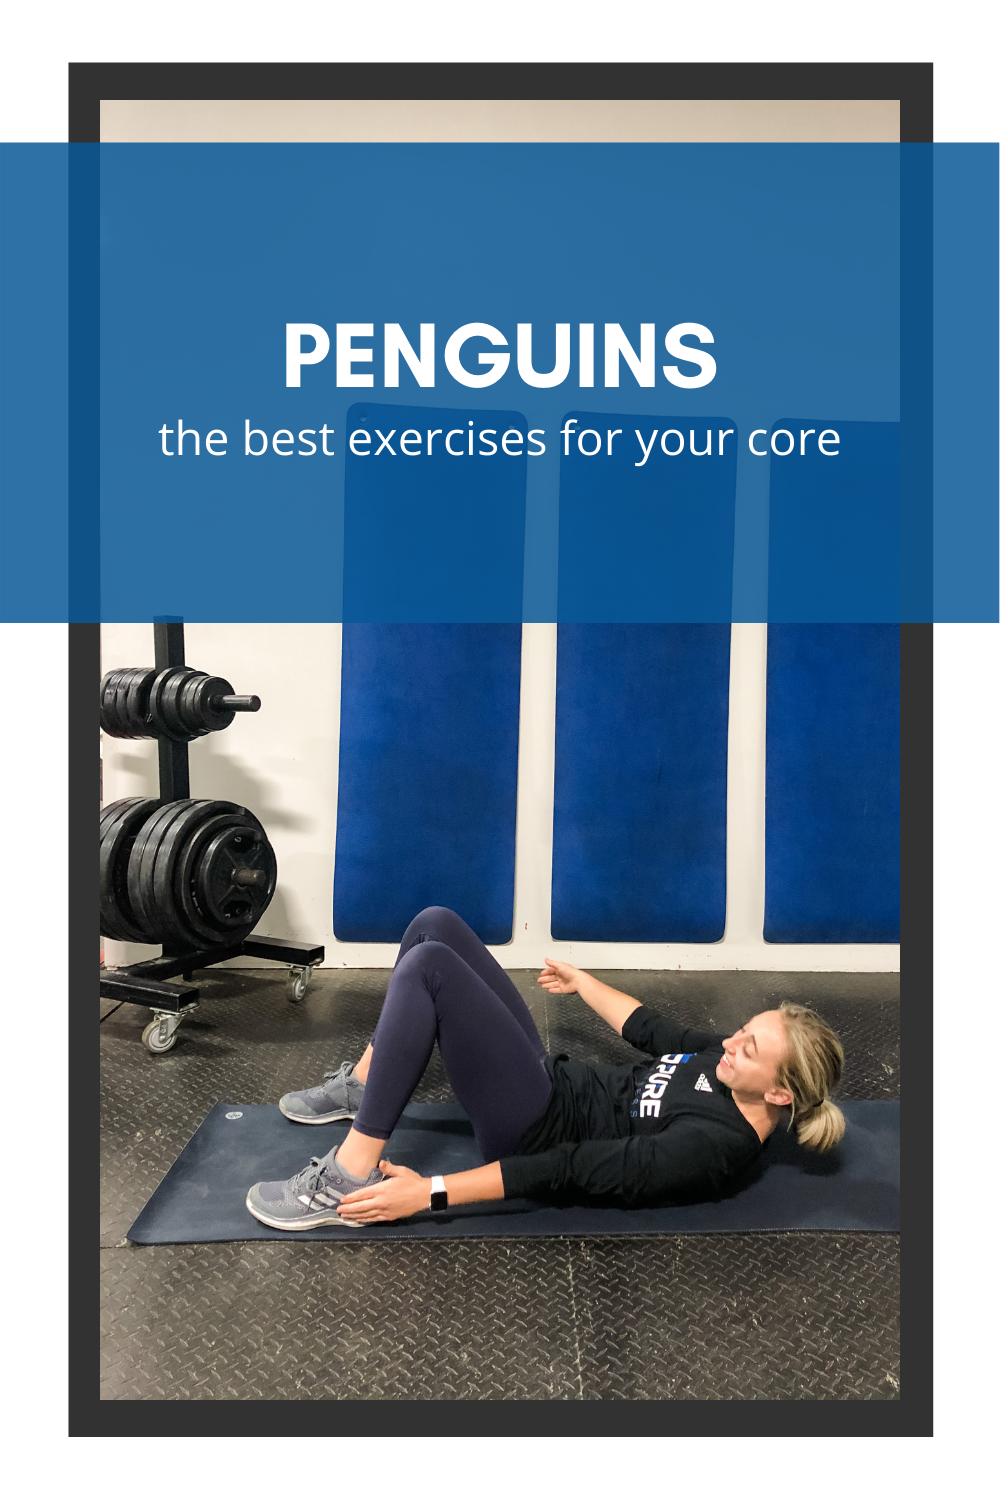
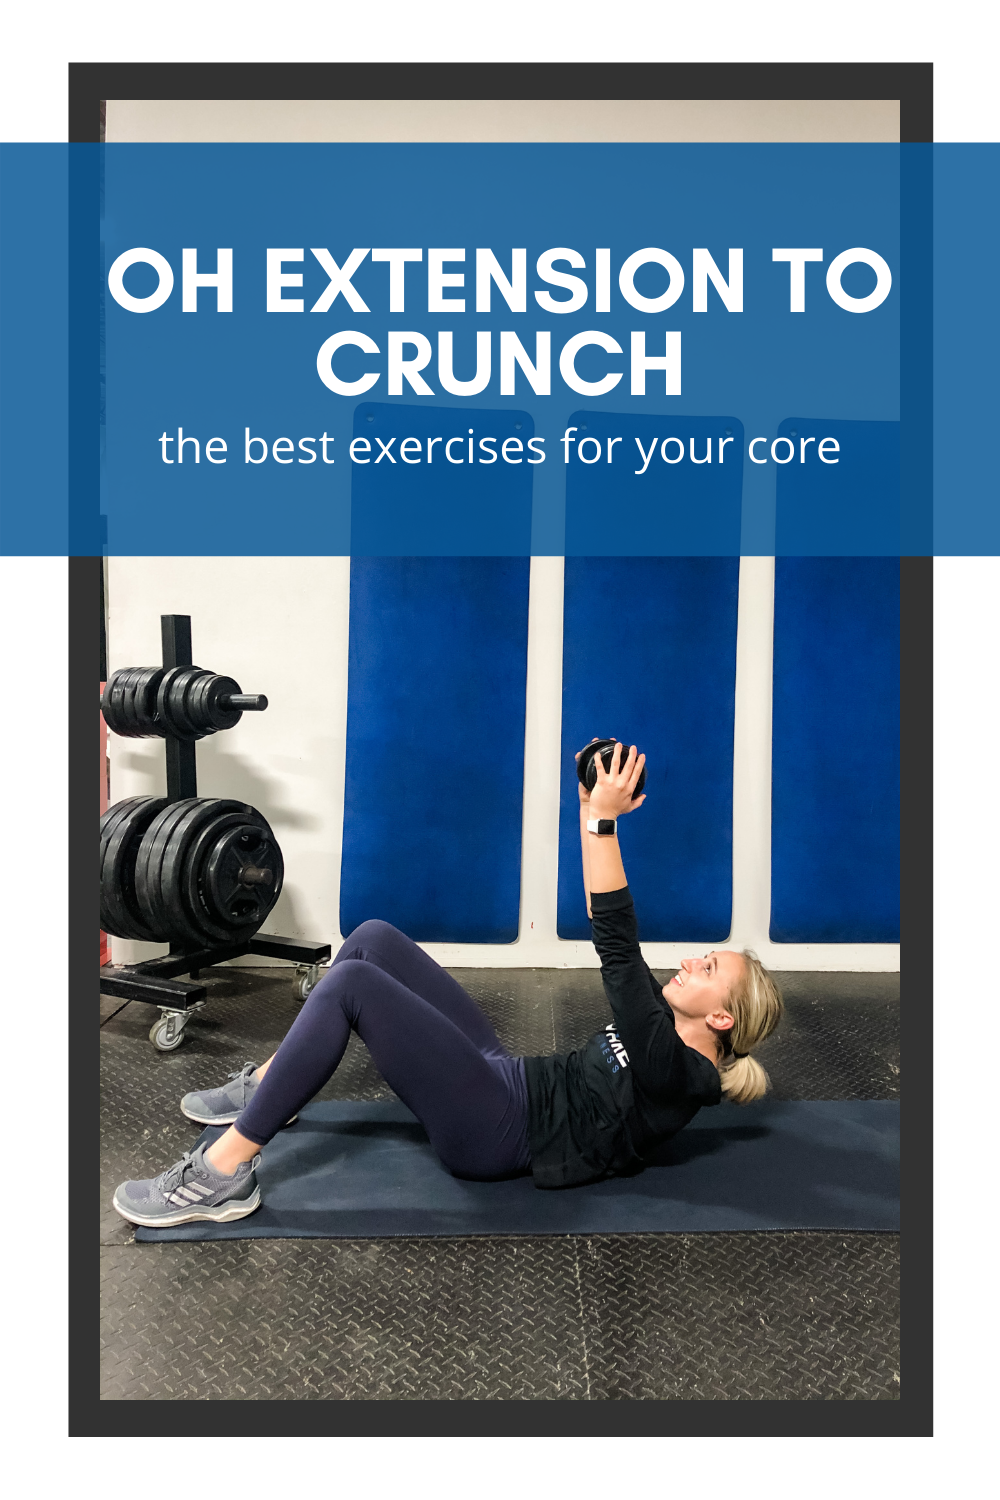
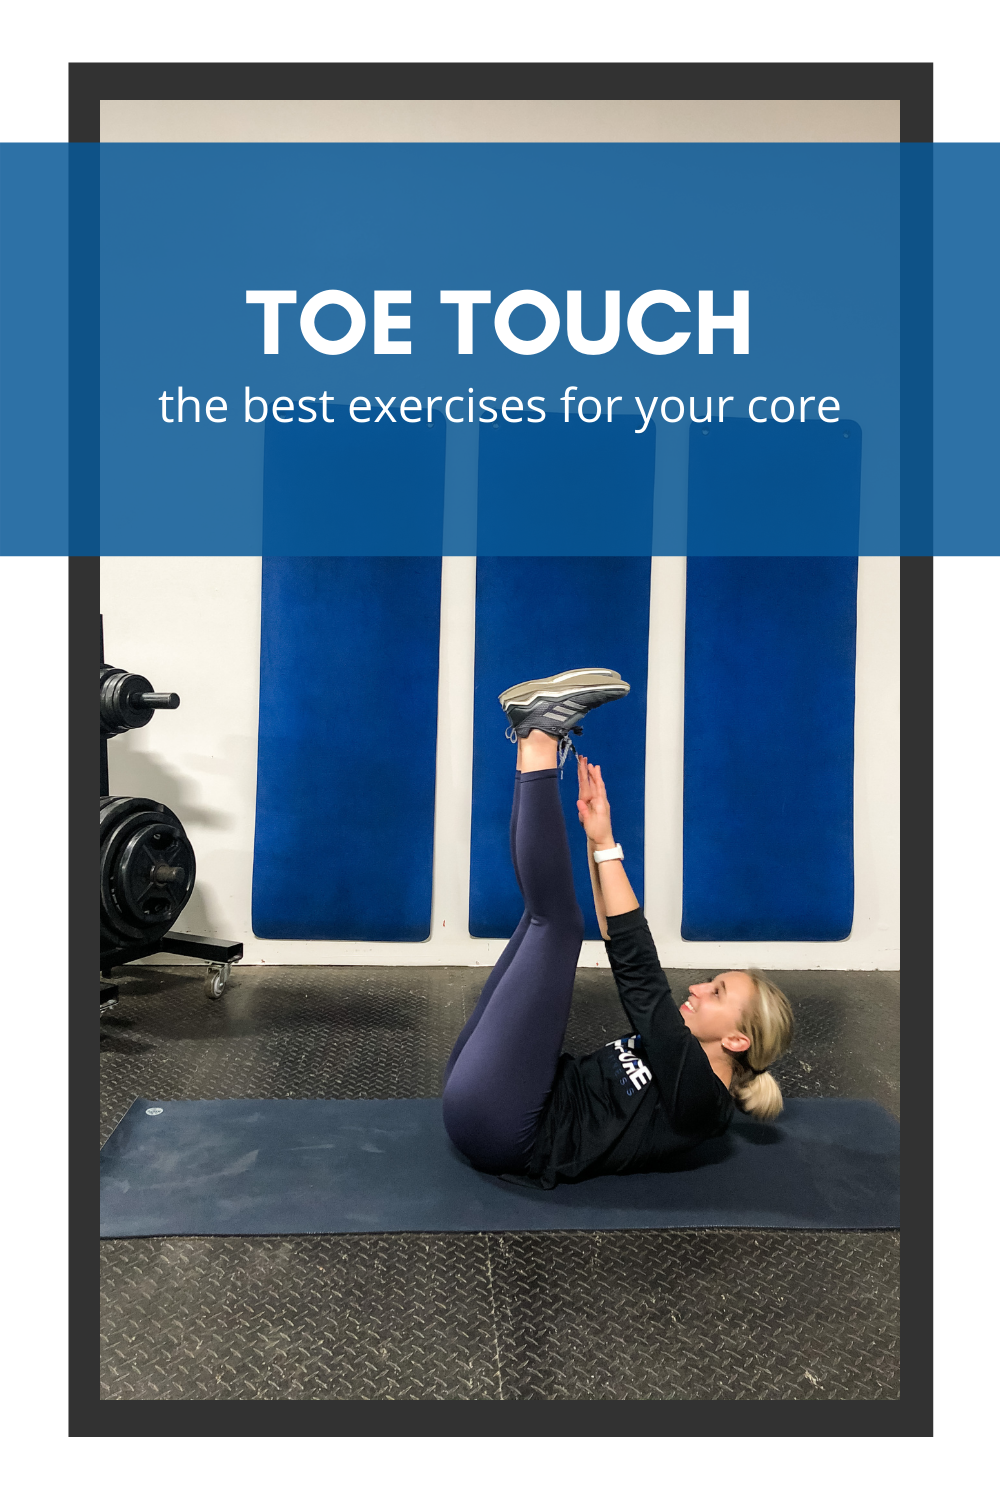
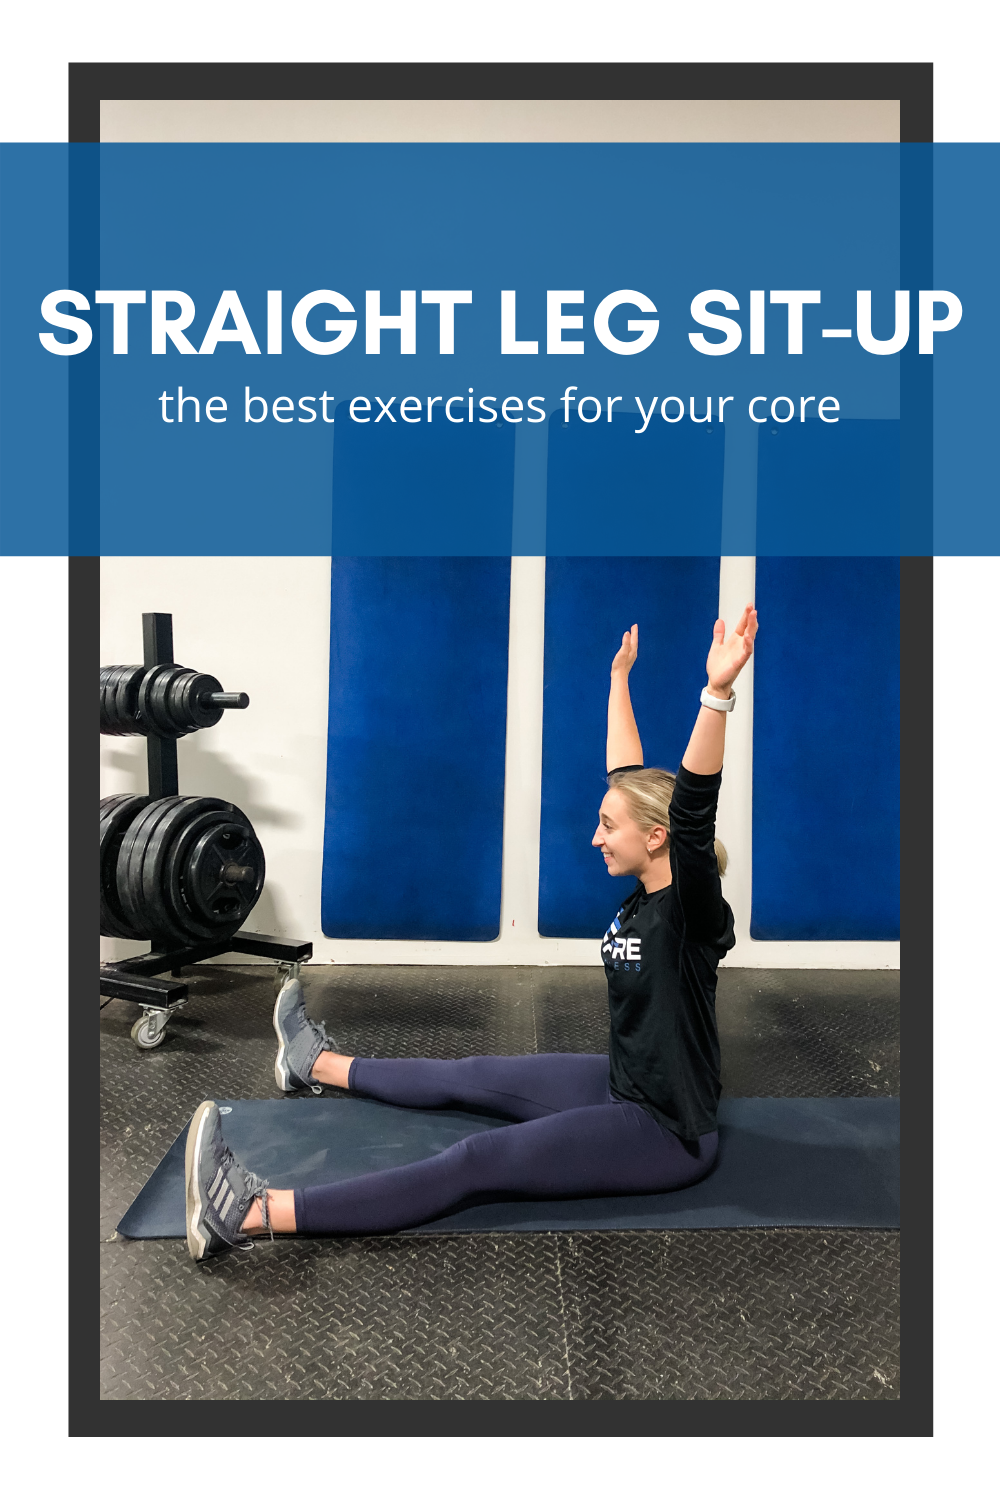
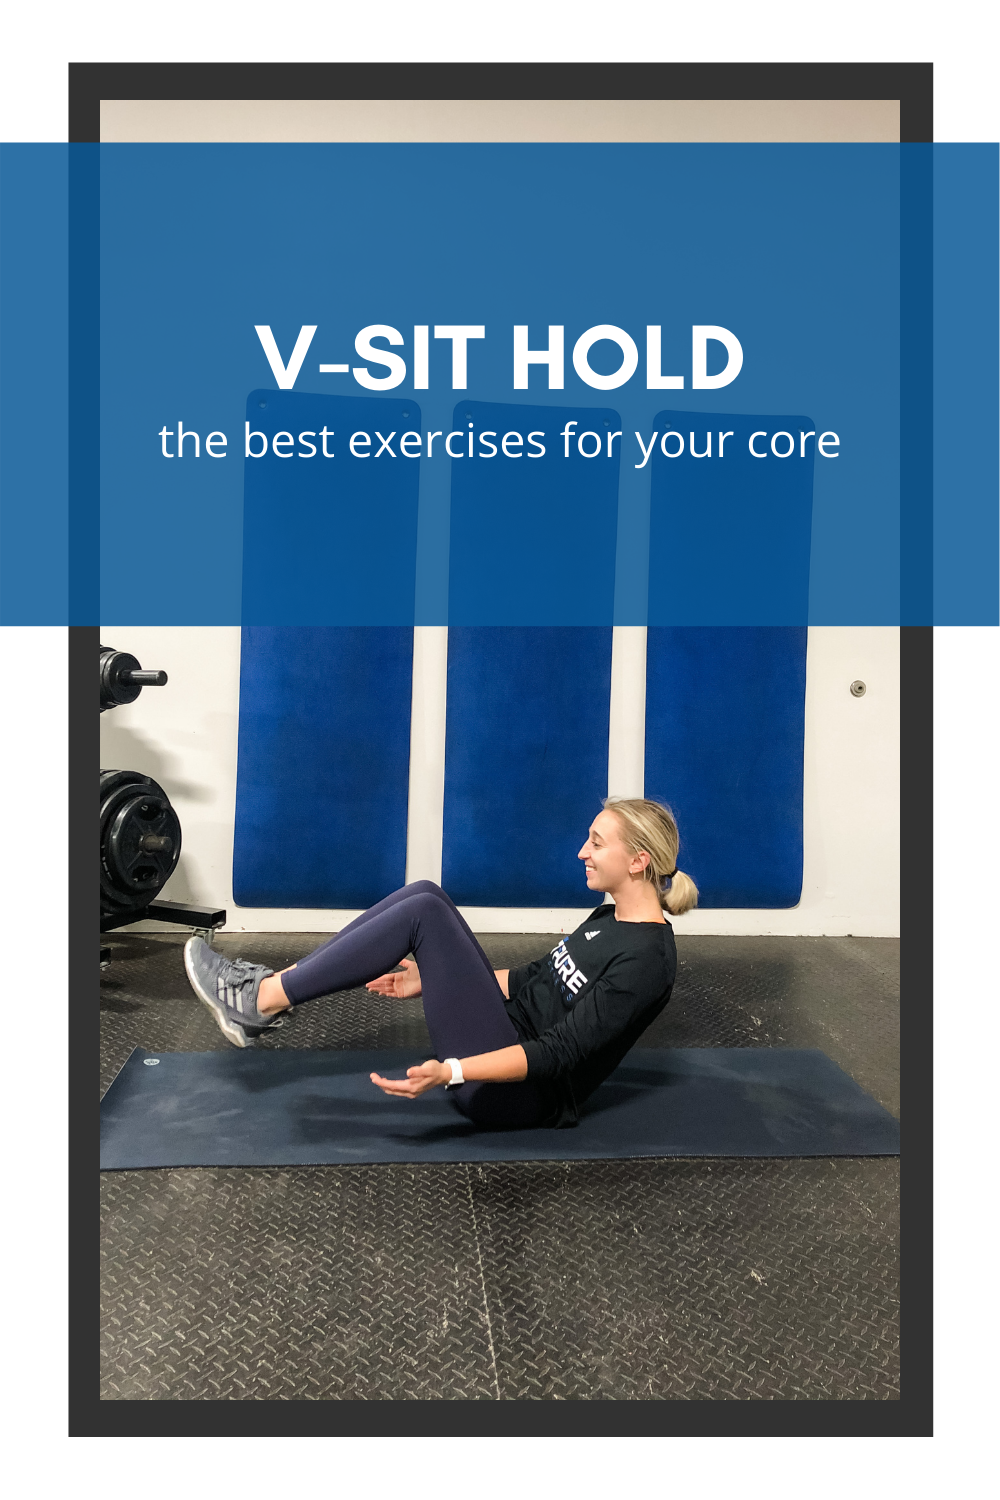
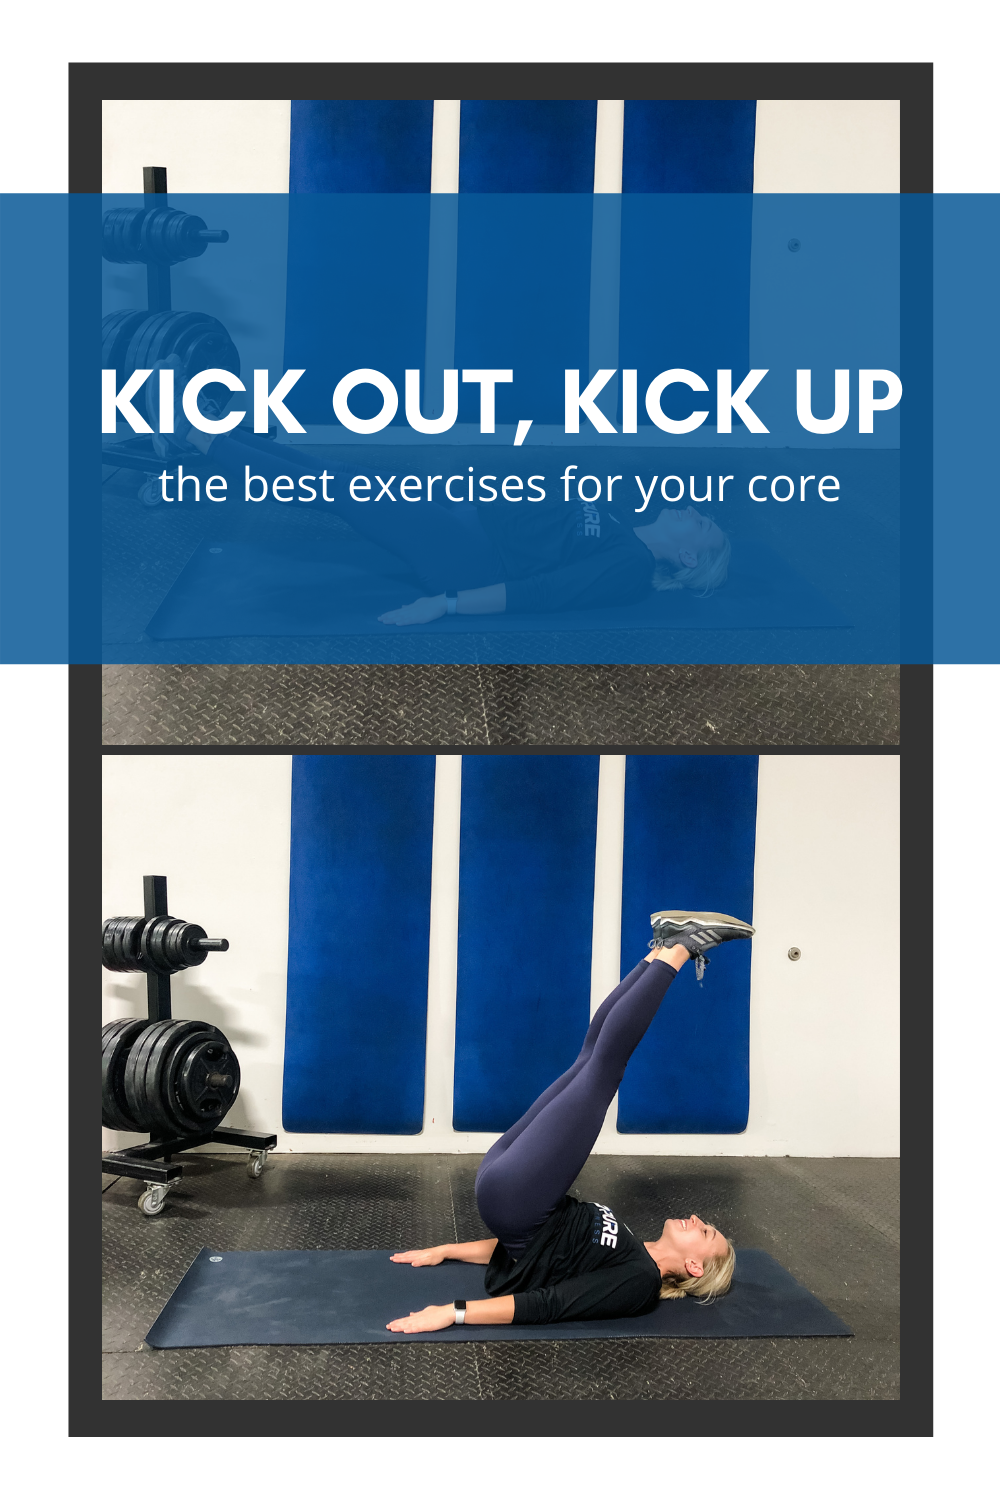
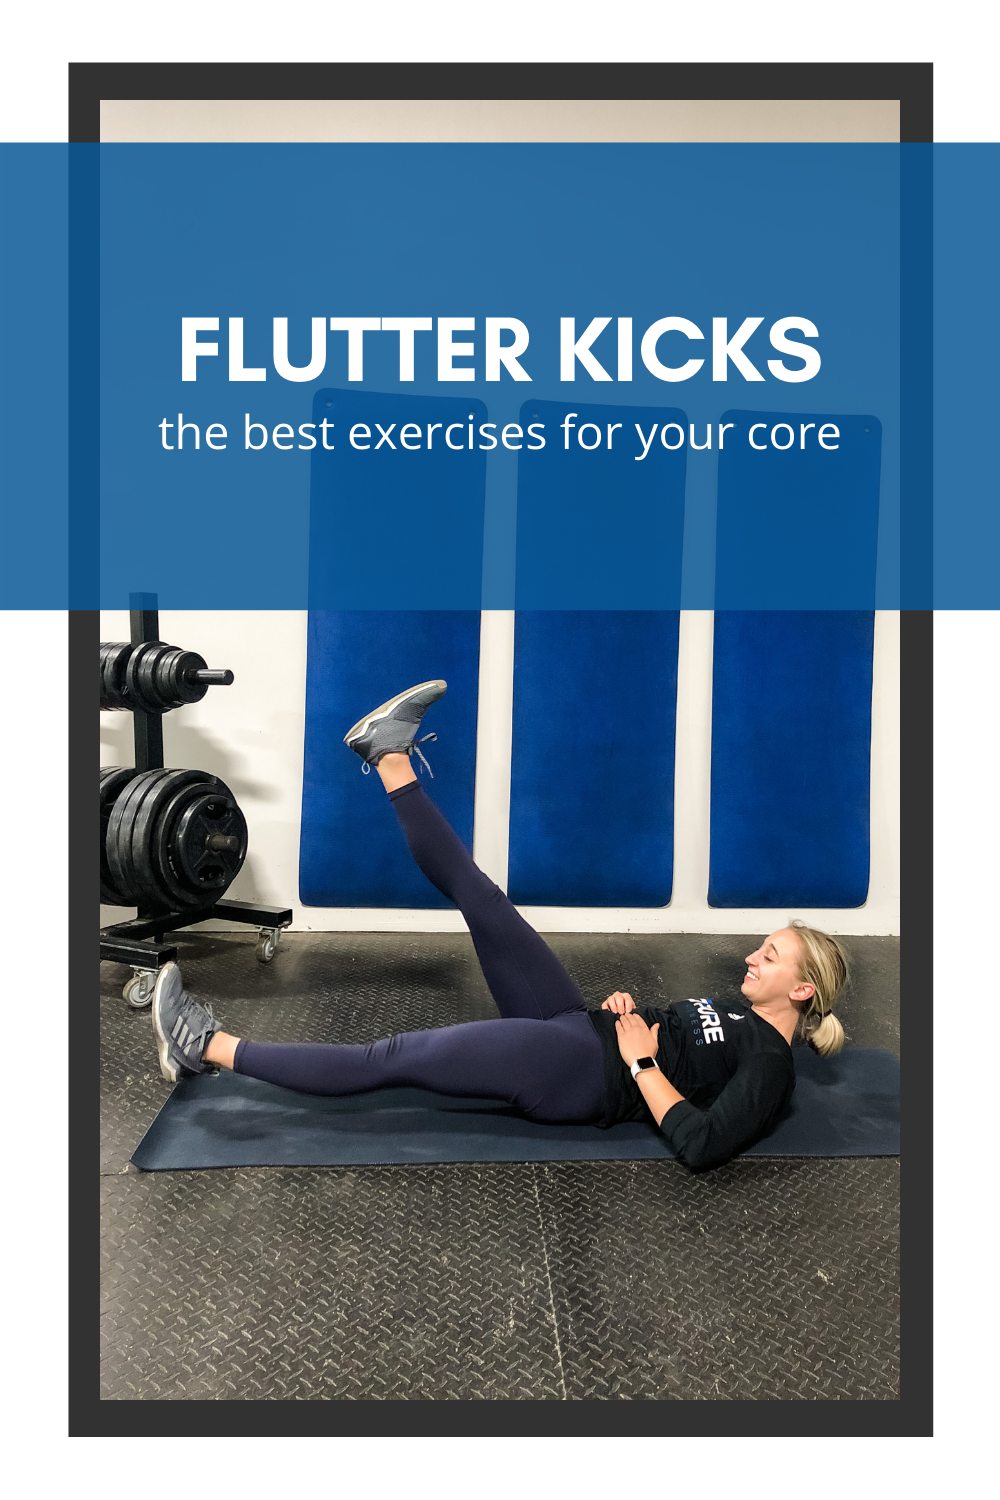
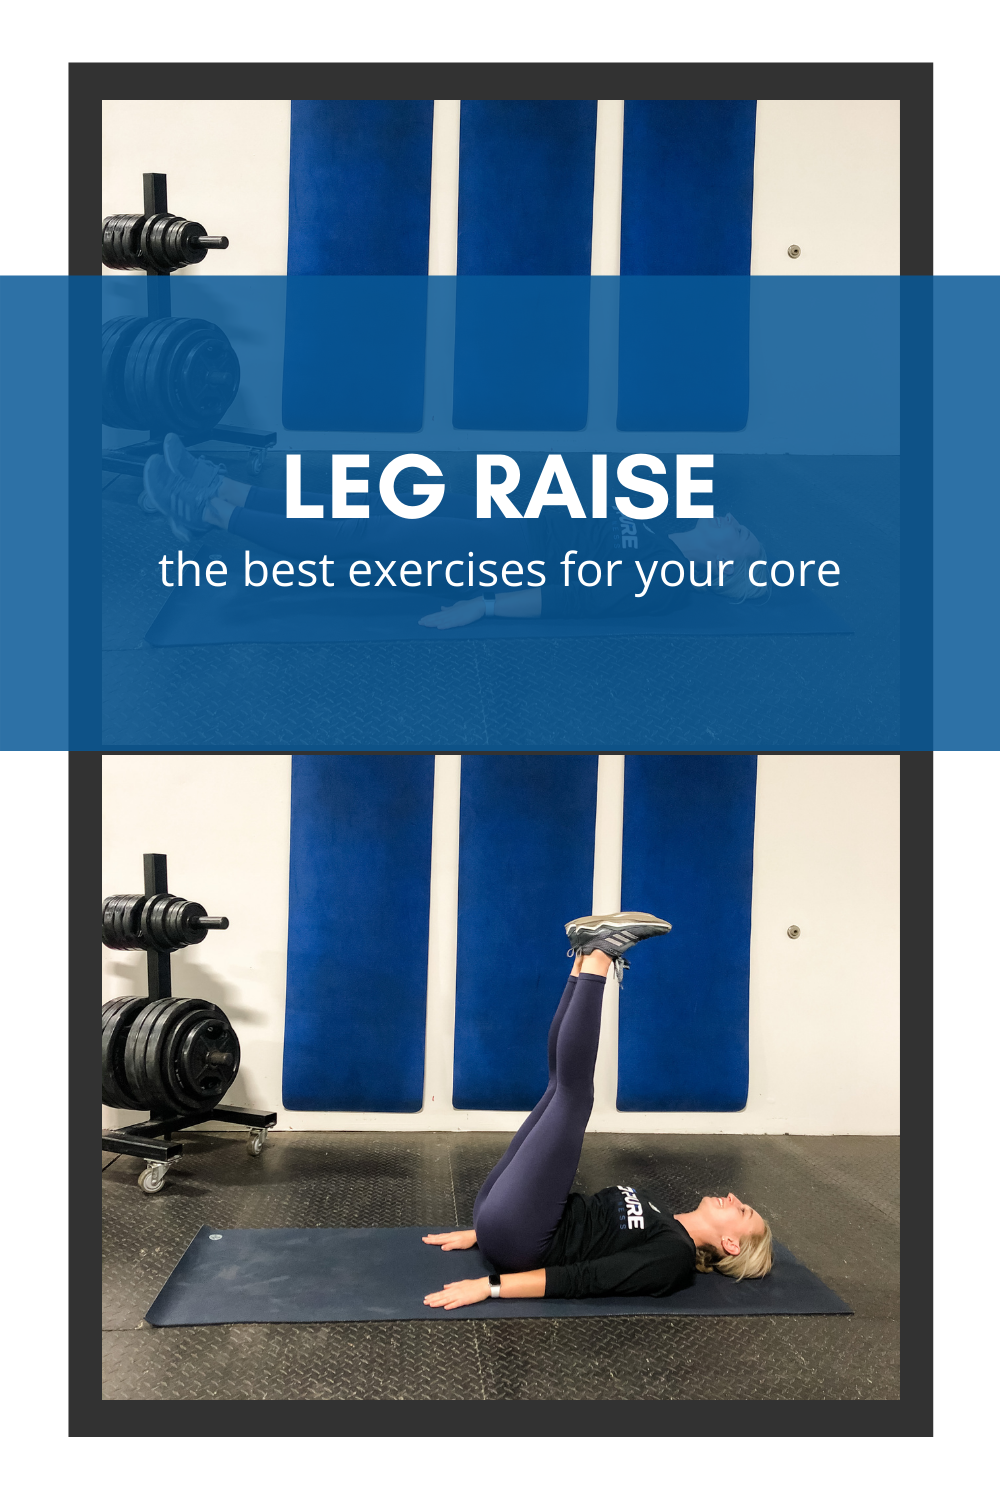
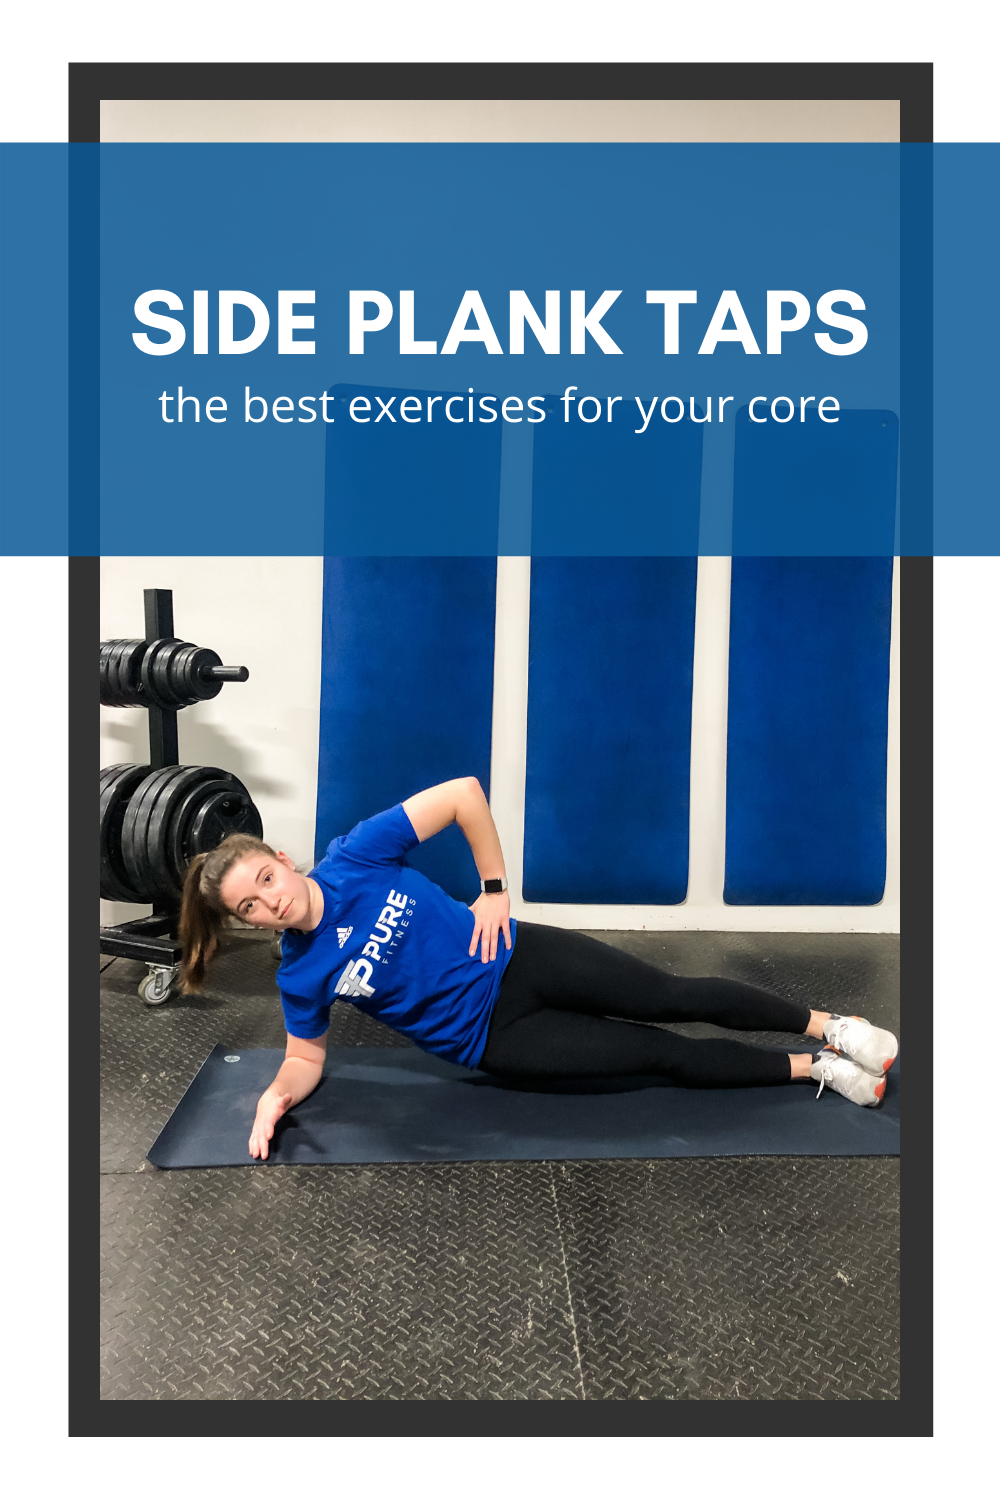
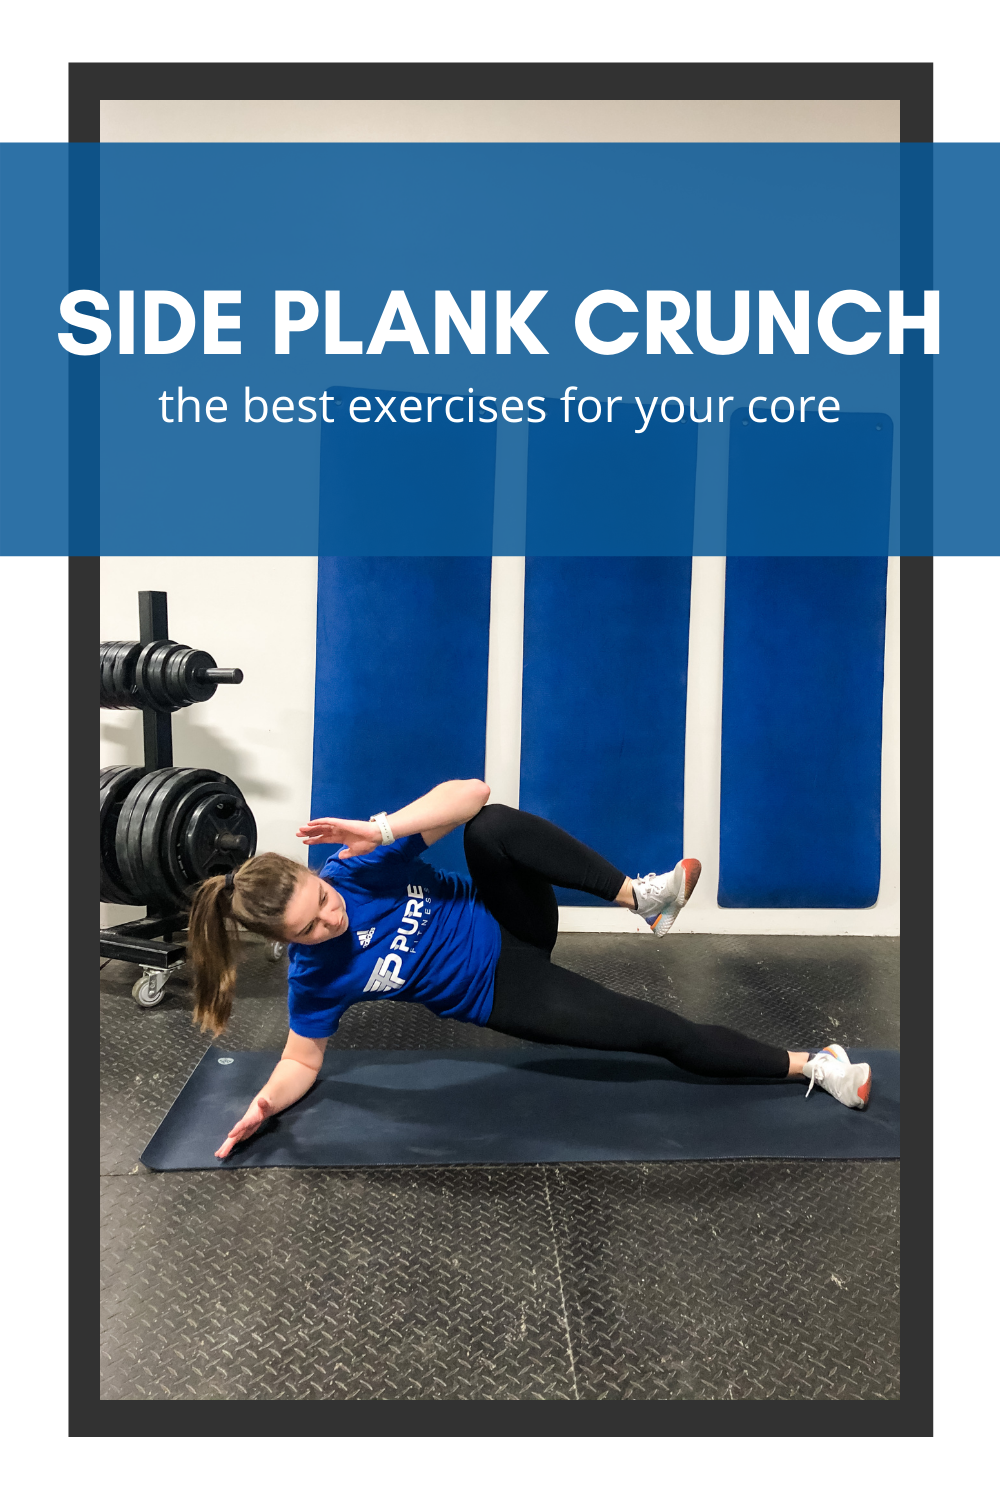
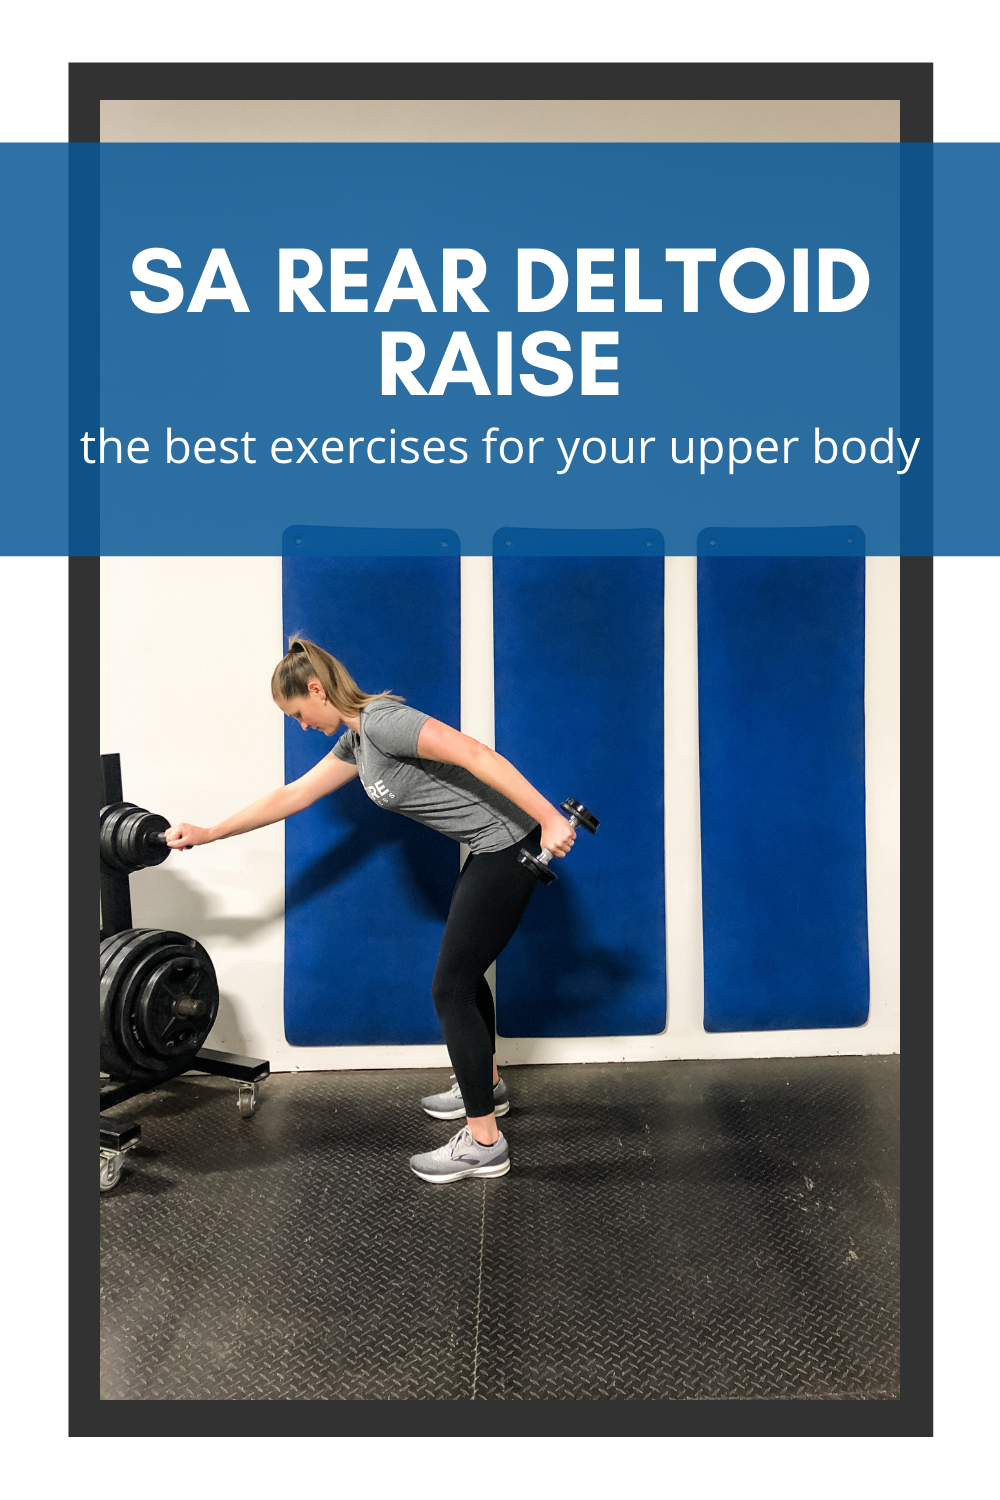
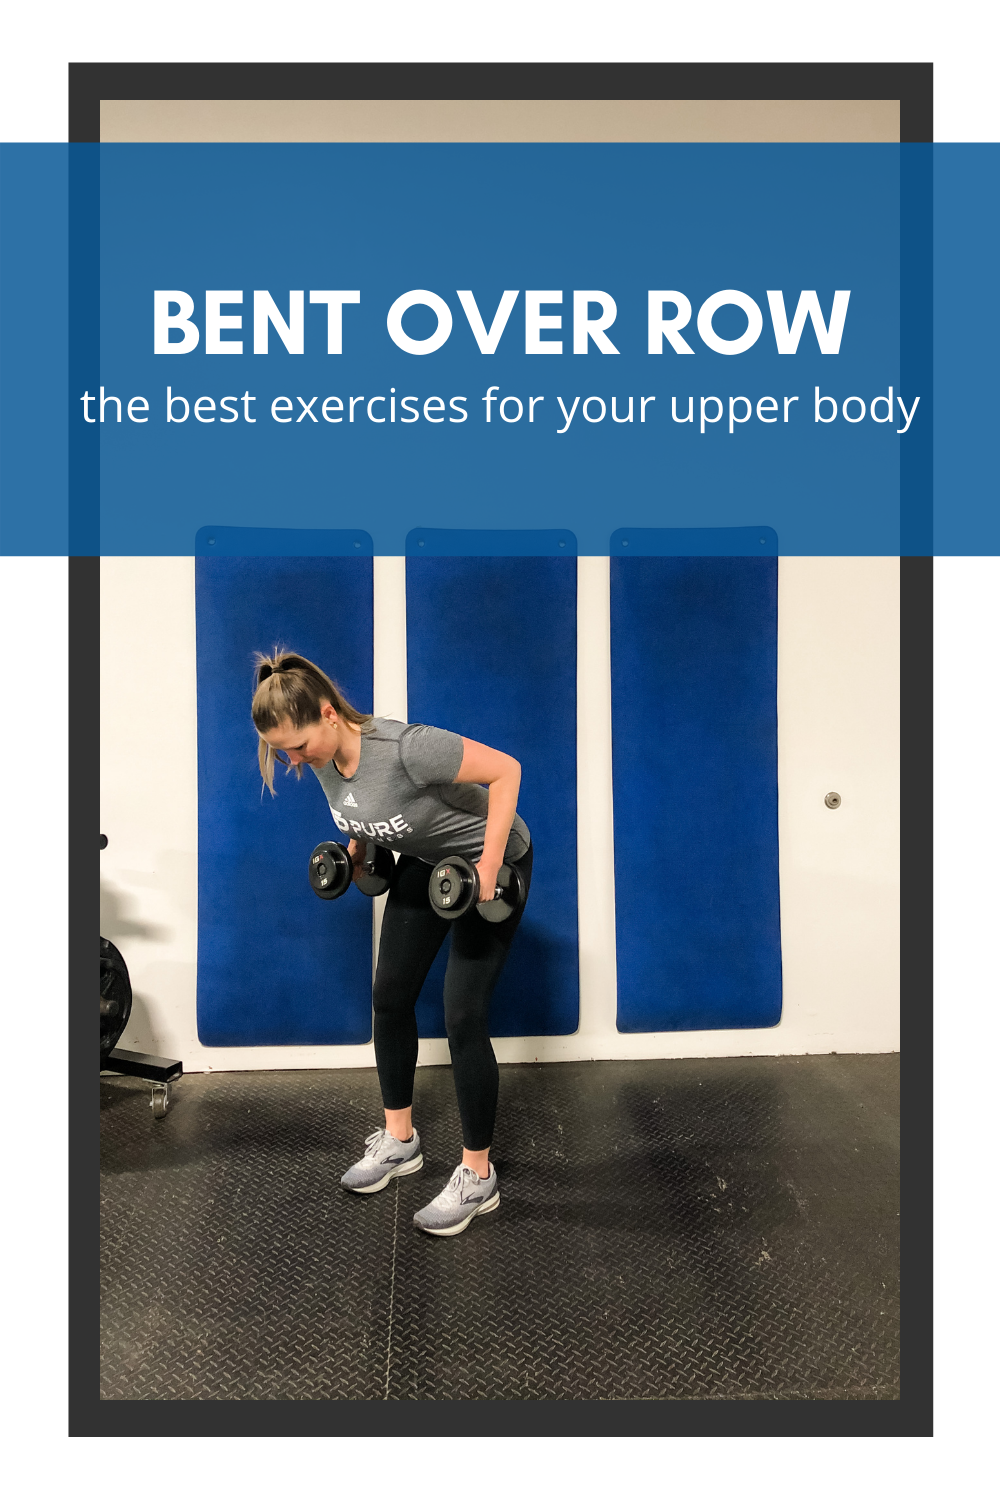
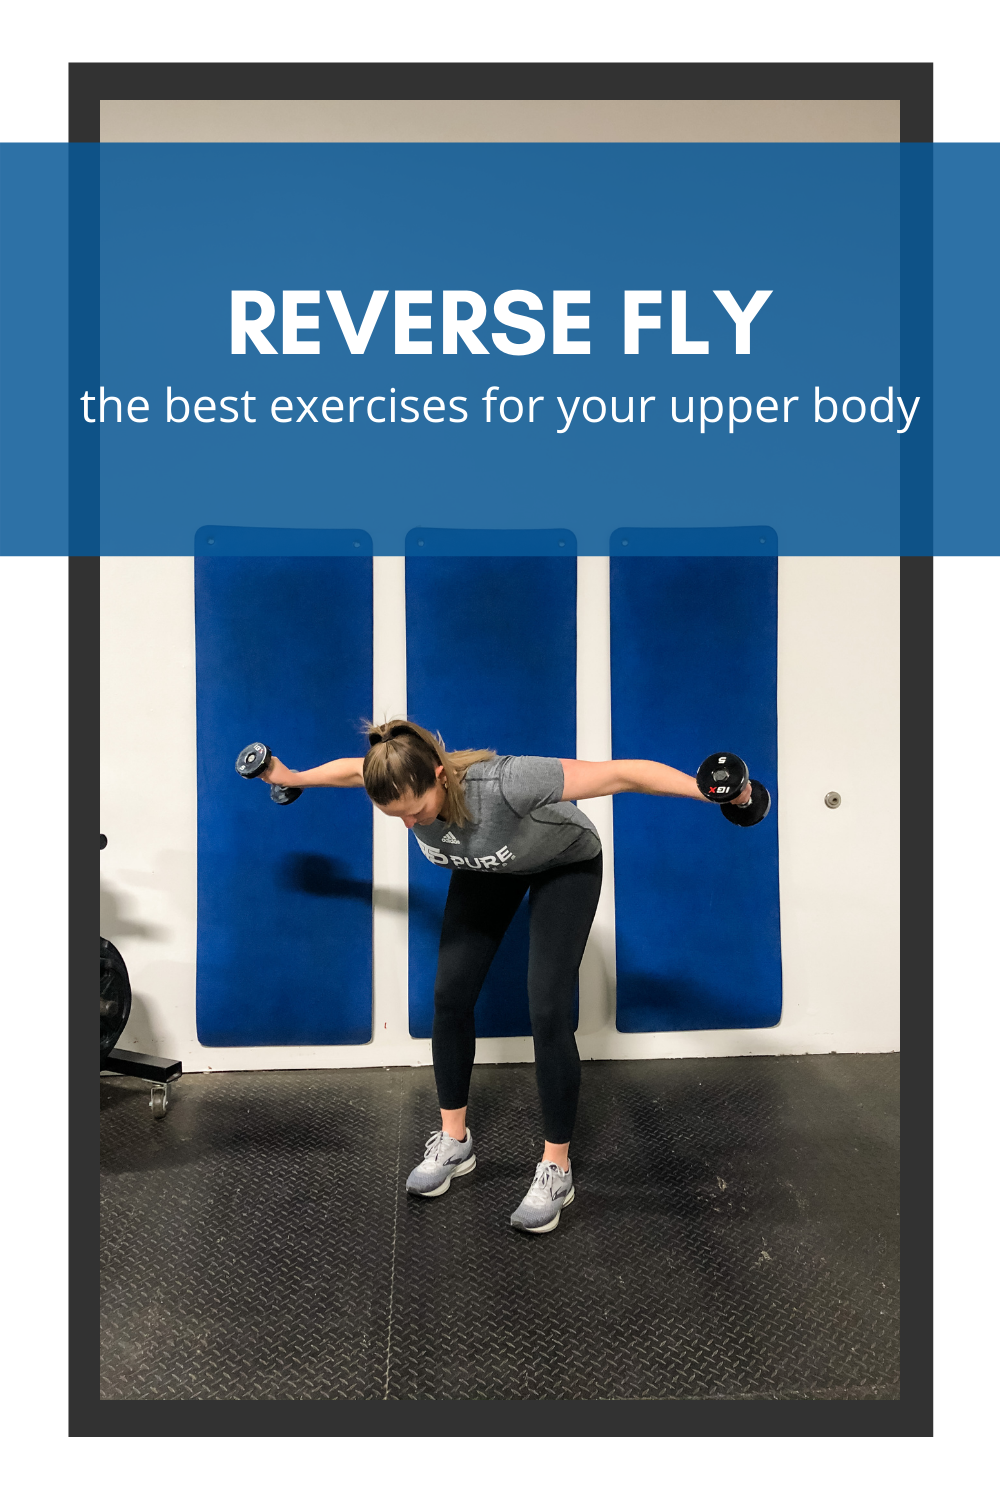
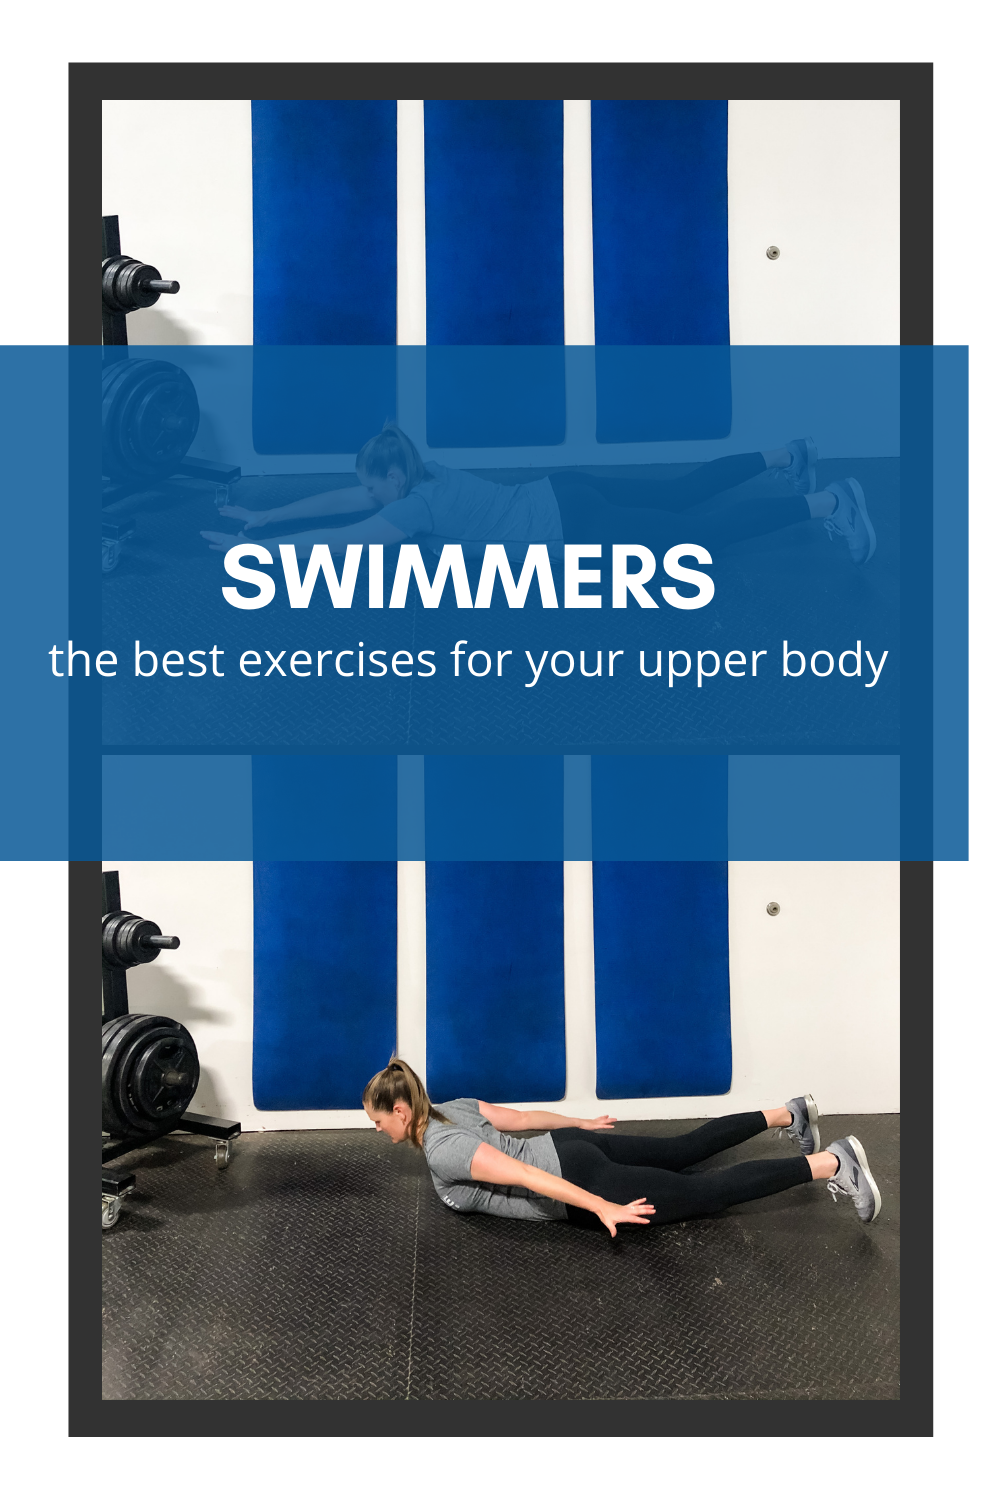
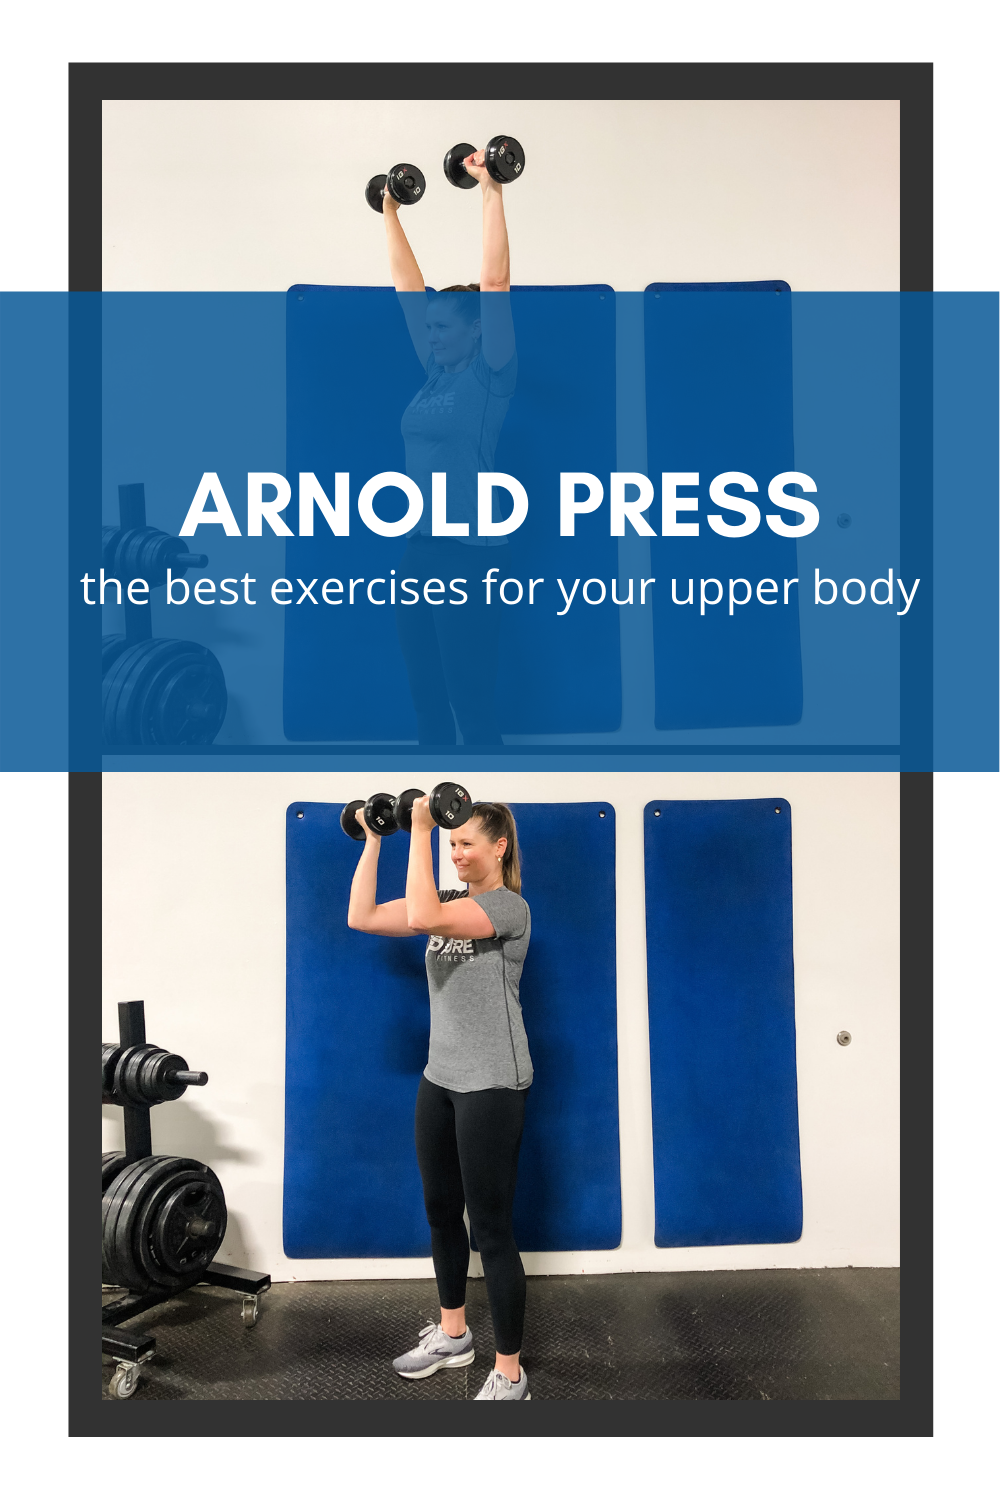
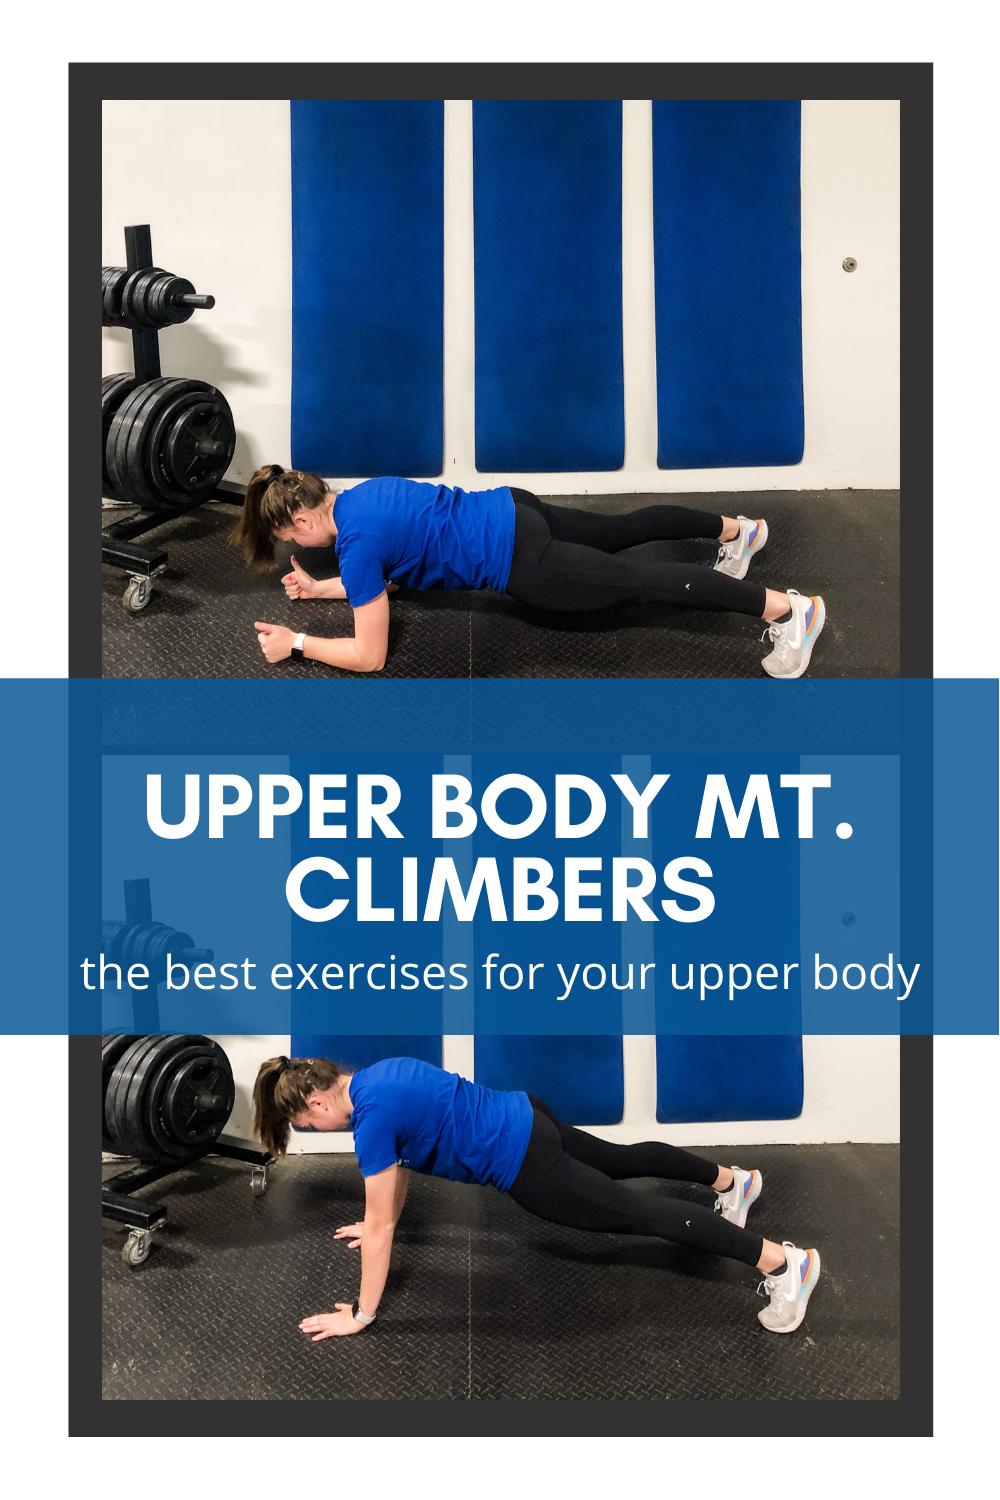
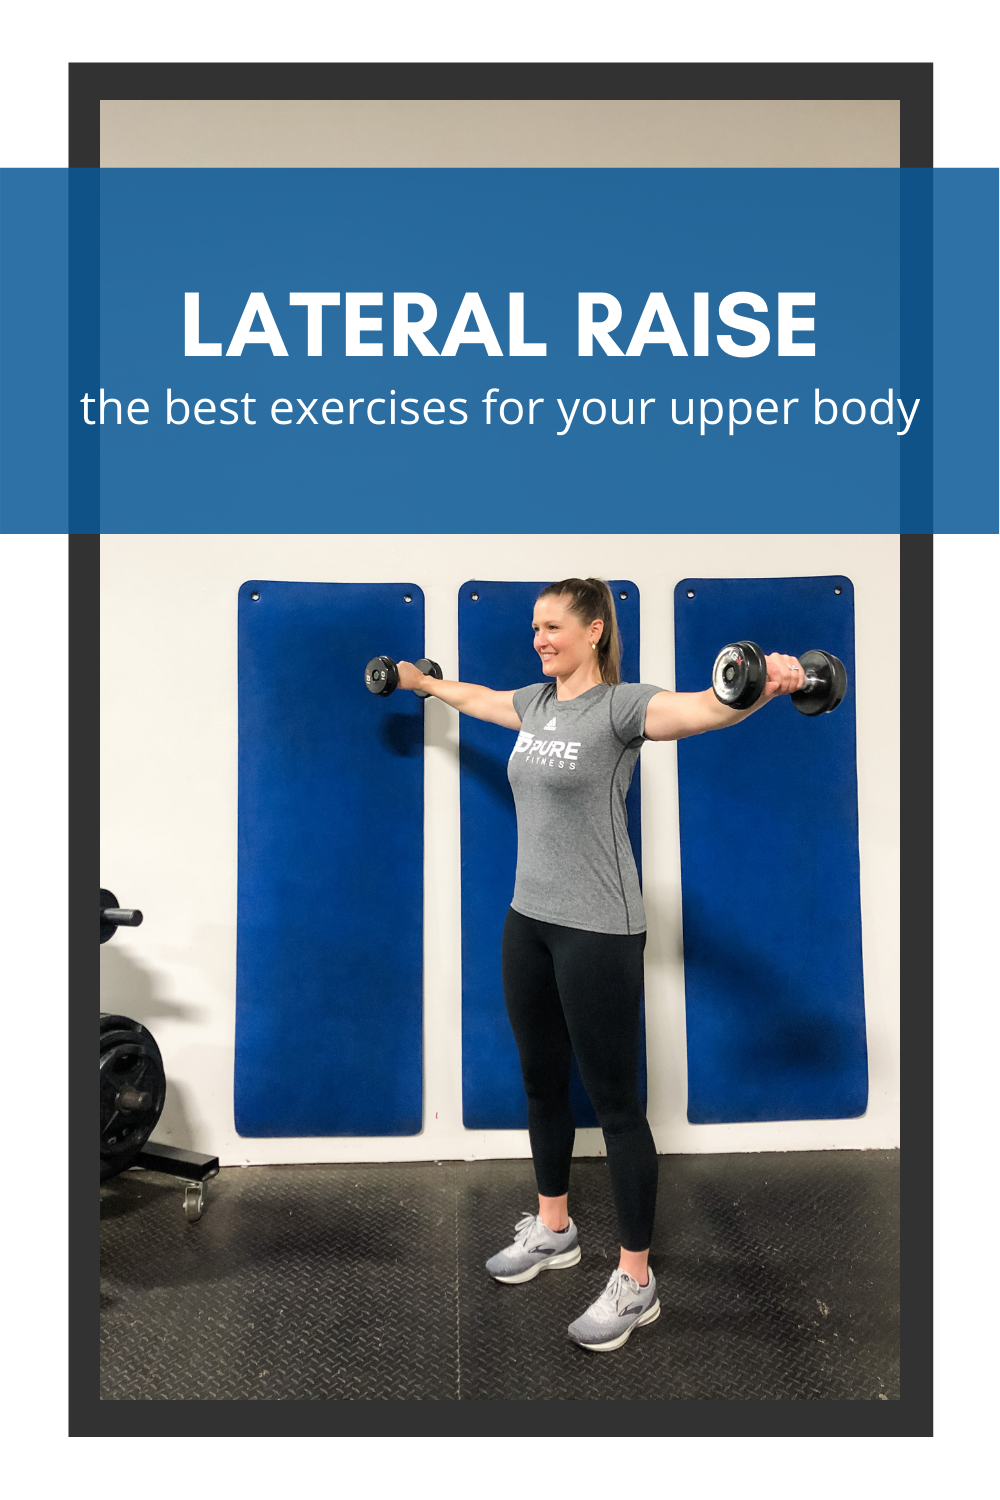
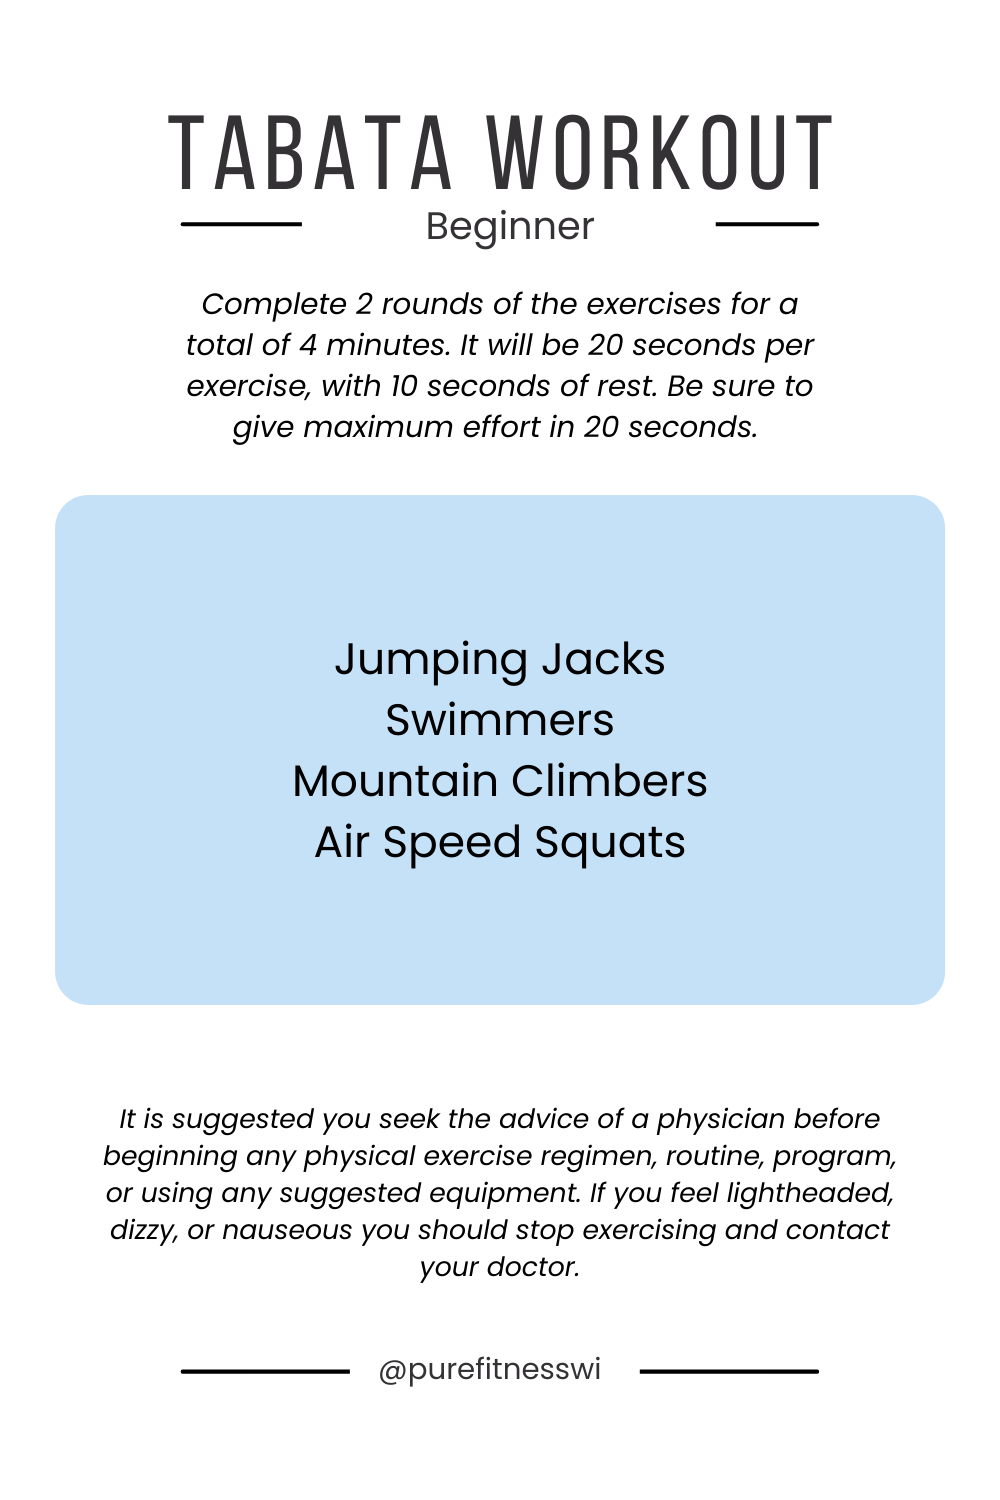
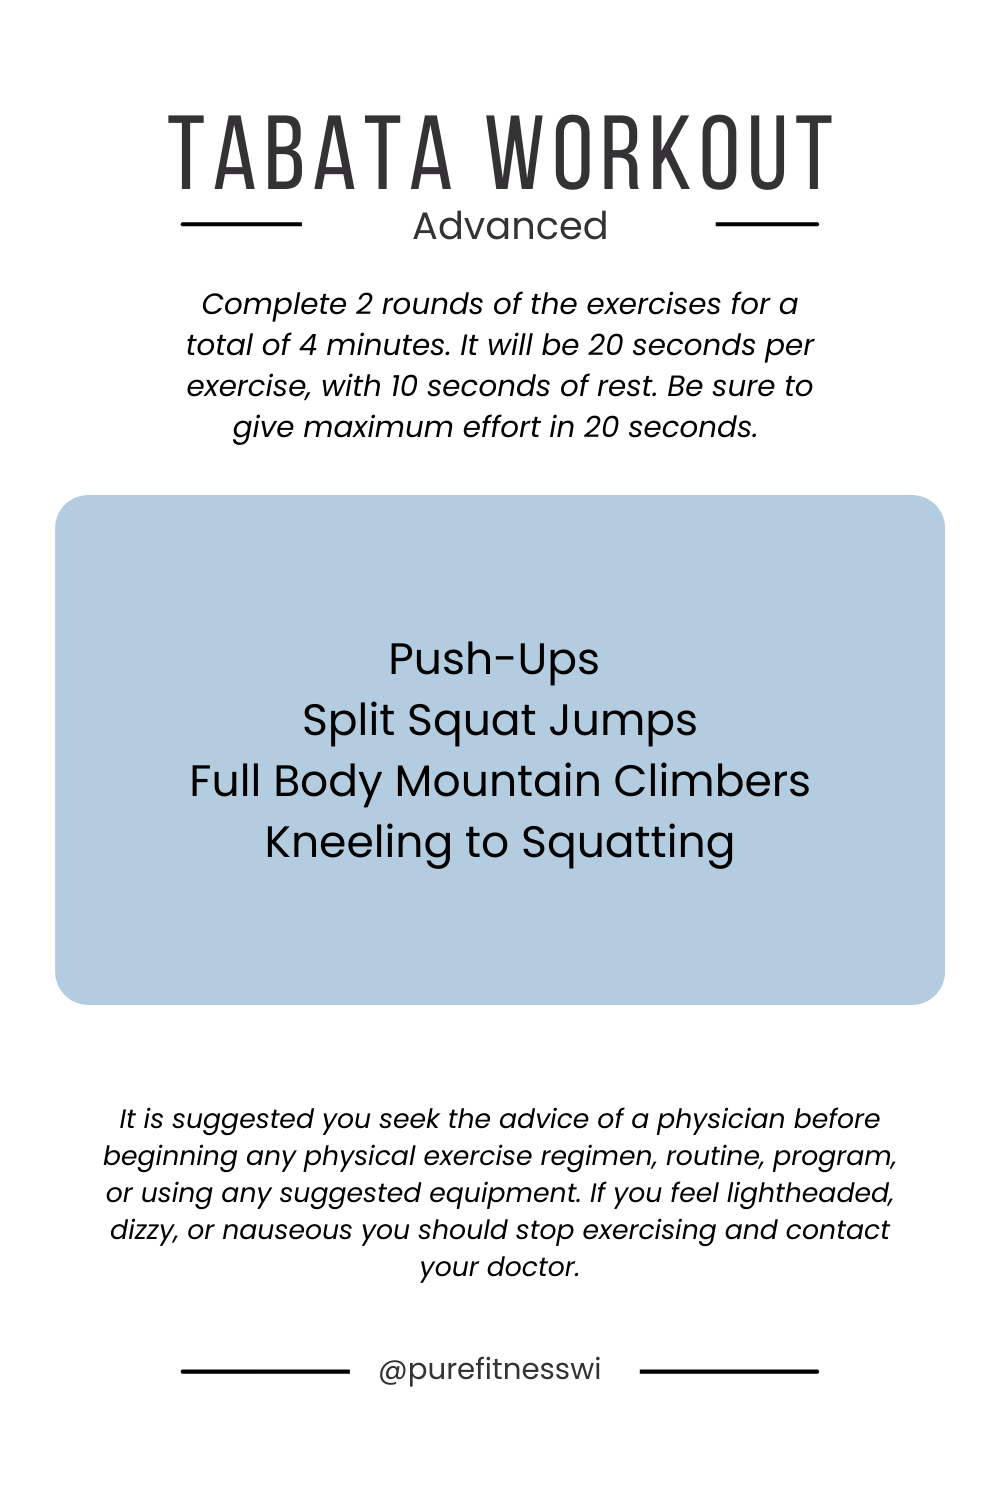
Here are three workouts that can be done at home to mimic the Tabata type style of training. They are going to add in a bit more muscular strength for a total body workout! Keep in mind it is important to give maximal effort in the twenty seconds and rest fully for the 10!

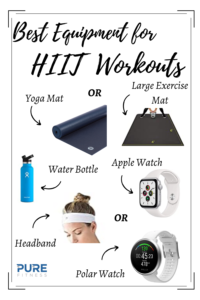
Most of these are not going to require any equipment! However I do recommend having these items on hand before you begin.

A Yoga Mat or a Large Exercise Mat for comfort when doing your at-home Tabata workout. Especially if you are on a hard wood floor these are a life saver. The yoga mats is the most common and cheap, but if you are an avid at-home gym go-er, you might want to consider investing in this larger mat!

For myself, I like to bring this Hydroflask Water Bottle, this Lululemon Headband, and of course my airpods for picking the about two songs to crush my 4 minute Tabata workout. I love these items because the water bottle keeps my water cold, the headband keeps the sweat out of my eyes and my airpods keep me going even when I’m tired!

You will also need this Jump Rope for the Intermediate workout because not only does it have comfortable handles, but it is adjustable as well! I would recommend this Stability Pad for the advanced workout for the kneeling to squatting exercise. This one can be rough on the knees even with a yoga mat!

It should be reiterated that this is not actually a Tabata workout! This is just a style of HIIT that you can try at home! Get creative with what you want to put into your workouts and make them enjoyable so you can get the most out of your workout!

As with HIIT training, it is important to recognize that you should not do a Tabata workout everyday. Even in the original study, the athletes did not perform the workout every single day. This is a great method of exercises to fit in on the days that you are not strength training and need a cardio workout, but don’t have a ton of time!

Grinder Salad Recipe

Grinder Salad Recipe

I think this recipe exploded the internet last summer and since then my girl friend and I have been tweaking and perfecting the recipe that we now consider the source of truth for all Grinder Salad to come.. Some of it might be the exact ingredients or maybe it is the...

read more
How Personal Trainers Can Achieve Financial Independence

How Personal Trainers Can Achieve Financial Independence

Achieving financial independence as a personal trainer isn’t just about working harder—it’s about working smarter. A well-structured business model can be the difference between financial instability and consistent income growth. In this blog, we’ll explore how to...

read more
5 Hacks to Grow Your Fitness Business

5 Hacks to Grow Your Fitness Business

For personal trainers, time is often the most valuable yet limited resource. Balancing client sessions, marketing tasks, and business growth can feel overwhelming, leaving little room to focus on growing your reputation and scaling your business. The good news? With...

read more
fitness articles
lifestyle articles
nutrition articles
golf articles
Circuit Training: Fact VS Fiction

Circuit Training: Fact VS Fiction

Ever wonder what all these fitness trends mean? Circuit training is probably one of the most used fitness trends that you will see applied “differently” at various establishments. Let’s break down circuit training – what you need to know before starting your workout.

When you think of a great workout, what do you think of? Most of you would answer that question in three ways. One, you work up a great sweat. The mindset of “if I am not drenched in sweat by the end of this workout I have not done enough”. Two, it is fast paced with little time for water and rest. You envision yourself pushed to the limit. Three, you are sore beyond belief. You are barely able to walk or even do everyday activities the next day.

As a lot of us have been taught, a great workout results in those three things, or at least one of them. It doesn’t matter what we do, how many sets we do, what our form is like, or any of that. This has been the way we have been taught. That attention to detail and the individual doesn’t matter as long as everyone leaves believing they have accomplished one of those three goals. Better yet, all three of them.

But are those the right goals? Or are there other things for you to consider?

DEFINING CIRCUIT TRAINING

All circuit training means is the format of your workout. It is grouping together a handful of exercises in a list, going through them, and then heading back to the top. You move efficiently from exercise to exercise and your larger rest period will come at the end. In fact, HIIT training can be done in a circuit format.

To build a circuit, you would group together a couple of exercises, say an upper, a lower, and a core. Or you could create a muscle group burnout and do a couple of lower body exercises to condense your leg day into a focused circuit. If you search circuit training on the internet, they will tell you it has to be full body. THIS IS FALSE. Targeting one muscle group can still be a circuit and it is actually an effective way to overload.

If your focus is on muscular strength, you might create a shorter circuit of only 5 exercises with a bit more rest in between each exercises and round. You would increase the weight used for a moderate to low rep count.

If your focus is more muscular endurance, you would manipulate the rest intervals to be shorter. You might also choose lighter weight and even body weight exercises for a high rep count.

WHERE CIRCUIT TRAINING GOES WRONG

Often times the popularized group fitness classes focus on how they can get your heart rate up through cardio intervals and sprinkle in some resistance. The emphasis is put on how fast and hard you can push yourself, not on how you are performing the exercises.

This is a dangerous mindset to have for every workout you do. It increases the likely hood of injury (minor to major), it encourages bad form or creates bad habits, and it limits your body’s ability to adapt and recover.

Do not get me wrong, I understand that these group classes can be effective. Circuit training has its place in the world and in your workout routine. I am not here to bash the workouts you have come to enjoy. I myself have found these group circuit training classes to be fun, challenging, and effective for getting a great workout in.

However, these exercises routines are taxing on your body when they are done everyday. They tend to rely heavily on one energy system. Typically they do not focus much on strength training in an intentional way with correct form. There is not enough emphasis on exercises selection to build range of motion, stability, and strength, which are keys to a well-rounded and balanced program.

In is important to note, that circuit training can be used in a less intense manner. You do not have to kill yourself at a high tempo pace. I recommend alternating your workout tempo or speed for the best results physically and increase your consistency.

BENEFITS OF CIRCUIT TRAINING

Circuit training is effective and efficient when done correctly. In fact, I use circuit training in the gym almost every day. Tempo and repetitions are adjusted to purposely work on different energy systems.

The great part of doing a circuit for your workout is you get to choose what you want! If you want to focus on upper, lower, total, or core you can create that circuit to do just that. If you are searching to build your muscular strength or endurance, you can make it focused as such. The possibilities are endless when deciding where you want your circuit to take you.

The other great part about circuit training is it can fit in the time slot you set. If you have twenty minutes you can do one circuit, 4 times through! Or if you have an hour to workout, you could even do 3 circuits, 3 times through! It is completely under your control.

As I said before, the possibilities are endless for circuit training. You can create thousands of different combinations and types of workouts with all the freedom it entails. The important thing is to do the exercises right and create a balanced program!

WHERE TO START

Here are some options for circuit training that build in the correct balance, still give you a great workout, and will develop you in every area essential for overall well-being! I have split these up into muscular strength and muscular endurance circuit training workouts. 30 minutes each. They are total body workout, but as I said you can develop these into anything you want. Scroll down to download each workout.

Muscular Strength

This is a circuit of 6 exercises and you will go through 3 times for a 20 to 30 minute workout. Your rest periods will be about 90 seconds in order to stay in the muscular strength window. You will want to weight these exercises a bit heavier because the rep count is lower! Shop dumbbells and a hip circle for leg extensions.

Muscular Endurance

For this one it is going to be 6 exercises again, this will be for 4 sets total. These are going to be higher rep and are going to have shorter rest periods in order to work in the muscular endurance stage. These rest periods are going to be in the 0-45 second range. These should be weighted moderately.

These are just examples of how you could build a circuit based upon every energy systems. As I stated, the sky is the limit for how you can create a circuit. Just be sure to be intentional with your programming and have a goal in mind when deciding what you want out of your workout. You can create a difficult, sweaty, and effective workout while still maintaining great form and proper programming!

Grinder Salad Recipe

Grinder Salad Recipe

I think this recipe exploded the internet last summer and since then my girl friend and I have been tweaking and perfecting the recipe that we now consider the source of truth for all Grinder Salad to come.. Some of it might be the exact ingredients or maybe it is the...

read more
How Personal Trainers Can Achieve Financial Independence

How Personal Trainers Can Achieve Financial Independence

Achieving financial independence as a personal trainer isn’t just about working harder—it’s about working smarter. A well-structured business model can be the difference between financial instability and consistent income growth. In this blog, we’ll explore how to...

read more
5 Hacks to Grow Your Fitness Business

5 Hacks to Grow Your Fitness Business

For personal trainers, time is often the most valuable yet limited resource. Balancing client sessions, marketing tasks, and business growth can feel overwhelming, leaving little room to focus on growing your reputation and scaling your business. The good news? With...

read more
fitness articles
lifestyle articles
nutrition articles
golf articles
HIIT Workouts What Are They And How Can I Do Them Better?

HIIT Workouts What Are They And How Can I Do Them Better?

If you are like me, you enjoy getting in a great sweat from your workout. You regularly are in the gym working on your resistance training and it is great! You feel strong and powerful afterward. Your muscles are sore, and you can barely walk after one of these intense workouts. But you feel like something is missing from your workout program. Upon further investigation, you discover that cardio is never in your workouts. You get bored of running for long periods of time and riding a bike for an hour hurts your butt. You think to yourself, this can’t be the only way for me to build up my endurance. The answer is right under your nose, High-Intensity Interval Training (HIIT).

WHAT ARE HIIT WORKOUTS?

I think at this point almost everyone has come into contact or heard of HIIT or High-Intensity Interval Training. However, not everyone is well-versed in the parameters of HIIT workouts. Which means that most people, and probably you, aren’t actually doing a HIIT workout. And that means you aren’t maximizing the full potential of a HIIT. Keep reading and get more details under “drawbacks”.

The goal of HIIT is to maximize a person’s aerobic capacity. This means your working sets (i.e. the high intensity portion) must be greater than 90% of your VO2 max with recoveries at less than 40%. VO2 max is the volume of oxygen that is being transferred and utilized within the body during exercises. These sections of higher intensity should alternate with the sections of lower intensity. They should be pre-planned to ensure you are getting the proper amount of recovery as well as the most out of your working sets.

WHAT IS THE OBSESSION WITH HIIT WORKOUTS?

People have come to love this style of workout for many reasons. One being that they feel they are getting the most out of their workout because of the amount of sweat and exhaustion they feel afterward. HIIT can be done through many different modes of exercise including at-home cardio workouts.

Another reason why these types of workouts are so popular is because they can be modified to meet anyone at their fitness level. Because it is a workout tailored to finding your limit, it is adjusted to each person. Depending on where you are at in your aerobic capacity, it may be easier to get up into that target range! If you do not feel like you are giving about 90% of your effort, it is time to speed it up or add more weight.

The other great part about a HIIT workout is that it saves time. Although you are working to build up your aerobic capacity, you are no going out and taking an hour run. Instead you can build up your endurance without having to block off half of your day for a workout.  HIIT provides the same about of adaptations to your body that long and slow endurance training can. But it saves you time!

WHAT ARE THE DRAWBACKS?

HIIT is almost always misinterpreted and done wrong! Since the average person doesn’t A.) know their VO2 Max and B.) have the ability to measure it during exercise accurately measuring HIIT at home is impossible. The good news is that we are trying to get the most out of our workouts to stimulate an adaptation, not be perfect in VO2 number range.

The way to do this is by pushing yourself to get into the upper range of your heart rate zones (way more manageable to monitor than VO2 Max). Through higher rep counts or more resistance, you can get yourself there. As we mentioned before, this is where HIIT workouts can meet a person where their fitness level is at. A highly conditioned athlete can do more reps in the timed interval than a de-conditioned athlete. But both, if pushing to the 90% range and resting appropriately, can stimulate a physiological adaptation.

Your target heart rate is specific to the individual. It can be dangerous to push your heart rate higher than it is supposed to go and medications you are taking can impact your ability to get a true heart rate reading. If you are highly de-conditioned or on medication you should consult a medical professional before trying a HIIT workout.

Another key component that is missed is REST. Your heart rate has to come back down. If it is not you will not be able to sustain the same level of output, or work. And sustaining your workout output is important in producing the physiological adaptation. So as much as you are watching your heart rate to see it elevate, you need to watch it lower as well.

How to find your max heart rate?

You can find your projected max heart rate by taking 220 minus your current age. If you are feeling like you are light-headed, dizzy, or faint, then it is time to stop the workout. And remember if you are on any medication measuring your heart rate at home can give you skewed results.

HOW TO USE HIIT WORKOUTS AT HOME

Below are two HIIT workouts that you can do from your living room. No equipment required! I made one that is for beginners and one that is more advanced! Be sure to push yourself, but be smart and safe, especially when working with heart rate training 😊.

EQUIPMENT

You don’t need much at home for a HIIT workout, but here are my essentials. I’ve included a yoga mat or a large exercise mat that is 4 by 6 feet. Great for if you are doing a lot of at-home workouts!

I also included my favorite water bottle for on-the-go. The Hydroflask water bottle is great because it keeps water cold and has two different caps for if you need it closed or easy access. I have included here the one with a sport cap. Great for grabbing a quick drink during your rest interval!

My favorite lululemon headband is also linked. I have struggled with find the right non-slip headband. This one has stuck with me through playing college volleyball and has stayed on during an entire match of me diving and sweating! It is the perfect non-slip headband for not letting sweat drip into your eyes!

Last I included different heart rate trackers. I have the apple watch which I absolutely love. I have had my apple watch series 2 for about 3 years now. It has been awesome for keeping track of my everyday movements and exercises. It even has an exercise mode for HIIT workouts. The other two are ones owned by my family and friends that they have also enjoyed. They both have great reviews from my in-person experience and in the their comments.

These are affiliate links. While there is no cost to you when you order through them, I do make a commission. Your support, by ordering through them, is greatly appreciated!

 
equipment for a HIIT workout

YOGA MATLARGE EXERCISE MATWATER BOTTLEHEADBANDAPPLE WATCHFIT BITPOLAR WATCH

KEY POINT!

The important thing to recognize about HIIT Training is that it is not an everyday workout and the rest between is a key part of it! You may feel like you are getting a great sweat and workout in, but you are only training in the aerobic state. Strength and power should also be key elements of your training regimen. If HIIT is a part of your program, try to leave two days between HIIT workouts to ensure full recovery.

HIIT can be a great training tool in getting to where you want to go with your endurance goals. If you are like me and running a couple miles a day is not your cup of tea, HIIT is a great alternative for you to find your limits without the time consumption!

And if you enjoy this fitness trend breakdown you should check out the articles on circuit training and Tabata workouts.

Grinder Salad Recipe

Grinder Salad Recipe

I think this recipe exploded the internet last summer and since then my girl friend and I have been tweaking and perfecting the recipe that we now consider the source of truth for all Grinder Salad to come.. Some of it might be the exact ingredients or maybe it is the...

read more
How Personal Trainers Can Achieve Financial Independence

How Personal Trainers Can Achieve Financial Independence

Achieving financial independence as a personal trainer isn’t just about working harder—it’s about working smarter. A well-structured business model can be the difference between financial instability and consistent income growth. In this blog, we’ll explore how to...

read more
5 Hacks to Grow Your Fitness Business

5 Hacks to Grow Your Fitness Business

For personal trainers, time is often the most valuable yet limited resource. Balancing client sessions, marketing tasks, and business growth can feel overwhelming, leaving little room to focus on growing your reputation and scaling your business. The good news? With...

read more
fitness articles
lifestyle articles
nutrition articles
golf articles

SUBSCRIBE

Click to sign-up for weekly information and offers.

DISCLOSURE

We are a participant in the Amazon Services LLC Associates Program, an affiliate advertising program designed to provide a means for us to earn fees by linking to Amazon.com and affiliated sites.

DISCOVER THE BEST MUSCLE TARGETING EXERCISES

DISCOVER THE BEST MUSCLE TARGETING EXERCISES

Targeting a muscle group is part of any well designed program. Below is a list of 10 different muscles or areas of the body and some of the best exercises to target them. Keep in mind this is not an exhaustive list, but consists of very effective exercises that you can’t go wrong using.

The purpose of this post is not to encourage spot reduction, but to be able to effectively work the desired muscle group for the purpose of strengthening it.


Table of Contents

  1. Back Targeting Exercises
  2. Shoulder Targeting Exercises
  3. Bicep Targeting Exercises
  4. Tricep Targeting Exercises
  5. Glute Targeting Exercises
  6. Hamstring Targeting Exercises
  7. Quad Targeting Exercises
  8. Oblique Targeting Exercises
  9. Upper Abdominal Targeting Exercises
  10. Lower Abdominal Targeting Exercises
  11. Exercise Gallery
  12. Equipment

Back Targeting Exercises

The muscles of your back include your latissimus dorsi, deltoid, rhomboids, and teres major and minor to name a few. It is important to strengthen these muscles to open up the anterior of our shoulders. improve posture, and elongate the appearance of our body.

Swimmers

In a prone position, start with your hands overhead and thumbs together. Proceed by moving your hands out away from your body, keeping your elbows almost straight, and then bringing them back toward your glutes. This should work to engage and burn out those posterior shoulders!

Variations: Standing – on a bosu or on single leg, paused, one arm at a time.

Reverse Flys

The reverse fly is executed by holding two dumbbells out in front of you in a forward hinged position with a tight core. With a slight bend in the elbows and palms facing in, control the weights out to the side as you retract your shoulder blades. Be sure to really pinch those shoulder blades to effectively target the rhomboids.

Variations: Pause at the outer most point, stand with a single leg balance, rotate your palms to face up or down. 

Bent Over Rows

Start by standing in a bent over (or hinged) position with your back flat and core engaged, and the weights hanging directly below your shoulders. With your palms facing inward, pull the weights up toward your ribcage by retracting your shoulders blades, allowing your elbows to pass your ribcage. Avoid any flexion or extension (bending) at your wrists.

Variations: Use an underhand grip, use an overhand grip, pause at the top, alternate sides per rep. 

Single Arm Rear Deltoid Raise

Holding a dumbbell in one arm, have a slightly bent over position with your opposite hand resting on your knee and the weight hanging directly below your shoulder. With a straight arm, extend the weight back while keeping your chest forward to not activate the anterior shoulder. All the work should be in your posterior deltoid!

Variations: use a resistance band, eccentric work as you very slowly resist the force and control the return to starting position.

Banded Pull-Apart

Grabbing both sides of a long resistance band, grip the band according to the difficulty you would like with palms facing up. The closer your hands are together, the more difficult. In a smooth and controlled movement, pull the band apart with your hands while bringing your shoulder blades together for great posterior shoulder work.

Variations: Diagonally pull the band apart, elbows fully bent or fully extended.

Band Face Pulls

Looping the band around a pole, banister or anything stable you have available, grip the band with palms facing toward the floor. Pull the band toward your forehead to activate the deltoids for great back work. As always, keep the core engaged to prevent low back extension (arching).

Variations: Try the exercise in a hinges position for more core work and increased back load, single arm.

Shoulder Targeting Exercises

The shoulder joint is very dynamic, allowing for a wide range of movement, which means it needs a lot of stability to stay healthy.  It also means it can be susceptible to injury and that not every exercise is right for every person.

Neutral Grip Press

Starting with the dumbbells at your shoulders and palms facing in, proceed to raise them up above your head. The keys here are not to let your lower back arch or let momentum take over. These can be prevented by keeping core tension and focusing on the movement in the shoulder.

Variations: Palms facing outward, use band instead of dumbbells, add a curl before the press, seated or standing, in an isometric lower body hold, single leg or on a bosu for balance.

Front Raise

Starting with the dumbbells at your side with palms facing in. Lift them up in front of your body until about shoulder height. The dumbbells should not be lifted higher than that. Your core should remain tight to not allow your back to arch at the top.

Variations: Palms facing toward the ground, seated or standing, use one weight instead of two, banded instead of dumbbells, in an isometric lower body hold, single leg or on a bosu for balance.

Lateral Raise

Similar to the front raise, a lateral raise is just going to go out to the side of your body instead of in front of it. For the lateral raise, your palms will be facing the front of your body. As always, core tension is important. Similar to the front raise, it is important not to raise the weights above shoulder height.

Variations: Palms facing toward your body, seated or standing, banded instead of dumbbells

Upper Body Mountain Climbers

Start in a push-up position with feet shoulder-width apart. Begin by lowering one elbow to the ground, then the other. Using the first arm, extend the elbow to go back to the push-up position. Then do the other arm. Start with the other hand the next rep. Be sure to keep a neutral spine and tight core during the reps.

Variations: To make the exercise easier elevate your arms off the ground using a bench or try it from your knees. To make it more challenging try using a bosu ball (round side up) at your elbows or feet, add a lower body movement between each rep, or place a weight on your upper back (don’t let it fall off!)

Bent Over Y’s

In a slightly bent over position, start with your arms between your legs and palms together. In a smooth and controlled motion, raise your arms above your head while keeping your thumbs toward the ceiling. At the top position your arms should form a Y with the rest of your body (hence the name)!

Variations: Add small weight (2.5s, 5s), Lay prone on the ground (start overhead and lift a couple inches off the ground), swimmers.

Arnold Press

Start with your palms facing your body and weights up in front of your face. The first step is rotating your arms from in front of your face to the side of your head so that your palms face outward. The next step is to push the weights up overhead with the palms still facing out. As you lower the weights down, repeat the same pattern in reverse. This creates some great rotational work in the shoulders.

Variations: This is an exercise done best without any variations because it keeps the load most heavily focused on the shoulders.

Bicep Targeting Exercises

The biceps are made up of the brachioradialis, brachialis, and the biceps brachii (long and short head). When people think of the biceps, they think of bulky muscles and definition in the arms. However, those biceps are more than just for looks. Our Biceps are one of the main muscle groups we use in our everyday life. From carrying in our grocery bags, lifting up the trash bags, and even having to do our hair for a long period of time.

Bicep Curls

This is one you see almost everyone doing in the gym. One of the most simplistic exercises for targeting those biceps. Start with the weights at your side with palms facing forward. Flexing at the elbow proceed to lift the weights up toward your shoulders while putting the load into your biceps. As always, keep core tension and limit momentum moving the weights.

Variations: take your arms to the outside of your hips and perform wide curls, stand on a bosu, single leg or in a split stance to challenge balance, use resistance bands or a cable to change the load.

Hammer Curls

This is going to be the same as your bicep curl, but switching your grip to have your palms facing each other. This is just going to target a different muscle head of your bicep to put the load into your bicep brachialis.

Variations: bring your arms in a crossbody pattern alternating hand towards opposite shoulder, stand on a bosu, single leg or in a split stance to challenge balance, use resistance bands or a cable to change the load.

TRX Bicep Curl

Starting with your palms facing up in the TRX bands, position your body to the level of difficulty you desire. The more parallel your body is with the ground, the more difficult it will be. Proceed to bend your elbows towards your chest to lift your body up. It is very important to keep core tension and limit low back arching.

Variations: change your palm positioning and try overhand (palms down) and neutral grip (palms in), try single arm or single leg and fit the rotation that gravity applies to you.

Isolation Work

This is not a specific exercise, but incorporating a single arm curl while the other hold the dumbbell with 90 degree flexion can be very effective in strengthening the biceps. This can also be done with an isometric hold during a pull-up. This just helps us work not only eccentric and concentric, but also isometric!

Variations: try a flexed hang from a pull-up bar or single arm bent over row with the non-rowing arm holding a (isometric) row position.

Eccentric Neutral Grip Pull-Up

By either climbing up or jumping up to have your chin over the handles, lower your body downward toward the bench or ground with a 3-5 count. This is going to work your biceps eccentrically. It is a more advanced exercise, but can be really effective in strengthening your biceps.

Variations: change your hand grip for an increased challenge – wide palms facing away is the hardest. Add a weight vest to increase the load

Tricep Targeting Exercises

Working our triceps can be tough. They are a small muscle group that can fatigue quickly. But working on our triceps is just as important as getting strong biceps. They can help increase numbers for a bench press, help get those toned arms people are always searching for, and just assist with every day activities.

Tricep Dips

A favorite among anyone who looks to work their triceps. This is a simple exercise in which you start with your hands behind you on the bench with knuckles forward. While being slow and controlled, lower your body to the ground to reach about 90 degrees of flexion at the elbows. The further away your legs are from you, the more difficult the intensity!

Variations: hold a weight on top of your legs, pause at the bottom, or add leg raise with toe touch at the top.

Tricep OH Extensions

Holding a dumbbell or resistance of your choice above your head with full extension at the elbows, lower the weight down behind your head. It is very important to resist the tendency to arch the low back. Prevent this by keeping core tension and letting your triceps do the work. Limit the work that your shoulder is doing and keep the focus on the triceps.

Variations: increase weight or reps, add a single or double leg lower to get the core active, or add a skull crusher between each rep.

Tricep Push-Ups

Set up in a high plank position with your hands directly below your shoulders. As any other push-up, lower yourself toward the ground and push back up while maintaining a flat back and tight core. The narrow position of your hands will allow for the load to go into your triceps. This can be done on your knees or on an incline as well.

Variations: elevate the legs, single leg, weight on the back, pause at the bottom, or hold a plank after completing your last rep.

Narrow Bench Press

Lying supine on a bench or on the ground, start with the dumbbells above your chest. Lower the weights down toward your chest while keeping your elbows in tight to get the work into your triceps. Your grip should be neutral, having your palms face each other.

Variations: increase weight or reps, put your feet on the bench, or lower the weights on a 5 count loading the eccentric phase.

Banded Tricep Pull-Down

Attaching the band higher up on a banister, pole, or anything you have (or use a cable as seen in the picture), place hands about shoulder width apart on the band to start. Extend your elbows to bring the band down toward your hips. Be sure to keep core tension to not let the work go into your low back. This can also be done with a cable machine using the handles or rope attachment.

Variations: single arm pull-downs, hand on top of hand pull-down, or standing on top of a bosu.

SKLZ Single Arm extensions

Using your SKLZ sliders, a towel on a hardwood surface, or a Tupperware lid on carpet put one underneath one of your hands in a kneeling position. As you extend the hand with the SKLZ, the other arm goes into elbow flexion, keeping the arm close to your body. This creates a single arm tricep push-up in the arm off of the SKLZ.

Variations: this is an advanced movement, you may need to regress and perform tricep push-ups and the ab wheel separately to build enough strength and stability. You can make this harder by going from your toes and even harder by elevating your feet or putting them on a bosu.

Glute Targeting Exercises

Posterior chain training, which includes your glutes, is so important to your overall health. Lack of proper glute activation and engagement can lead to pain (back, hip, knee), and many other issues throughout the kinetic chain. Learning how to focus and use this muscle will change not only your workout, but the way your body feels!

Banded Step-Outs

With the band right above the knee, start with your knees slightly bent. Step out to the side with one leg, then switch to have the other one step out while still standing in the right spot. Be sure to think about squeezing your glutes to prevent your hip from doing the work.

Variations: Make it a band walk by stepping out and together for about 10 yard and back! Put the band below your knees to make it harder.

Glute Bridges

Lay on your back with your knees bent and feet on the ground. Proceed by lifting your hips up toward the ceiling and engaging your glutes. What we want to prevent here is a low back arch and pain. The goal is to be able to have a straight line between your head, hips, and knees. However, this should not come at the expense of low back pain and using the wrong muscles.

Variations: Elevate your heels on a bench, put a band above your knees, pulse at the top, add a weight on your hips, or try them on single leg.

Plank Leg Lifts

In an elbow plank position, start with your feet about shoulder width apart. Lift one leg up no higher than the hips, so that you just use your glute to extend your hip. Alternate and do the same thing on the other leg. This should all be done while keeping your core engaged and a flat back. Tip: squeeze your glute before your foot leaves the ground.

Variations: Add a band above your knees, move to a high plank, have your elbows or hands plank on a bosu.

Clam Shells

Lay on your side with your knees bent at 90 degrees with a band just above them. Think about your heels being in line with your glutes. Your arms can be in whatever position is most comfortable. Squeeze your glutes to lift the top leg against the resistance of the band. Again, this should only be done in the range of motion that only engages your glutes, and not your hips. Control your legs as they lower back down to the starting position.

Variations: This one can be done without a band as well, in a side plank from your elbow or with your butt against the wall to control any torso rotation isolating the work to your glutes.

Reverse Hyper

This is not a piece of equipment most would have at home, but at your gym go find this machine! It is one of the most effective exercises for targeting your glutes. Lying on your stomach with hands on the bars, start with your legs hanging toward the ground. Begin by lifting your legs up through your glutes. Similar to the plank leg lifts, be sure to prevent low back arch by not extending higher than your hips.

Variations: If you do not have this equipment, you could replace it with a banded hip extension or backward band walk

Squat

Although the squats hit pretty much every muscle in the lower body, it can be great for our glutes. If you don’t feel your glutes working during the squat try using one of the above exercises before squatting to “wake them up”. Super setting squats with a glute isolated exercise can provide a great glute burn.

Hamstring Targeting Exercises

Training our hamstrings involves a lot of hip hinging or flexion at the knee. The more you teach your hips to hinge properly, the better off you will be in real life. Hamstrings are very active as you bend down to pick things up or do other everyday tasks (laundry, gardening, stairs, etc.).

Bonus! Training your hamstrings effectively will make you faster if you are an athlete. This is due to their role as a hip extensor which also helps in your ability to decelerate and change direction.

Single Leg RDL

This is one of my personal favorites, and not just because it does a great job of targeting your hamstring. Start balancing on one leg with a slight bend in the knee. Proceed by hinging at your hips, pushing your butt back while keeping your core tight and back flat. The leg not on the ground will extend back while your hips and shoulders stay square to the ground. Reach for mid-shin with your hands or to the length that your hamstring and good form allow. Return back to the upright position, tapping the other foot down when needed.

Variations: Add weights in each hand, only one weight in one hand, perform on a bosu, use a cable as resistance, use a swiss ball under the back foot.

Double Leg RDL

Very similar to the single leg RDL, the double leg starts with a slight bend in the knees and a hip hinge back. Lower the weight to below the knee, again only as low as your great form allows. Return back to neutral by standing up tall and squeezing your glutes at the top. This is a great bilateral alternative to the single leg RDL.

Variations: Use a barbell instead of dumbbells, perform on a bosu, use a single weight, use a cable, or make it a complex with other exercises.

Hamstring Curls on Swiss Ball

With your back flat on the ground and your knees bent at 90 degrees, put your feet up on the stability ball. Lift your hips up as if your were doing a glute bridge. Extend your legs out while keeping the stability ball underneath your feet. Pull the stability ball back in using your hamstrings and maintaining core tension so that the work is not felt in your low back.

Variations: Put your feet in TRX straps, try single leg curls, or place your feet on the SKLZ sliders

Hamstring Walk-Outs

Begin with shoulders and feet on the ground with your hips up in a glute bridge position. Begin by stepping out with your heels alternating right and left. Step out 2-3 steps each side, then walk back in to the original position.

Variations: add a band above your knees to increase glute engagement, squeeze a medicine ball to work your inner thighs also, hold a weight on your hips.

Kettle Bell Swings

With a little bit of knee bend and holding the weight between your legs, start with the same hip hinge back as your would with a double leg RDL. Proceed by bringing the weight forward in a swinging motion by pushing your hips back to neutral and squeezing your glutes. Do not use your arms to bring the weight higher or let momentum do the work.

Variations: Use dumbbells as your resistance, use a band to pull through your legs

Eccentric Hamstring Curl

While on your knees, your feet can either be pinned down by a partner, or have them in a machine in the gym. Slowly lower your chest toward the ground until you cannot anymore. Either drop to the ground or use a stick as assistance to lift yourself back to the original kneeling position.

Variations: If you are crazy you could try this single leg 😜 otherwise you could use a hamstring curl machine focusing on slow extension to get an eccentric load.

Quad Targeting Exercises

These are mass muscle movements. This means that in the list below I am not giving you quad isolated movements. Rather movements where the quads are active and prime movers. When these exercises are used consistently and properly you will benefit from stronger quads. Work them routinely on a weekly basis to see your work pay off.

If you have any lower body joint issues or chronic pain I suggest you find an experienced and educated fitness professional to help you get started. And remember if you are light headed or dizzy you should stop exercising,

Goblet Squat

Standing in an upright position, hold a dumbbell at your chest. Proceed by bending you knees and squatting down. Keys are to not let the weight bring your chest toward the ground, but instead keep good posture. This does not mean arching your back, instead keep good core tension. When coming out of the bottom of the squat, use your quads to help push your body back up to neutral.

Variations: Swiss ball on the back against the wall, standing on a bosu ball.

Wall Sit

Although this is a fairly common exercise, it can often be done incorrectly. Sit against a wall as you would sit in a chair with your feet shoulder width apart. Be sure to keep your upper body in contact with the wall. Do not let the weight get too far on your toes or heels. Aim to sit as close to 90 degrees at your hips as you can.

Variations: Use a Hip Circle band and pulse your knees out, put a med ball between your legs.

Leg Press

Seated in the chair place your legs on the platform at a comfortable position as you would with a squat. Push the platform up and release the safety bars using the handles. Proceed to bring your knees toward your chest, going only as close as your hip mobility and strength allow. Push back up to the original position without locking out your knees. Once you complete the reps return the safety bars to their original position.

Variations: Single leg, toes out with a sumo stance.

Split Squat

Start with one leg out in front of you with the weight mid-foot to heel and the other one behind you on the ball of your foot. Lower your body down by bending both of your knees but keeping your posture upright and your core tight. The goal is to reach 90 degrees in both knees while still keeping great form. Return to top position and repeat.

Variations: Swiss ball on the back, front foot on Bosu, back foot on bosu.

TRX Single Leg Squat

Using the TRX straps, go as far back as you can while keeping your elbows bent comfortably at your side lift one leg up out in front of you. Sit back as if you were doing a normal squat, while letting the leg not on the ground stay out in front of you. Be careful not to lean too much into the bottom leg or let your chest fall toward the ground. Push up through the ground to lift yourself up and squeeze your glute at the top.

Variations: Foot on Bosu, without TRX for advancement.

Bulgarian Split Squat

Similar to the split squat, the Bulgarian elevates your back foot onto a bench. The weight should still be mid-foot to heel on the front foot. The back should be either on the ball of your foot or rest the top of it on the bench. Proceed to lower yourself keeping the same upright posture and knee staying in line with your front toe. Push off of the ground to bring yourself back to the top.

Variations: Add weights, add a rotation for stability.

Oblique Targeting Exercises

The obliques serve a great purpose as the muscles that support the sides of our core. They assist in the deep exhalation in our breathing routine. They help us with rotation, anti-rotational stability and overall strength in the core. Training your obliques should be a part of your program.

Side Plank Hip Taps

Start in a side plank position with your bottom elbow directly below your shoulder. The other hand can be on your top hip, extended toward the ceiling on the floor for some balance. One leg should be stacked on top of the other. Begin by lowering your body to the ground so that your bottom hip taps the ground. Do not do this at the expense of your form. Make sure your knees, hips, and shoulders all stay in line.

Variations: Bottom knee bent on the ground to decrease load, elbow on stability pad or bosu ball, hold a weight in your top hand.

Plank Hip Dips

In an elbow plank position with tension in your core, be sure not to have your hips too high or your low back arch with hips too low. Proceed by trying to tap one hip to the side and then switch over to the other. It is not essential to tap each completely to the ground if it means your feet are coming off the ground. This one crushes my obliques!

Variations: Elbows or feet on the soft side of a Bosu Ball or stability pad. 

Side Plank Crunch

Start in the same position as the side plank hip taps above. Begin by bending your top knee and top elbow. Have that elbow and knee meet in the middle as you crunch through your top oblique and your bottom one stabilizes isometrically. Return to the original position and repeat.

Variations: Bottom knee on the ground, elbow or bottom foot on a stability pad or bosu ball.

Pallof Press

Using a band or a cable machine, stand so that your side is facing the machine (perpendicular). Have your inside hand on the bottom and outside had overtop. Bring the cable handle or band to the middle of your chest at your sternum. Keeping a tight core, press straight out with the handle/band, then return to the chest. Be sure to control the band or cable keeping your hands moving in a straight, consistent line.

Variations: add a rotation in before you press, use a split stance, or incorporate a bosu ball at your feet.

Woodchoppers

Hold a weight in your hands (dumbbell, weight plate, med ball) and start in a loaded position with the weight at your shins on one side of your body. Using your core to rotate, bring the weight back up across your body to about shoulder height on the other side. Continue by diagonally chopping the weight down on the outside of your body near mid-shin where you started and repeat.

Variations: bring the weight all the way over head at top.

V-Sit Twists

Start by sitting in a v position with your pelvis tucked under so that your core is thoroughly engaged (if you cannot do this without back pain, use a different exercise). Holding a weighted resistance in both hands, move it front one side of your hip to the other in a twisting motion.

Variations: add a press, tuck, single leg tuck, flutter kick or scissor kick after the twist.

Upper Abdominals Targeting Exercises

Targeting the upper abdominals can be tough because working this area of our core often times means a lot of crunches. These usually bore people, give them neck pain, and even when done improperly can lead to some lower back discomfort. Here are 6 variations of a regular crunch that give you better targeting of your upper abdominals.

Straight Leg Sit-Up

Begin by lying flat on the ground, with your arms overhead and your legs straight out. Ensuring that your core is properly engaged by tucking your hips under, proceed to do a sit up while keeping your hands above your head and your legs out straight. Come up only so that you are in a seated position. Then lower yourself back down without letting your back take over the work.

Variations: Hold light weight with one hand, both hands or a weight in each hand.

Flatback Bicycle

Lay flat on the ground with your legs bent at 90 degrees with feet in the air and your hands behind your head. Proceed to crunch your opposite elbow and knee together as your head rotates with it. Extending the opposite leg straight. Repeat the other direction, as the other elbow comes to the other knee.

Variations: Pause at the end of each crunch, perform in a v-sit.

Toe Touches

Lying on your back, put both feet up in the air. The straightness of your legs is going to depend heavily on your flexibility in the hamstrings. Only hold them at the range of motion you have, pain free. Have both hands up in the air, similar to the beginning stages of a deadbug. Using only your core and not the momentum from your arms, reach for your toes by crunching through those upper abdominals and lifting your shoulders off the ground.

Variations: Add a weight, hold one leg up in the air and do a single leg.

OH Extension to Crunch

Start with your back flat to the ground, your knees bent and feet on the ground, and holding a weight in your hands up in the air above your chest. Extend the weight over your head while ensuring your back does not arch off the mat as you do so. How far back the weight goes will depend on the range of motion you have in your shoulders and your ability to maintain core contraction (keeping your back flat to the ground). Return back to the original position of your weight. Proceed to crunch your upper abdominals while keeping your arms extended. Be careful to not go too far forward or the load will enter your back.

Variations: Perform with a weight in single arm to work shoulder stability and unilateral load, change the overhead extension to a skull crusher, change the crunch to a toe touch.

Penguins

Start with your back is flat to the ground, your knees are bent, your feet on the ground, and your arms are at your side. Crunch up slightly so that your head up and shoulders are peeled off the ground. Proceed to reach along the ground for your foot with the hand that is on the same side as the foot you’re reaching for. Creating a side crunch motion. Then go to the other foot and repeat, alternating each rep. This will create a rocking motion back and forth (similar to a waddling penguin). If you have any neck pain (very common) in this exercise, you can support your head with your hands and just create the same motion.

Variations: Reach to both sides then relax back to the ground, pause an hold for a 2 count on each side.

Crunch w/ Extension

Lying on the ground, bend one knee and place your foot on the ground while the other is extended straight out in the air. Have your hands at your head and proceed to crunch with your upper abdominals while the leg stays extended. Do the reps all on one leg, then switch which leg is extended. Height of the extended leg will depend on your ability to keep your core contracted, back neutral and pain free.

Variations: Adjust height of leg to increase or decrease difficulty, extend both legs to increase difficulty. 

Lower Abdominals Targeting Exercises

Having strong lower abdominals can help reduce back pain, improve overall balance, and just like all core can help improve your posture. Your rectus abdominus has this lower and upper split and many people only target the upper abdominals with many crunch variations. The lower abdominals are often tougher to work and therefore get pushed aside.

REVERSE CRUNCH FOR LOWER ABDOMINALS

Lying on the ground with your knees bent at 90 degrees suspended above the mat. With your entire upper body staying grounded to the mat, lift your hips up as your knees come toward your head. Using your abdominals, crunch your knees toward your head. While still controlling through your core, return back to the original position and repeat.

Variations: Hanging from a pull-up bar, holding on to the handle of a decline bench.

V-SIT HOLD FOR LOWER ABDOMINALS

Begin seated with your knees bent and feet off of the floor. Be sure to have your core engaged by tucking your pelvis under. Place your hands directly out in front of you or holding them together above your stomach. It is important not to try and sit too upright. This is a mistake many people make that causes the load to go into their low backs.

Variations: Add a curl and press, Add a twist, do an overhead extension with it.

KICK OUT, KICK UP FOR LOWER ABDOMINALS

Lying on a bench or a mat, start with your knees tucked to your chest. You can place your hands underneath you or behind your head holding on to the bench if that is where you are doing the exercise. Begin the movement by extending your legs out so that your body is as straight as possible while still having your back maintain contact with the mat/bench. Proceed to bring your knees back toward your chest. Then, kick your legs up in air by lifting your hips off of the mat.

Variations: Perform the same actions on a decline bench.

FLUTTER KICKS FOR LOWER ABDOMINALS

Lying on a bench or a mat, extend your legs out so you are as straight as possible and feet are off of the ground. Only do this to the height where you are able to keep your back flat. Trying to get lower with your legs by arching your back will only lead to a pain in your lower back and your core not firing as it should. This kind of compromise defeats the purpose of the exercise and does you no good! With this in mind, proceed to the exercise by alternating which leg is lifted higher and which is lowered. Keep switching back and forth while maintaining good form.

Variations: Speed up your kicks and go for time or a higher rep count, slow down and control each kick with a pause and each end.

LEG RAISE FOR LOWER ABDOMINALS

Start lying flat on the ground or on a bench. Place your legs directly in the air as close to your body making an L shape as you can. This is largely going to depend on your hamstring flexibility. You can place your hands underneath you for support, hold on to the bench, or even hold on to a beam behind your head. This will help maintain core tension. With keeping your back flat to the mat, lower your legs down to as close to parallel as you can get while keeping the load in your core and not your lower back. Keeping your core braced, raise your legs back up to the starting position. This can be difficult for those who have tight hips and will sometimes cause some discomfort because of that.

Variations: Hanging from a pull up bar, single leg lower.

SCISSOR KICKS FOR LOWER ABDOMINALS

Similar to the flutter kicks, start by lying flat on a mat with your legs extended out in the air. Again, it is important to keep your back completely flat. Instead of kicking alternating your legs up and down, you are going to instead do it side to side. This is going to create a “scissor” like motion with your legs. It is also important to remember that compromising to lower your legs by arching your back does not do you any good!

Variations: Speed up your kicks and go for time or a higher rep count, slow down and control each kick with a pause and each end.

EXERCISES

EXERCISE DISCLAIMER

Before starting an exercise routine make sure that you are prepared for exercise and consult a medical professional if you have any concerns. If you are recovering from an injury be sure to have clearance to exercise from your doctor and listen to your body. Results will come from consistent work. Injuring yourself will only further delay your results.

If you feel dizzy or lightheaded you should stop exercising immediately and seek help. Pain or joint discomfort should not be ignored. If you can’t exercise without pain or discomfort you should seek out a trusted fitness professional to guide you. They will be able to adjust your form & technique, programming & volume to manage your discomfort. Make sure that you search for an educated and reputable fitness professional who will support your needs.

Grinder Salad Recipe

Grinder Salad Recipe

I think this recipe exploded the internet last summer and since then my girl friend and I have been tweaking and perfecting the recipe that we now consider the source of truth for all Grinder Salad to come.. Some of it might be the exact ingredients or maybe it is the...

read more
How Personal Trainers Can Achieve Financial Independence

How Personal Trainers Can Achieve Financial Independence

Achieving financial independence as a personal trainer isn’t just about working harder—it’s about working smarter. A well-structured business model can be the difference between financial instability and consistent income growth. In this blog, we’ll explore how to...

read more
5 Hacks to Grow Your Fitness Business

5 Hacks to Grow Your Fitness Business

For personal trainers, time is often the most valuable yet limited resource. Balancing client sessions, marketing tasks, and business growth can feel overwhelming, leaving little room to focus on growing your reputation and scaling your business. The good news? With...

read more
fitness articles
lifestyle articles
nutrition articles
golf articles

10 ZERO EQUIPMENT EMOM (EVERY MINUTE ON THE MINUTE) WORKOUTS

10 ZERO EQUIPMENT EMOM (EVERY MINUTE ON THE MINUTE) WORKOUTS

Have you ever heard of EMOM workouts? I hadn’t, but I started to see them pop up everywhere. And honestly, I thought they looked easy. Famous last words right? Man was I WRONG!! These workouts will kick your butt.

The tricky part of an EMOM workout is that each exercise has a rep count, but you only have a minute to do each exercise. Whatever time is left in the minute after you have completed your reps is your rest period. So you need to work fast (without sacrificing form) to maximize the time you have to catch your breath!

These workouts are great for when you’re short of time but still want a good workout! I really like to do EMOM workouts after a long day or when I don’t have very much motivation because I can tell myself I am going to do 4 rounds of 5 exercises and know that I will be done in exactly 20 minutes!

How to do an EMOM Workout

personal trainer mequon wisconsin

Like I mentioned above, you have 1 minute to complete the reps for each exercise and the time left over is your rest. So, getting the reps done fast will increase your heart rate. I like to track my heart rate using my apple watch, it allows me to track my steps, exercise, calories burned, and so much more!

Each of the next 10 workouts is made up of 5 or 6 exercises. You should repeat each set of exercises 3 to 5 times for a 15-30 minute workout! You only need three things for these workouts: space, a stopwatch and the discipline to get it done!

Take a look below for the fast and effective workouts you can start doing today! Tag us in your workouts on Instagram to be featured 💙.

Full body EMOM Workouts

These workouts are super quick and will target your full body! During workout number one you will be working your glutes, quadriceps, pectorals, latimuss dorsi muscles, and your lower abdominals. Workout number two will focus more on rotational core and triceps, but still glutes and quadriceps. All you need for this workout is a small space to move around in! Maybe a yoga mat if you are on hard wood or cement. EMOM workouts are a high pace style of exercise. So this workout will definitely get your heart rate up and make you work up a sweat. Do four rounds of each of these five exercises for a 20 minute full body workout! Take a break between rounds if you need to but keep it less than two minutes.

Want 8 More EMOM Workouts?

Use the button below to subscribe to our newsletter (and pick your preferences) and we will send you 8 EMOM workouts that cover upper body, lower body, core and heart rate. We share full workouts, fashion trends, health tips and more weekly in our newsletter.

Be sure to check your spam and/or promotions folder for our emails.

What I Use for an EMOM Workout

personal trainer grafton wisconsin

INSULATED WATER BOTTLE | TELETIES HAIR TIES | YOGA MATSWEATSHIRT | LEGGINGS | LANE EIGHT SHOES

Looking for More Workout Ideas?

Check out Discover The Best Exercises For Each Muscle Group. 6 Exercises per muscle group and at least three workouts for each one!

Are you looking for more specific workouts for the glutes? You can find the 6 best glute exercises and free workouts in our article!

This blog has a list of the best exercises for your back and a few of guided upper body workouts.

If ab exercises are what you are looking for check out this blog about the top 7 core workouts.

Want more heart rate workouts? Try HIIT workouts but first educate yourself with this blog post all about high intensity interval training.

Grinder Salad Recipe

Grinder Salad Recipe

I think this recipe exploded the internet last summer and since then my girl friend and I have been tweaking and perfecting the recipe that we now consider the source of truth for all Grinder Salad to come.. Some of it might be the exact ingredients or maybe it is the...

read more
How Personal Trainers Can Achieve Financial Independence

How Personal Trainers Can Achieve Financial Independence

Achieving financial independence as a personal trainer isn’t just about working harder—it’s about working smarter. A well-structured business model can be the difference between financial instability and consistent income growth. In this blog, we’ll explore how to...

read more
5 Hacks to Grow Your Fitness Business

5 Hacks to Grow Your Fitness Business

For personal trainers, time is often the most valuable yet limited resource. Balancing client sessions, marketing tasks, and business growth can feel overwhelming, leaving little room to focus on growing your reputation and scaling your business. The good news? With...

read more
fitness articles
lifestyle articles
nutrition articles
golf articles

SUBSCRIBE

Click to sign-up for weekly information and offers.

DISCLOSURE

We are a participant in the Amazon Services LLC Associates Program, an affiliate advertising program designed to provide a means for us to earn fees by linking to Amazon.com and affiliated sites.