8 Mobility Exercises Anyone Can Do

8 Mobility Exercises Anyone Can Do

I highly encourage all my clients to incorporate mobility into their week. Generally leaving when and how much up to them, but these are 8 mobility exercises anyone can do. Read for a full explanation on how and why to do them and find downloadable workouts to follow at the end.


TABLE OF CONTENTS

  1. Child’s Pose with Traction
  2. Trap Traction
  3. 3 Point Hip Flexor 
  4. High Plank Sit Back
  5. 90/90 Hip Mobility
  6. Hip Circles
  7. Iron Cross
  8. Thoracic Extension
  9. Downloadable Workouts

HOW TO PERFORM CHILD’S POSE WITH TRACTION

Let me be clear here. Adding traction to child’s pose will shift the traditional focus to stretching your lats. If you can’t even get into child’s pose I would not suggest using this stretch for your lats.

Your lats are the largest back muscle you have. They run the length of your entire back and they are used in so many movements from throwing to pull-ups. Taking care of your lats like you do your glutes and lower body will help your posture and daily comfort.

To really target your lats using a child’s pose with traction you need to make two changes:

  1. Once in child’s pose bring both your hands across to one side and grab a stable object.
  2. Allow your hips to fall to the side as you bring your hands across.

Making these two changes to a traditional child’s pose will create traction and elongate your lat. Read the full steps below and as always be sure to stay in a pain free range of motion. And since we are doing mobility do not hold the end position for long. Simply work into your end range of motion then back to start and repeat.

STEPS FOR A CHILD’S POSE WITH TRACTION

  1. Start in child’s pose, see the first picture below, with an object on your left that you can hold on to create traction.
  2. Walking your hands to the left and grab the object.
  3. Once you have a firm grasp of the object allow your hips to fall to the right increasing the lengthening of the lat muscle.
  4. Hold for a few moments, return to start and repeat.

WHAT TO AVOID

You should never be in pain. Please stop ANY mobility you are doing if pain exists. Our bodies are designed to try and prevent injury. That doesn’t mean that we can never get hurt. Rather that we should listen to our bodies.

Our muscles consist of muscle fibers in which every fiber has a muscle spindle. The muscle spindle’s only job is to detect and regulate the lengthening of muscles. When we are doing mobility, or pushing the range of motion, we are lengthening the muscle. If we push, intentionally or unintentionally, to a point of pain the muscle spindle will be activated to PREVENT the lengthening from occurring. This is the opposite of why we want.

HOW TO PERFORM A TRAP TRACTION

Your traps, or Trapezius muscles, are one of several back muscles.  This muscles is named after it shape, a trapezoid. And it is quite large, running from the base of the head, out to the clavicle and shoulder and down the spine. Our traps help tilt, turn and stabilize at the head. They also are involved in shrugging your shoulders, stabilizing the shoulders and twisting the arms.

Basically you are using your traps all day. And there are other factors that impact your traps. Like sleep. If you are like me you like to sleep on their side, giving themselves a hug and pulling their shoulders (shrugging) up to the ears. Basically increasing the tension in my traps while I sleep, go me! I go to sleep to recover, not make things worse.

And then there is stress. If you haven’t heard, your shoulders are a very common place to “carry stress”. Simple put that means, when you are stressed you tend to shrug your shoulders. Putting more tension into those already active traps.

STEPS FOR A TRAP TRACTION

We are using a weight to produce the traction portion of this exercise, but you can just as easily use a counter or desk by grabbing underneath.

  1. Stand comfortable on two feet with a shoulder width stance with a weight in your left hand.
  2. Keeping your posture tall, but your shoulder relaxed, slowly turn your head to the right and tuck your chin towards your armpit.
  3. Find your end range of motion, hold for a few moments and return to start. Repeat this movement varying your chin location.

WHAT TO AVOID

  • Pain. As always, mobility should be pain free. Control the stretch by bringing your head into a more upright position.
  • Shrugging Shoulders. This is the opposite of what you want here. So try to relax those shoulders to get the most out of this stretch.

TIPS FOR A TRAP TRACTION

  • You don’t need a ton of weight, but if all you have at your disposal is a 5 pound weight you are better off using a table/counter/railing. Anything that you can get your hand under to provide a base for the pulling force.
  • Try working your chin from your midline out towards your armpit. There might be more than one spot that needs stretching.

HOW TO PERFORM A 3 POINT HIP FLEXOR EXERCISE

This is a variation you can take on a traditional hip flexor mobility exercise. It is by no means the only variation you can take, but you bet your bottom dollar it feels fantastic early in the morning or at the end of the day.

We commonly say “my hip flexor” is tight or “you have tight hips”, but this can be misleading. When we talk about hip flexion it is the act of bending at your hip to bring your knee towards your chest or lower your chest towards your legs. But the hip is a very dynamic joint, allowing for a very large range of motion. For example abduction at the hip with flexion will put your knee out to the side and up toward your chest.

All of this is to say that hip flexion can occur in various movement patterns, which means various hip muscles will be active. And those muscles attach at various points on your pelvis, spine and femur. So when we work to relieve “tight hips” or “a tight hip flexor” moving in various ranges of motion can be helpful. 

STEPS FOR A 3 POINT HIP FLEXOR EXERCISE

  1. Start in a split kneeling position. I suggest having something soft, like a stability pad, to kneel on.
  2. Tilt your pelvis under and squeeze your glutes.
  3. Keeping your glutes tight you lean forward then return to starting position. Point 1
  4. Reach overhead sideways towards the forward knee then return to starting position. Point 2
  5. Rotate towards the front knee. Point 3. (See pictures below.)
  6. All 3 movements combine to make the 3 point hip flexor exercise. Perform 5 reps on each side.

WHAT TO AVOID

  • Arching or extension in your low or mid back. Allowing yourself to arch or extend will produce a range of motion we are not looking for. We want the movement (of the range of motion) to be from the hip. I remind my clients to keep their core braced to serve as a reminder for a neutral posture.

TIPS FOR A 3 POINT HIP FLEXOR EXERCISE

  • Focus on tilting your pelvis and engaging your glutes. This will help increase the stretch at your hip flexor by pushing your hip into extension. You must maintain this posture with movement.
  • It is likely one movement is tighter than the other(s). Consider adding in a few extra reps in that pattern regularly.

HOW TO PERFORM A HIGH PLANK SIT BACK

With so many mobility exercises “on the market” it is hard to know why you should or shouldn’t do one. Unfortunately, without knowing your health history it is hard to know what is right or wrong for you. However, I can tell you some great reasons for doing the high plank to sit back. And if any of those reasons hits home with you, then give it ago by following the steps below. Just make sure to read the section on what to avoid.

Hip & shoulder mobility together – a nice benefit to save time and work functionally. However, this may be a drawback for you if you experience shoulder pain or limited range of motion.

Warm-up & core activation – we know that a plank requires us to use our core, so a high PLANK to sit back will be no different. Doing these will help wake up your core and warm your body to be ready for more challenging movements.

Decrease low back pain – hip mobility is linked to decrease low back pain, but so is core strengthening. Two birds, one stone. You can’t really go wrong there.

STEPS FOR A HIGH PLANK SIT BACK

  1. Start in a high plank with your feet shoulder width apart.
  2. Push through your hands, bend your knees and sink into yours hips as you “sit back”. This should mirror child’s pose in yoga, except elevated off the ground.
  3. Once you have reached your maximal “sit back” push through your toes, straighten your legs and move back to a high plank position.
  4. Repeat for desired reps. I recommend sets of 10 for a warm-up, sets of 5 for active recovery

WHAT TO AVOID

  • Be sure not to let your low back arch or your hips sag as you bring your body back into a high plank position. Keeping your core engaged the entire time will help prevent any low back arch.
  • Pain. We are always avoiding any pain or high level discomfort. Remember that there are a large variety of hip mobility exercises out there. You can certainly find another.

TIPS FOR A HIGH PLANK SIT BACK

  • This is a great warm-up exercise, but it can also be incorporated into a workout by adding a movement between reps. For example, a push-up between sit backs or step your feet in and stand-up between each rep.
  • If you have wrist discomfort when in a high plank consider using dumbbells (hex style are easiest) as the base for your hands. This will allow your wrists to stay straight, versus the flexed position they typically in during a high plank.

HOW TO PERFORM A 90/90 EXERCISE

90/90s should be included in your mobility program because they target the hip from multiple angles. Depending on what leg is in front, or your chest is facing, the joint positioning is different. Add in the process of switching from side to side and you are accessing a large range of motion, or trying to at least. 

Another unique factor is how you are using your body weight in this mobility exercise. 90/90s use your body weight, and the ground, to help increase the the end range of motion achieved on both sides. This will help to produce quick results in improve mobility.

The key is in the set-up. Starting position should be 90 degrees at knee and hip of your front and back leg. This will be awkward and unusual the first time. If you can’t get into this position try other hip mobility drills consistently and come back to this one.

Mobility is always about quality over quantity. Be calculated in your movements and listen to your body.

STEPS FOR A 90/90

  1. Start seated on the floor with your knees bent and let both of your legs fall to the same side. This will put the outside of one leg and the inside of the other leg on the floor.
  2. Adjust your upper legs so the angle between your thigh and your hip is at 90 degrees on the front and the back leg.
  3. Adjust your lower legs so the angle at your knee is at 90 degrees.
  4. Once in this position you want to apply force down into the ground from your front and back leg, working towards contact with the ground.
  5. Lean your chest forward towards the front leg, keeping your back flat.
  6. Return to to starting position and switch your legs and face the other direction and repeat.

WHAT TO AVOID

  • Anything other than 90 degrees at your hip and knee. After all, that is the whole point of the exercise.
  • Pain. Mobility or flexibility training should not be painful. Pain is an indicator that you are doing something wrong. Listen to your body.

TIPS FOR A 90/90

  • Your mobility will be challenge on each side and in transition. There is a reasonable amount of core work going on here to be able to change your leg position. Keep your upper body quiet and core braced as you go to switch sides.
  • On each side try to achieve floor contact from both your front and back leg while you slightly lean forward by hinging at your hips. That means your back stays straight!
  • There are a lot of variations of this exercise, but we consider this to be a good starting point. If switching your knees side to side isn’t your jam you can always work the forward lean on each side for a few reps before switching positions.

HOW TO PERFORM A HIP CIRCLE

Hip mobility has a large impact on low back pain. For example, tight hips can cause your posture to change and your low back to hurt. Tight hips can also cause an individual to use poor technique while lifting increasing the odds of a low back injury. Working hip mobility to restore range of motion can minimize low back pain and injury.

Increasing range of motion at the hips is also connected to improved athletic performance. Limited range of motion means your mechanics, loading pattern and ability to work efficiently will be limited as well. Opening up range of motion opens up the opportunity to access more power and translate that power to performance.

Before we jump into the steps decide whether you want to do standing or quadruped hip circles. Does it matter? An argument can be made in both directions, but for this purpose you decide. I favor the quadruped when I am indoors and or doing mobility. I use standing when I am outdoor or getting warmed-up, especially for running.

STEPS FOR A STANDING HIP CIRCLE

  1. Find your balance on one leg  by engaging your core and keeping a soft bend in the knee of the weighted leg.
  2. Once balanced raise the non-weight knee to 90 degrees.
  3. Then keeping your foot pointed at the ground rotate your hip open so your knee points to the side.
  4. Finally rotate your hip so your knee points down to the ground and your foot to the back.
  5. Bring your knee back up to 90 and follow the same steps.
  6. Repeat 5 times then reverse the steps, working hip rotation in the opposite direction.

STEPS FOR A QUADRUPED HIP CIRCLE

  1. Start on all fours, hands and knees, and brace into the ground by driving force through your limbs and engaging your core.
  2. Lift one knee off the ground and rotate at your hip raising your knee away from your body.
  3. Rotate your hip again so that your quad is parallel with the ground and your foot is pointing to the sky.
  4. Bring your knee back down to the ground and follow the same steps.
  5. Repeat 5 times then reverse the steps, working hip rotation in the opposite direction.

WHAT TO AVOID

We have said it before, but we will say it again … we are focusing on a specific range of motion. The size of the movements does not matter. We do NOT want excessive motion or a flailing body. Isolate the movement at your hip by controlling your torso and upper body.

Your hip joint is a ball and socket, which allows the joint a large range of motion. That range of motion can become limited over time. Enter mobility and flexibility training. While you are doing the exercise think about that ball and socket joint. Envision your leg moving around your hip. The rest of your body should be still or quiet.

TIPS FOR A HIP CIRCLE

  1. You can use a wall as proprioception to control the rest of your body from moving. Just line up sideways with one shoulder against the wall and maintain contact as you move through the range of motion.
    • When you are in the quadruped position it will prevent too much rocking side to side which will help control your range of motion.
    • Standing it will prevent the side bend from occurring in order to move your leg.
  2. Keep your core braced so that you do not wobble side to side and hyper focus your attention on your hip.
    • In the quadruped position you should drive your limbs into the ground & squeeze your abdominals before lifting the knee off the ground.
    • Standing you should put a slight bend in the weighted leg and engage your abdominals to help with balance and posture.

HOW TO PERFORM AN IRON CROSS FOR DISASSOCIATION

The iron cross can be helpful to establish rotational range of motion at their hips separate of the upper body. Also known as disassociation. There are a significant number of exercises that focus on disassociation of the hips and shoulders where the hips stay still and the shoulders move. Think of a split squat with arms straight forward and rotating your shoulders side to side.  There are far less that work the opposite.

The simple reason is that it is hard. To rotationally move the lower body without the upper body requires you first to be in an open chain movement pattern. Second the joint(s) that actually produce enough rotational movement are found in your thoracic spine, not your lumbar spine. And your lumbar spine is closest to the hips.

STEPS FOR AN IRON CROSS

  1. Starting laying flat on your back with your legs straight and your arms out to the side at shoulder height, palms down. Making a T with your body.
  2. Brace your core and lift one leg straight up into the air. Maintaining core tension and contact with the ground at your hands and shoulders try to cross the upright leg over toward the ground.
  3. Once you have found your greatest range of motion, keeping your shoulders down, return the leg to upright and lower to the ground.
  4. Alternate legs focusing on the same key points side to side.

IMPORTANT!

Your range of motion is limited by movement at your shoulders. Remember we are trying to create movement at the hips without movement at the shoulders. This means you may need to place a box, chair, foam roller or something elevated off the ground to work towards instead of the ground. The height of this object will depend on your range of motion.

The rotation should be felt through your thoracic spine, not your low back. If for any reason this causes discomfort in your low back stop immediately. This exercises is not for you. Seek professional help if you are looking to work on your ability to disassociate your hips and shoulders.

The range of motion from your hips can be limited by the flexibility of your hamstrings and IT band. If you experience that you should consider specific stretches, for example a standing hamstring stretch. We do not agree with using this exercise to increase flexibility of your legs.

If you experience too much of a pull or any discomfort in your legs doing this exercise you should consider bending your knee to decrease the the flexibility demand. Bending the knee will also decrease the load by shortening your force arm.

WHAT TO AVOID

This is not an entry level mobility exercise. It looks simple, but demands a person be relatively mobile and highly stable to begin with. And at very least requires you to check your ego at the door and appropriately limit your range of motion.  If you are new to mobility or stiff/tight start with a thoracic rotation exercise like side lying chest openers. These will still work on disassociation between the upper and lower body and help to contribute to improved thoracic rotation.

TIPS FOR IRON CROSS

  • Focus on the rotation occurring through your thoracic spine. I like to envision a twist through my belly button.
  • Remember upper body should stay still.
  • Bending your knee will decrease the flexibility demand on your legs and decrease the force load of the exercise.
  • More is not better. Work for controlled, quality movements and couple with rotational strength for the best results.
  • If you have any discomfort in your low back, stop immediately.

HOW TO PERFORM THORACIC SPINE MOBILITY MINI CRUNCHES

The objective of these mini crunches is to work your thoracic spine into extension. Since we spend a typical day in flexion – sitting and rounding of the shoulders. It is important to focus your attention and movement to the thoracic spine. Movement elsewhere will give you a false range of motion and could contribute to more discomfort.

For simplicity, you can think of your thoracic spine as the section where your ribs are located. It is designed to support and protect the heart and lungs via the ribcage. The range of motion is small, but the thoracic spine can move in flexion (bending forward), extension (arching backward) and rotation. Range of motion most commonly decreases in extension and rotation due to repetitive motions. Like I said above – sitting at a desk, driving, etc.

Of course age and injury can and will have an impact on range of motion. But for the average person it is your daily life style that is causing your range of motion to change, decreasing mobility and contributing to daily discomfort.

STEPS FOR MINI CRUNCHES

  1. Start with your foam roller perpendicular to your spine at the bottom of your shoulder blades.
  2. Cross your arms over your chest and plant your feet firmly on the ground.
  3. Engage your abdominals and squeeze your glutes to brace your lower body.
  4. Allow your back to extend, or round, around the foam roller as you lean back.
  5. Extend back, as far as you can go, keeping your core engaged.
  6. Return to the starting position.
  7. Perform 5 reps in one location then move the foam roller slight up your back and repeat.

WHAT TO AVOID

Our main focus here is on the mid back, or the thoracic spine. Your focus should be on creating movement in that region of the body. Avoiding movement in others.

When working on spinal mobility you have to acknowledge that your spine works synergistically, but it should also work independently. Isolating our thoracic spine is essential to creating mobility. We need to avoid movement in our lumbar spine during extension on this exercise.

TIPS FOR MINI CRUNCHES

  • You should feel no pain, movement or work in your lower back. If you do work to better engage your core.
  • Move the foam roller up only an inch or two at a time to help target individual vertebra.
  • If you are able to keep your core engaged you can extend your arms overhead to increase the the force pulling you into extension. A weight can also be held in your hands.
  • I’ll say it again … be conscious of your core, specifically keeping it braced. Doing so will help control any movement in your lumbar spine and isolate the movement in your thoracic.

WORKOUTS

There are many workouts for you to download and save. Scroll through them all to find which ones you want to try. 

Sculpt Your Goals: Dumbbell Only Workout Program

Sculpt Your Goals: Dumbbell Only Workout Program

Are you ready to start a new workout program that focuses on building strength in a simple and effective manner? Then you are in the right place! My Dumbbell Only Workout Program is your answer to achieving your fitness goals. Let's explore why my program is the...

read more
3 Reasons to Own Your Own Training Business

3 Reasons to Own Your Own Training Business

Owning your own training business can be an exciting and yet overwhelming thought. But ask yourself... Are you committed to the long term? Does passion and knowledge fuel your desire to work with clients everyday? Are you looking for more career advancement...

read more
fitness articles
lifestyle articles
nutrition articles
golf articles

SUBSCRIBE

Click to sign-up for weekly information and offers.

DISCLOSURE

We are a participant in the Amazon Services LLC Associates Program, an affiliate advertising program designed to provide a means for us to earn fees by linking to Amazon.com and affiliated sites.

6 Exercises To Create A Stronger You Today

6 Exercises To Create A Stronger You Today

We use on a regular basis with our clients and that we think are very valuable. These 6 exercises to create a stronger you today when worked routinely will have a measurable impact on your fitness. Read how to do each movement safely and check out the downloadable workouts at the end for a place to get started.


TABLE OF CONTENTS

  1. Ab Wheel
  2. Bent Over Row
  3. Wall Sit
  4. High to Low Core Rotator
  5. Tricep Dip
  6. Band Walks
  7. Downloadable Workouts

AB WHEEL

The ab wheel is almost a standard in our gym. Not that everyone “should” be able to do it, but that it is an example of core strength and stability. Performing the ab wheel correctly, pain free is a benchmark that we can measure core strength by. Again, we do NOT use it with everyone, but healthy individuals, especially look for improve athletic performance you better bet your bottom dollar we do.

If those individuals can give 15-20 exceptional ab wheel reps then we hit them with some progressions. Like putting a weight on your back or performing the reps from your toes. Both show a high level of core & shoulder strength & stability.

HOW TO PERFORM AN AB WHEEL

First off you are going to need to have an ab wheel. If you don’t skip over to your nearest store or order one up off of amazon (affiliate link). Next up is something for your knees. We have the stability pads (affiliate link) that we use at the gym, but if you don’t have one on hand you can use a towel or pillow. I would 10 for 10 recommend the stability pad, we use it for so many exercises from core to balance. But I am against having a bunch of stuff laying around – so make sure you have a place for it. Otherwise grab the pillow of your couch and get going.

STEPS FOR AN AB WHEEL

  1. Start on your knees with the ab wheel on the ground under your shoulders.
  2. Brace your core and push from your knees and hands to move the ab wheel forward.
  3. Once you have reached YOUR maximal range of motion pull the wheel back to the starting position by equally pulling in from your arms and hips.

WHAT TO AVOID WHEN DOING THE AB WHEEL

In no way is this an “entry level” core exercise. Most common mistake we see is continuing to perform this exercise incorrectly. The exerciser either creates an issue (pain) or exacerbates one. Make sure you are strong enough by doing plenty of core exercises with great form, to failure.

  1. Arching low back or sagging butt – this is an ab exercise, brace your core!
  2. Only moving your arms – your torso should come forward with your arms.
  3. Only moving your hips/torso – your arms should extend forward at the same time.

TIPS FOR THE AB WHEEL

  • Control your pelvis. Arching in the low back is the number one cause of pain or discomfort with this exercise. It indicates that your abdominals are not staying engaged. Keeping your hips tucked can help you engage your low abdominals and prevent the low back from arching. But the more neutral spine you can stay the better.
  • Equal Movement. We want to see your hips and shoulders extending simultaneously in both directions. The movement should be smooth and equal.
  • Range of Motion. The end goal of this exercise is a full extension. However, that isn’t where you start. Most people will have to shorten their range of motion in order to keep their pelvis tucked/ back neutral and equal movement from the hips and shoulders.

CORE REGRESSION & PROGRESSION EXERCISES

With the ab wheel being an advanced core exercise you may need some other exercises to supplement. Try planks with upper body movements like shoulder taps and plank step-ups to work on strength in the end range of motion of an ab wheel. Sit-up variations on the decline bench or v-sit variations to work on hip flexor strength and low abdominals.

If you want to make the exercise hard you can work on angles out to the side, add a weight to your back or try from your toes. BUT we caution these moves unless you are truly doing 15-20 really high quality, full range of motion reps.

BENT OVER ROW

It may be a basic, simple, old exercise, but everyone should be familiar with a bent over row. And if you already know the bent over row, how many other back exercises can you think of? Hopefully 2 or 3 times as many chest exercises.

Training your back muscles should 100% be a priority during your workouts. We live in a forward dominant world – meaning life we do most of our activities in the front of our body. Exercise should work to maintain balance in our bodies, which means we need to do more back work to manage the impact of our lifestyle habits.

HOW TO PERFORM A BENT OVER ROW

Let’s start by recognizing the posture of a bent over row. It is important to understand that this bent over posture puts a large load on the core – back and abdominals. Maintaining core engagement while in this posture will help maximize your results and keep your back pain free.

Second piece about posture is that the more parallel to the ground you are able to get your chest the better. That is from the perspective that we want to load more of the mid back and less of the upper back. Of course, there will be times you want to load the upper back, but that’s not right now.

An added bonus for the bent over row is that it requires your lower body to work isometrically to hold the hip hinge posture.

Finally, because I can’t say the word posture enough … the bent over row will help improve your posture. Any back exercise, done properly, will help your posture. You will notice you stand up straighter, walk taller and have a more elongated appearance in the mirror. But, that will only happen by putting in the work and following a regular, consistent program.

STEPS FOR A BENT OVER ROW

  1. Holding weights at your hips, set your feet in a comfortable stance. Try to go no wider than shoulder width.
  2. Brace your core and slightly bend your knees.
  3. Hinge at your hips, keeping your core tight and your spine neutral as you lower your chest to parallel with the ground.
  4. Once in position the weights should hang directly below your shoulders (see picture).
  5. Pinch your shoulder blades together and “row” or pull the weights toward your chest.
  6. Control the weights back down to the starting position and repeat.

WHAT TO AVOID WHEN DOING A BENT OVER ROW

  • Arching & rounding of the spine/back.
  • Curling of the wrists.
  • Lifting chest out of parallel posture.

TIPS FOR A BENT OVER ROW

  • Focus on your shoulder blades, not the distance your weight travel. Retracting or pinching your shoulder blades as the first motion in a row is critical to recruiting your back muscles over your biceps. Try to “grab a pencil” between your shoulder blades to help visualize your shoulder blades retracting/pinching.
  • In a bent over, or hip hinged, posture you are increasing the demand on your trunk. Keeping a neutral spine and core engaged the entire time will keep your low back from becoming over worked. Work to keep your back parallel to the ground the entire time.
  • Keep your core braced and spine neutral through the entire movement. Tendency is to allow your back to arch as you pull the weight to your chest and round as you lower it towards the ground. Fight that tendency!
  • Far too often we see extension or arching in the mid-to-low back upon movement. This will cause irritation of the low back and decrease the use of your abdominals. Squeeze your core!
  • Change your grip and arm positioning to target your back differently. I like wide bent over rows with a palm down position and an underhand grip bent over row the best.

OTHER BACK EXERCISES AND BENT OVER ROW VARIATIONS

There are a significant amount of variations to a bent over row. Too many to name, but you can add a stability component and stand on single leg, you can make it unilateral and perform it single arm. You can do it from a plank position to increase the challenge on your core. Make your choice based on your ability to perform quality reps and the end goal (or adaptation) you are trying to achieve.

A few of the common exercises I use to train my back are pull-ups because there is no better exercise for your back. You may need to start with a modification (heavy seated row or lat pull down) or assistance, but being able to do pull-ups is an excellent measurement of back strength and overall fitness.

I also love reverse fly and bent over Ys because they effectively target the smaller posterior muscles of the shoulder that keep your shoulders back. Which translates to the appearance of walking tall or walking with confidence as you consistently hold your shoulders back, keeping your chest upright and open.

WALL SIT

The wall sit is an isometric exercise. If you are wondering what in the heck isometric is, or if it is even English, let me explain. Isometric is essentially a muscle contraction that produces no movement. In fact, you are likely doing isometric work in the form of a plank or a v-sit hold.

The biggest reason you should be doing isometric exercises is for the stability benefits. Whether you are a teenage athlete, avid runner or in the aging population stability is your friend. It should be your best friend.

You will also experience an improvement in muscle endurance by regularly incorporating isometric exercises. This is once again great for athletes, injury prevention and the aging body.

How to Perform A Wall Sit isometric exercise

  1. Find yourself a wall.
  2. Sit against it.

It really is that simple. However, we have some guidelines to follow or work towards.

  1. Try to get 90 degrees of flexion at your hips and knees. This depth mirrors a squat depth and has a direction translation to muscle fiber recruitment for proper muscle firing within the movement.
  2. Keeping your feet around hip width and knees over your ankles. We want to avoid excessive internal rotation, letting our knees knock in, and rolling onto the side of our foot, picking up our big toe, and lifting our heels off the ground. Focus on a consistent foot contact with the ground.
  3. Maintain contact with the wall at your head, shoulders, back and butt by bracing your upper body into the wall. This will make your wall sit more of a total body exercise and help the neurological connection between your lower and upper body in the squatting pattern.

What to Avoid when doing a Wall Sit

  • Lifting your heels off the ground (for a standard variation)
  • Letting your knees cave in
  • Rolling on to the outside of your foot
  • Leaning forward and rest your elbows on your thighs

Other Isometric Exercises and wall sit variations

A plank is a great upper body isometric exercise, but the sky is the limit. You can take any muscle contraction and make it isometric. Just think of an exercise you like. Here is a common one – a bicep curl. Simply hold the weight with your elbow(s) at 90 degrees. You can time the exercise, or do it while holding a lunge for an isometric lower body burn too. Alternately you could be doing a full reverse lunge and working the concentric and eccentric phase.

Here are a few of my favorite isometric exercises:

  1. Plank Variations: movement in the lower body like knee drives, pikes, scissors, kick throughs, or change the surface of the plank to be on a Bosu Ball, medicine ball, stability ball.
  2. Wall Sit Variations: add movement in your upper body with resistance bands or free weights, hold a medicine ball between your knees, march or wear a band and use your glutes to drive into the band.
  3. Upper Body Variations: chin up hold, flexed arm hold, single arm hold and perform reps with the other arm (ex – bench press with one arm locked out at the top).
  4. Lower Body Variations: split squat position, hold the bottom position of a RDL, glute bridge hold (optional single leg), calf raise hold, single leg squat with alternating toe tap.

HIGH TO LOW CORE ROTATOR

The high to low core rotator is functional rotational exercise targeting your core, including shoulders and hips. We consider it one of the best rotational exercises because of how effective it is at targeting specific phases of muscle contraction and focused movement patterns. The variations you can take from plane of movement, stance, unilateral vs. bilateral … they feel limitless. This really allows us to follow the principal of variability to increase stability throughout the core.

It is important to note that your core as we refer to it includes abdominals, posterior muscles of the trunk, glutes and shoulders. Additionally, if you focus on the abdominal muscles you will find that rotation requires multiple muscles, not just one like some ab exercises. The high to low core rotator is trunk rotation with flexion meaning we are getting obliques, transverse abdominis and rectus abdominis to name a few.

HOW TO PERFORM A HIGH TO LOW CORE ROTATOR

We love to use core rotator variations in our programming because they scale easily to meet the individual where they are, they are highly functional and the amount of variations make them applicable to everything from sports performance to injury prevention/rehabilitation.

The high to low core rotator we would consider a starting point. A basic, entry level movement that can provide us with feedback on client abilities and challenge a client’s strength, proprioception and range of motion.

STEPS FOR A HIGH TO LOW CORE ROTATOR

  1. Set your cable attachment at the top of the pulley machine so that it is above your head.
  2. Start perpendicular to and offset from the cable machine so that the machine is slightly in front of you. You can start on facing either side, as long as the cable machine is slightly in front of you.
  3. Hold on to a single handle with the inside hand, or the hand closest to the cable machine. Wrap the opposite hand around the top of that hand. And take a few steps away, from the cable so the weights are not resting.
  4. Set your feet shoulder width apart and bend your knees, pushing your weight into the midfoot – heel, to load your hips and glutes.
  5. Brace your core by squeezing your abdominals, rotate from your hips and shoulders bringing the handle across your body to the opposite hip.
  6. Control the cable and your arms as your rotate back to the starting position, following the exact same path.
  7. Perform 10 reps on one side and then switch sides.

WHAT TO AVOID WHEN DOING A HIGH TO LOW CORE ROTATOR

The cable should follow an angled path from high to low (hence the name). If you do not bring your arms down on an angle as you come across your body line the cable will hit you in the face or throat.

Your back should remain neutral as you rotate through this movement. Any extending or arching in your back will cause discomfort. This exercise is designed to use flexion and rotation, flex and squeeze your abs!

Keep your weight even between your left and right foot. Allowing your weight to shift or leaning to the side can cause you to loose balance.

HOW TO PROGRESS A HIGH TO LOW CORE ROTATOR

We have mentioned that there are almost limitless possibilities for a high to low core rotator, right? Well that makes it hard to tell you how to progress it. Here is our best advice:

  • Change the height – as you bring the cable pulley attachment down towards your chest, hips and then knees the exercise becomes increasingly more difficult. You should not be doing the same weight the entire time. Gravity isn’t helping you as you lower the cable. Which means you are now fighting gravity. Of course we don’t call these high to low core rotators anymore, but they are certainly harder variations.
  • Change your stance – you can move your feet around to work on different angles and in various stability situations like kneeling, half kneeling, single leg and more.
  • Change the grip – switching what hand is on the bottom and single arm versus double arm will change the difficulty and the demand of the exercise.

TRICEP DIP

Your triceps, or the muscle located on the back of your arms, are used more than you might think. The triceps muscle is responsible for straightening your elbow, which we do all day long. Like pushing yourself out of bed in the morning or off the ground, closing doors or cabinets or simply reaching for an item by straightening your arm.

We also use them in a lot of activities like push-ups, shoulder presses, chest presses, planks, swimming, volleyball, baseball and more. Just think of anytime you straighten your elbow to keep it straightened.

It is important to note that the triceps muscle has three heads. (An easy easy way to remember that is tri means three.) Training your triceps in a variety of movement patterns is needed to effectively target all three.

HOW TO PERFORM A TRICEP DIP

  1. Sit on the edge of a elevated flat surface with your hands resting, palms down on the surface.
    • You can use any stable surface that allows your feet to touch the ground. Think bench, box, chair, stair, coffee table, etc.
  2. Push through your hands and lift your butt off the surface while you walk your feet slightly away from you.
    • The hardest position is with your legs extended straight in front of you.
    • Keep in mind your hips should stay close to the surface you are using.
  3. Bend at your elbows and lower your hips towards the ground while keeping your chest upright and open.
    • Aim for a depth of 90 degrees at the elbows IF there is no shoulder discomfort and you can maintain good form.
  4. Drive through your hands and straighten your elbows to bring you back up to the starting position.
  5. Repeat for reps.

WHAT TO AVOID WHEN PERFORMING A TRICEP DIP

  • Minimal elbow bend – your triceps are responsible for extension at your elbow (straightening). The more intention you can put into bending your elbows to achieve the needed range of motion the more work you can put into your triceps.
  • Hips too far from surface – the further you allow your hips to drift away from the surface (box, bench, etc.) the more form challenges you will encounter. It will be harder to focus your intentions on bending at the elbow, there will likely be some shoulder discomfort, and your range of motion will change dramatically. 
  • Chest rounding forward – the round of your shoulders will change the range of motion, which will change the muscles used and the load you feel in your triceps. Focus on keeping your chest upright and open. 

Luckily all there of these pieces of advice work synergistically. If you focus on bending at the elbows you will have to keep your hips closer to the surface you are using and keep your chest upright. If you keep your hips closer to the surface you will be more inclined to bend at the elbows and more capable of keeping your chest upright. And, finally, if you keep your chest upright you will be able to keep your hips closer to the surface and bend at the elbows!

HOW TO PROGRESS A TRICEP DIP

Make sure you have mastered the straight leg tricep dip before moving on to a harder version. If you have been doing knees bent, straighten your legs for a bigger tricep load. This is because the force arm (your legs) is longer as you straighten your leg. Putting more load into your triceps.

If you can check straight leg tricep dip off the list check out these options:

  • Add a weight to the top of your thighs.
  • Elevate your feet onto another box, bench or chair.
  • Incorporate instability at your feet or hands by using a BOSU ball or TRX

OTHER TRICEP EXERCISES

  • Tricep Push-Up
  • Skull Crusher
  • Laying OH Extension
  • Standing Tricep Extension
  • Sklz Single Arm Extension
  • Narrow Floor Chest Press

BAND WALKS

Our training philosophy starts with establishing range of motion (ROM), building stability within ROM and then building strength and power. We follow this philosophy with all of our clients and for all joints. We use band walks to build and maintain stability at the hips.

HOW TO DO BAND WALKS

Band walks are done with a small circular band placed anywhere from the upper thighs to the ankles. This placement helps activate the muscles of your hip, building stability. The lower on the leg you place your band the hard the exercise will be. You can also get various levels of resistance which may change where you place the band.

I love to use the hip circle for myself and my clients It is a pretty great investment for $20. Shop here in this affiliate link.

Other factors like injury, orthopedic limitations or difficulty engaging the right muscles will dictate where you should place the band.

Two most common band walks are lateral and forward/backward, sometimes called monster walks.

  1. Select the location of your band and get it into place.
  2. For lateral band walks you will step sideways and for Monster walks you will step forwards. In both situations you are trying to maintain tension on the band every time your trail leg steps in. This means you are not allowing the band to pull your leg in, rather you are resisting that force.
  3. You continue to taking steps until you reach a desired location or rep count. I usually work my clients in sets of 20 in one direction. For monster walks my clients would walk forward 20 steps the backward 20 steps to the same starting position.

WHAT TO AVOID WHEN DOING BAND WALKS

One of the most common is an inward rotation or caving of the knees. The intention is for us to drive against the band activating our hip muscles. If we allow our knees to inwardly rotate or cave in we are being controlled by the band. Which is, generally speaking, a no-no in the training world.

You also want to avoid any back pain while doing band walks. Back pain can occur when you are straining against the band and moving into poor form to achieve movement. For example, if you are doing a glute bridge with the band on and experiencing back discomfort you are likely over extending (or arching) in your low back. Keeping a neutral spine and tight core while using the hip circle is necessary to get the most out of the exercise.

FAVORITE BANDED EXERCISES

Banded exercises are great for improving hip stability and good hip stability is impacted by more than external rotation and the glute muscles. There are a lot of supporting, stabilizing muscles of the hip including muscles of the inner thigh like adductors. While we use the hip circle to build hip stability we also incorporate other exercises designed to strengthen the muscles of internal rotation to keep the hip balanced.

  • Band Walk Variations
  • Squat Variations
  • Plank Variations
  • Glute Bridge Variations
  • Pulsing Wall Sit

WORKOUTS

There are many workouts for you to download and save. Scroll through them all to find which ones you want to try. 

Sculpt Your Goals: Dumbbell Only Workout Program

Sculpt Your Goals: Dumbbell Only Workout Program

Are you ready to start a new workout program that focuses on building strength in a simple and effective manner? Then you are in the right place! My Dumbbell Only Workout Program is your answer to achieving your fitness goals. Let's explore why my program is the...

read more
3 Reasons to Own Your Own Training Business

3 Reasons to Own Your Own Training Business

Owning your own training business can be an exciting and yet overwhelming thought. But ask yourself... Are you committed to the long term? Does passion and knowledge fuel your desire to work with clients everyday? Are you looking for more career advancement...

read more
fitness articles
lifestyle articles
nutrition articles
golf articles

SUBSCRIBE

Click to sign-up for weekly information and offers.

DISCLOSURE

We are a participant in the Amazon Services LLC Associates Program, an affiliate advertising program designed to provide a means for us to earn fees by linking to Amazon.com and affiliated sites.

IronMan Recap What You Need To Know From A New Mom And Fitness Professional

IronMan Recap What You Need To Know From A New Mom And Fitness Professional

IronMan race #3 is under my belt. Obviously the main question I get is “how do you feel?” … well I feel really good. Surprisingly good. 

Don’t get me wrong I’m not doing back flips or anything, but it is the best I have felt out of the three races. That right there is one of the biggest take aways for me. Clearly I my training was effective and I was prepared. 

Okay, let’s get into the thick of this recap. Here is what I have for you. First, I’m going to share an overview of race weekend. It’s broad, but I’m highlighting some key points. Then, I’m going to get very specific on race details (some of which may be a little much for some people). And I will wrap this all up with a review of my goals. 

So if there is something specific you want to know most … scroll to that section! 

RACE WEEK – IronMan Recap as a New Mom and Fitness Professional

​We left for Muncie on Thursday morning around 9 am. Nothing special about the drive. I felt the pull on my heart strings leaving my son, but he seemed to care less 😂 

We got to check-in and everything was peachy-keen. Timing chip, bib, swag, IronMan village stop … check, check, check, check. All that was left to do was get to our housing and get back to eating. 

Highlight moment 🌟 we were heading in the direction of our VRBO, which was selected because we wanted to be able to cook all of our meals, it’s saved a good chunk of change and gave us a common area to hang. We have 5 people staying. The home owner called and cancelled our reservation stating the house was “uninhabitable”. It’s 4:30 PM the Thursday before the race. Every hotel is sold out and we have nowhere to stay. 

Thanks to our friends and family who hopped on their phones/computers we were able to find one hotel that literally just had a cancellation. We were lucky to find a hotel and grateful to have somewhere to stay. But our entire plan had changed. 

Thursday night we ate at Olive Garden and tried to rework our plans. Unfortunately, Olive Garden didn’t sit well with ANY of us.  So we immediately realized we needed to make different food choices. 

Mike hadn’t left yet so I asked him to bring our Instant Pot so we could eat in. Best decision. And Kaite’s idea – I can’t take credit for it.  

Friday was low key, we checked our gear and bikes in. Then got lunch. Then went back for an athlete briefing. Except we went to the wrong place 😂 

RACE DAY OVERVIEW – IRONMAN RECAP

Saturday was race day so we spent Friday night stretching, foam rolling, using the theragun, hydrating, eating and further memorizing our race plans. 

Saturday we woke at 4:30 am and off the day went. We hit the water around 7:55 am. I finished around 8:20 am. We didn’t get back to the hotel until a little after 11 pm. Shower, organize, eat a little and to bed. 

Sunday was quick to get out of Muncie, but slow moving for me. Tight quads, fatigue and an odd feeling of hunger and fullness filled the day. 

The drive home was a cakewalk (for Mike). I was beyond excited to see Freddy, but he was more confused that we were home. All the change was rough on him. Which means with my wild emotions we (Freddy and I) both cried when he went to bed 😂

MY IRONMAN RECAP OF RACE SPECIFICS

For those of you who came here for the play by play of race day, let’s get after it. Check out this time breakdown. (These are rough estimates.)

  • 3:30 am I wake up and try to sleep more. 
  • 4:25 am alarm goes off.
  • 4:30 am banana and PB sandwich down, working on 32 ounces of Gatorade.
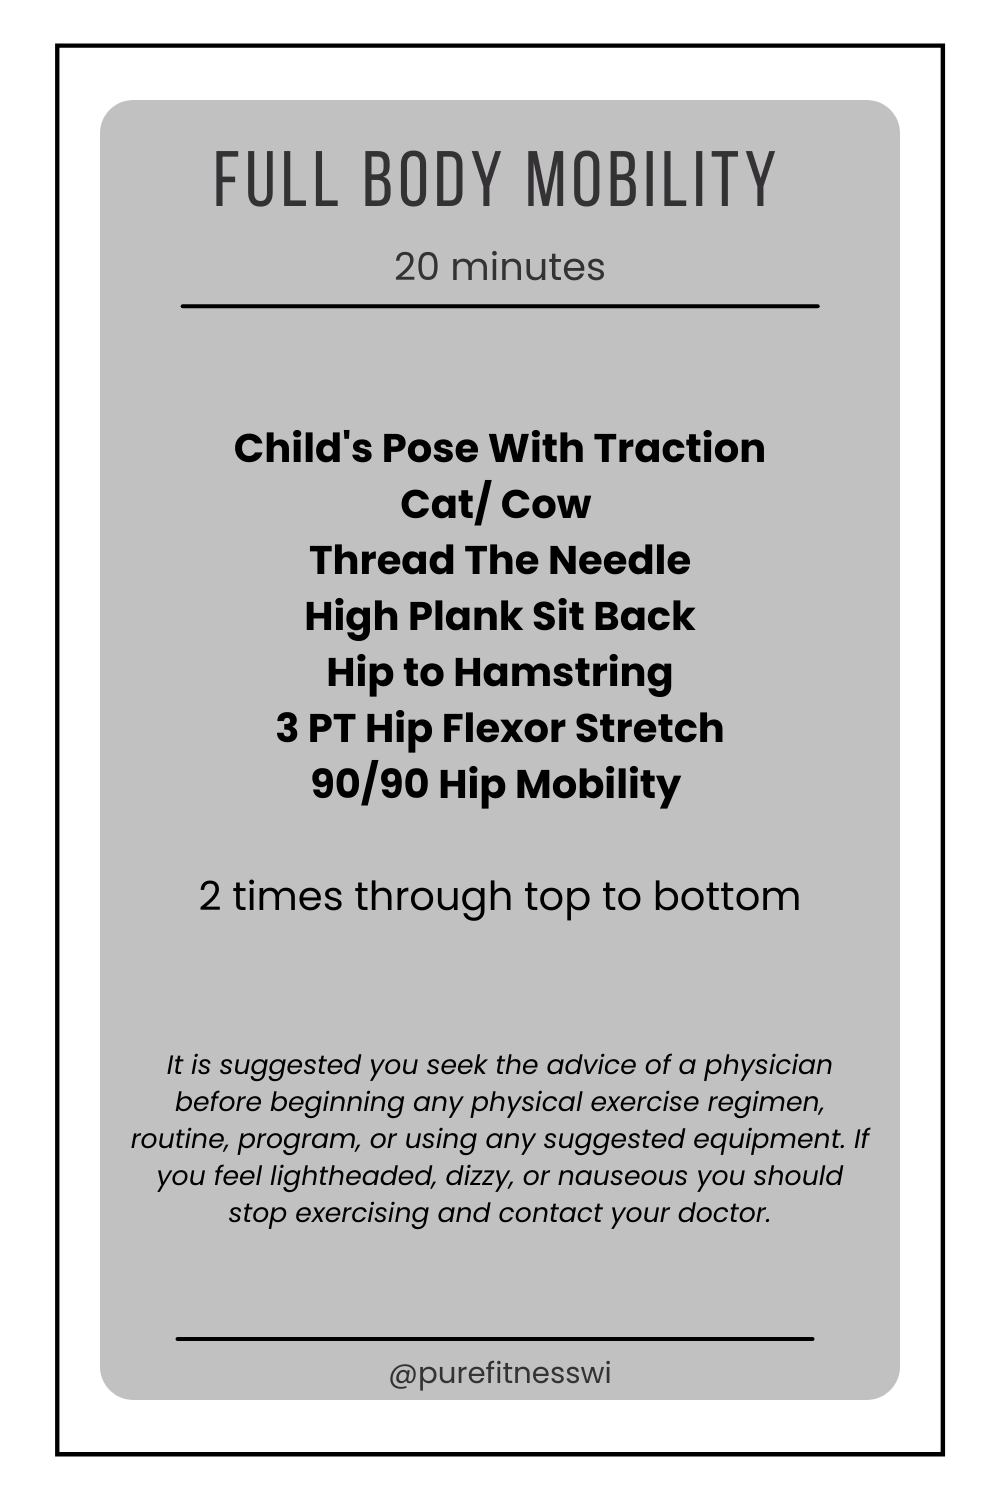
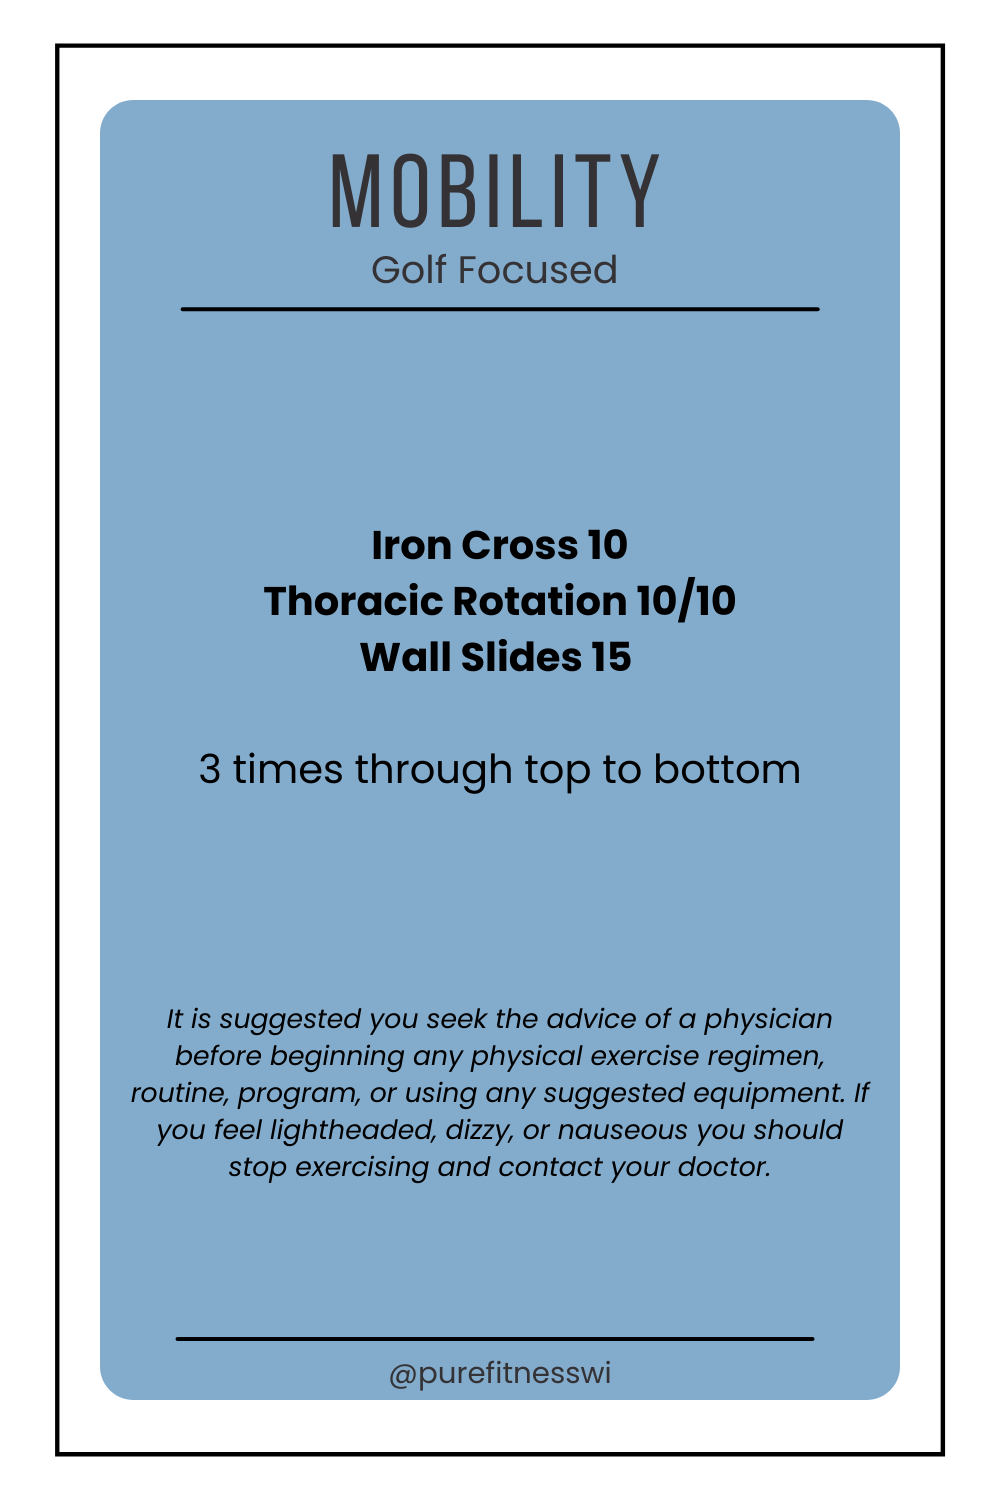
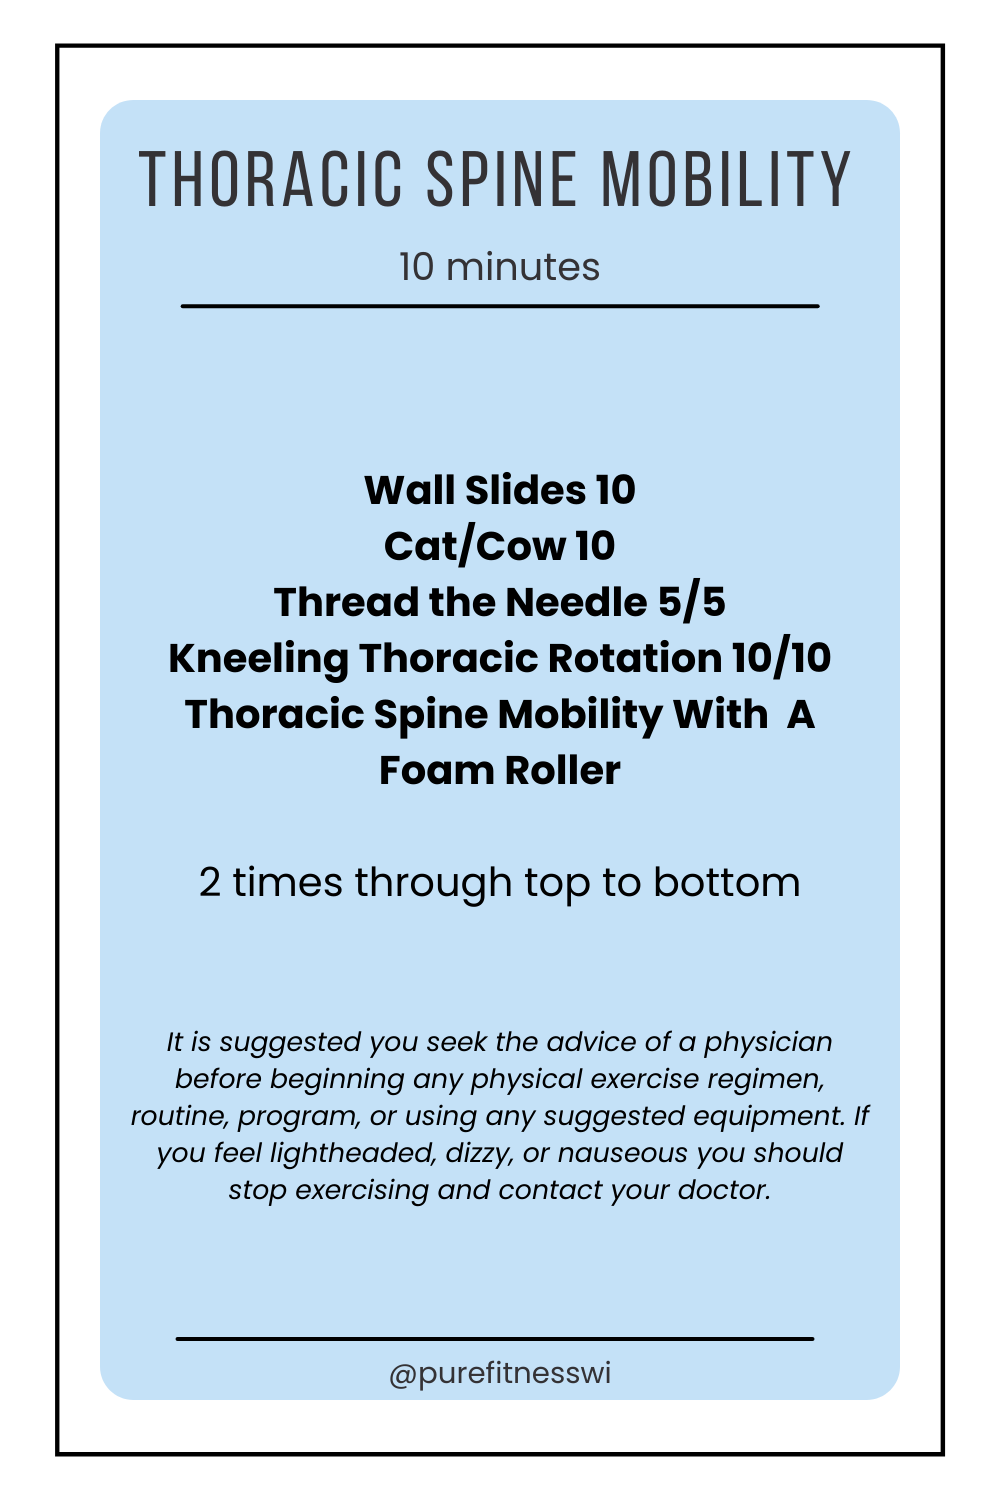
  • 5:00 am dressed, working mobility and reviewing race plan
  • 5:30 am drive to race site
  • 6:00 am adding fuel to our bikes and double checking gear bags.
  • 6:30 am eat half a PB sandwich, run race plan through head
  • 7:30 am take salt tabs finish Gatorade
  • 7:55 am in the water
  • 9:20 am out of the water and in transition
  • 9:30 am on bike course
  • 4:00 pm in transition
  • 4:10 pm on the run course
  • 8:30 pm finishing race

As you can see there is A LOT of time in there for thoughts, feelings and surprises. 

I would say the race went as hoped with a surprise or two on every leg. And, now a few days later, I can say I am 99% happy with how things went. 

IRONMAN RACE DAY SURPRISES

The lake water was 65.3°. Thats cold. Like real cold. I had never swam in water that cold. And boy was it shocking. I had to swim more than 100 meters before I could put my head in the water. I kept trying time after time and it literally felt like I was choking.

Mike, who somehow seems to know everything told me right before the race “the cold will take your breath away, don’t go out fast. That will make it worse. Stay calm and get comfortable slowly.” THANK GOODNESS he said that to me. Those words are what kept me moving forward the first 5 minutes. 

I never got warm. Literally getting out of the water after swimming 2.4 miles and I had not adjusted to the water temp. I had goosebumps and shivers on the bike.

I was also surprised by how badly I needed to pee while I was swimming. Luckily, this race had a very short beach run. Where you got out before getting back in to swim lap 2. Wadding back in gave me the perfect opportunity to pee. That was awesome. 

The start of my second lap I spent thinking … wow you have already peed once in the race. You have hydrated well, today is going to be better than the other two races. 

If you don’t know I was crippled by digestive issues and dehydration on the first two races. It was a huge goal of mine to NOT experience those symptoms again. 

And the next surprise came when I had to pee again after the second lap. I was a peeing machine! This had to be a good sign for my hydration levels going into the bike. 

Transition was fast and smooth. Best it has ever felt. Usually my hands are shaking and I feel flustered. This was just another day. I got out of there so smoothly. I was thrilled. 

SURPRISES ON THE BIKE – IRONMAN RECAP

The bike course was exhilarating. It started with rolling hills which is my absolute favorite. I knew it wasn’t going to last. That most of the course was flat, but I was determined to enjoy those hills! So I attacked them. 

I had so much incredible energy, excitement and happiness. Cloud 9 would be an understatement. 

After those rolling hills we turned into more of a headwind and flat course. I physically and mentally settled into a more appropriate pace and headspace. 

Unfortunately I was so amped up that I had been chugging Gatorade without regard. 32 ounces were already gone. 

I felt a burp coming on and let her rip. And out came Gatorade, peanut butter sandwich and salt. Woof. The good news was I felt fine and it was a rookie mistake that can be easily corrected. 

Eventually I came to one section of the course that was not well paved. It was as if the last step of paving hadn’t be done. Like those rumble patches on the side of highways to let you know you are out of your lane… not as bad, but constant vibrations. I had heard the course was beautiful and perfectly paved … clearly I have a different definition. 

Survived that section and I am working my way back up this long straight portion and I thought I felt a rain drop. I checked the time it was only 12:40. That can’t be rain. It wasn’t suppose to start until after 2 pm. 

It was rain. 

You can’t do a damn thing about it. I knew it was coming. I had just hoped to have more of the bike done before the rain hit. 

My emotions to this point had been pretty steady. I had a lot of self belief and a lot of focus on the finish line. 

It all came crashing down. I started to feel a desire to cry. Nothing hurt. I wasn’t behind on time. Everything was good. But I couldn’t shake this desire to cry.

And then, like a bag of bricks, I realized two things. 

  1. This was my last race for a very long time. Not ever. But we want more kids and this was one of the hardest things I’ve done. Preparing for an IronMan right after giving birth and finding balance between my family, my marriage, my career and my training.
  2. I immensely missed my son. The mom guilt had worked it’s way into my head and rooted itself. 

On top of all of this I had to pee. So badly I was convinced I should be able to stand up out of the saddle and pee. No such luck. I pulled my tears back. Calmed myself down so I wouldn’t look as hysterical and found the next Port-a-Jon. 

This peeing surprise was a good thing, but costly on time. I peed a second time later on. My bike computer said I averaged 17.2 MPH, that doesn’t account for stops. The IronMan tracker had me at 16.32. WTF. That’s just depressing. Why does it take so long to pee?!

Back to my realizations. 

I knew it would be harder than usual to train for an IronMan post baby, but I had no way of knowing just how hard. Because I hadn’t done it before. 

On the bike I knew that I didn’t want to do this again. Too work so incredibly hard and get myself race ready, race and then be done. The next time I race (any length) I want to be able to race multiple times. I want to continue to train myself to be better.

And for those of you that don’t know. I did my last IronMan in 2019. 3 weeks after that I was pregnant (intentionally). Physically the transformation from 2019-2021 has been wild and amazing in every way. 

Mentally it was a beast. 

So I have this itch that I can’t scratch. That I need more time and a different season of life for. And so the tears flowed off and on during the bike. 

Mix in the fact that I’m a new mom and I missed my son. That I felt selfish. That he didn’t understand what I was doing. After all, many adults don’t understand what I was doing. There was a cloud of guilt following me – it may as well have been the rain. 

I just cried. Tears of thankfulness for a beautiful baby boy. Tears of anguish knowing how hard it was to get where I am. And, of course, tears of fear. The run was still ahead and it held my primary goal for the day. 

A combination of I don’t want to do this anymore and this was your goal – to run the whole marathon – had a boxing match in my head.  As I finished the bike I was no closer to finding ground to stand on. 

IRONMAN RECAP – SURPRISES ON THE RUN COURSE

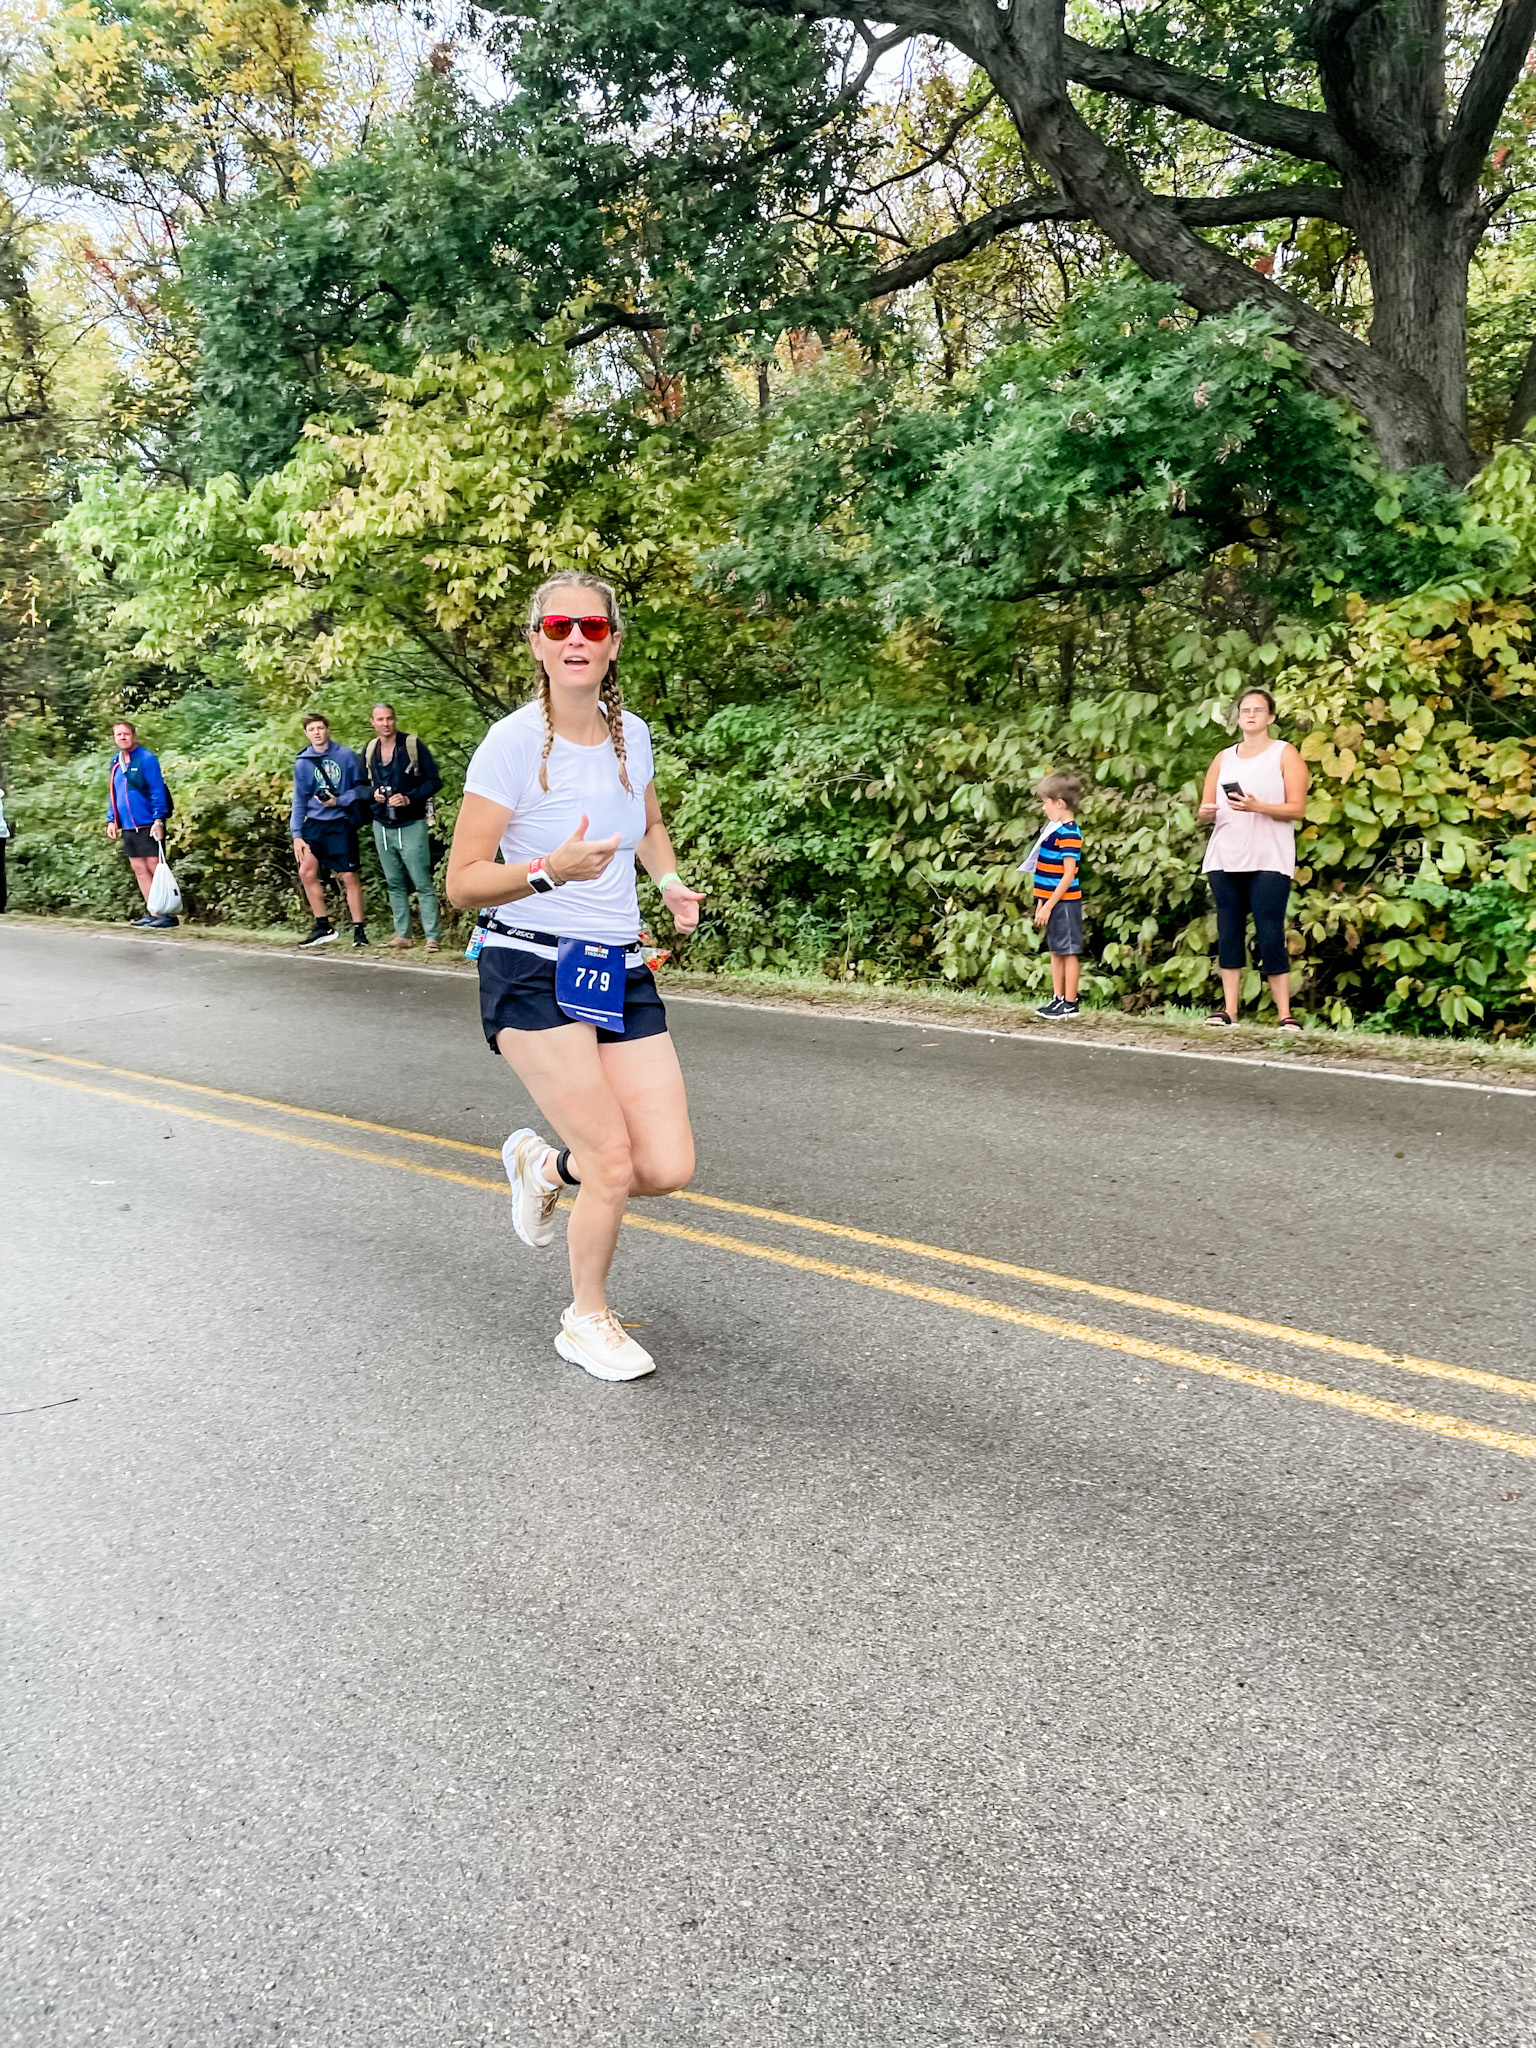
On the outside I was dancing around in transition. Tossing goldfish and catching them in my mouth. Singing to the music. Thinking maybe Kaite would get here soon and I could run with her. After 10 minutes of wasting time (this is coming back in the goals section) I headed out on the run. 

I spent 13 miles convincing myself to keep running. Trying to frame every step, aid station and landmark as positive progress. Unfortunately I also spent those 13 miles peeing myself. Why? I have no idea. 

I had already peed 5 times during the race. Most recently, I peed at transition from bike to run. It didn’t make any sense. And it took 13 miles and 2 more bathroom visits for it to finally stop. 

Was it being a new mom and pelvic floor weakness? Maybe it’s my nutrition? Could it be the warning sign of something major? 

Naturally, when you have nothing else to think about you go down some dark roads in your head. When I finally saw Mike I told him I couldn’t stop peeing myself. He said “just keep running”. And for some reason (as always) Mike’s calm, no frills demeanor did it’s job. If he wasn’t worried, I wouldn’t be worried. 

But I’ll be honest. After 13 miles of wondering the worst possible scenarios (insert thoughts of kidney complications) I was shocked at just how laid back he was. 

On I ran. Reminding myself that is never have to run these hills again. And that there was the biggest surprise of the day. And it was no one’s fault but my own. 

Unknowingly, I had picked a hilly run course to make my goal of running the entire marathon. Whoops. This is where I mentally lectured myself for not doing better research and not understanding the course better.

Nothing was going to make the hills go away. So I just kept putting one foot in front of the other. Starring at the ground. Not engaging other racers and just trying to believe in myself. 

Eventually, around mile 15-17 I became aware of how good I felt compared to past races. How strong I felt. How I had just ran all 17 miles without walking for more than 15 steps to sip some liquid. 

I didn’t feel hope or confirmation. But affirmation. My training was a success. The long hours, the grueling workouts, the compromises … it was all paying off. 

I was in single digits! Only 9 miles to go. The next 4 miles passed so quickly I would have sworn I was sprinting. 

The last five miles felt longer than the first 21 miles. As my quads tightened, I reminded myself to live in the moment. I tried to take in my surroundings. It was pitch black. All I could do was focus on the center line in the road. 

As I got within one mile of the finish line I couldn’t find a pep in my step. All I had was maintaining my slow and consistent pace. I was passed by 7 people. They finished minutes before me, but spent almost the entire marathon behind me. 

I can’t lie. That burned me a little. Again, I reminded myself to run my race. No one else’s. 

I saw that finishers shoot and the tears started to come back. I stared at the ground to try and keep my composure. I heard Mike, Bridget, Chad and Julia screaming my name. I looked up and saw nothing but joy on their faces. It was magical. Their emotions were absolutely beautiful. 

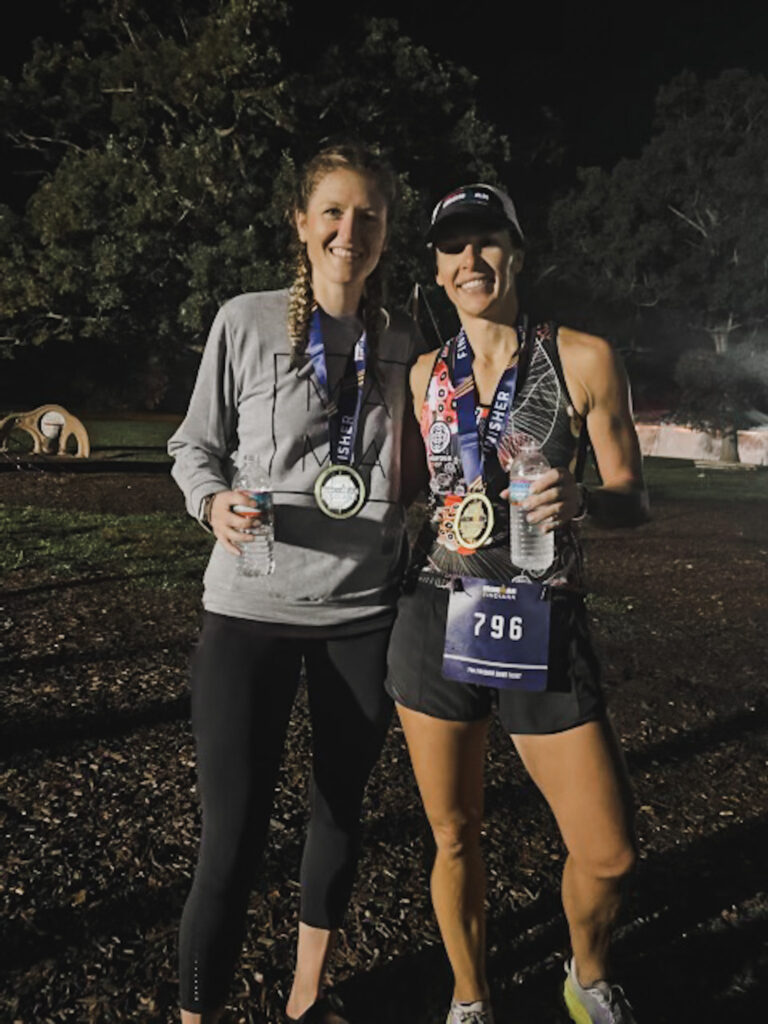
I crossed that finish line gave a solid breakfast club fist into the air and needed to find space. The volunteers were kind and worried. They could read my face. A woman fighting exhaustion and heavy emotions. 

Quickly I got my finisher medal, hat and t-shirt. I set out to find Mike. The minute I hugged him the flood gates opened and I couldn’t do a thing about it. He kept saying those better be happy tears. And I couldn’t explain. I couldn’t explain until the next day. 

IRONMAN RECAP GOALS

I went in with one clear and simple goal run the marathon. That’s it. My run experience on my first two races was so awful I knew that was the key to a better race for me. 

Then there was the goal of avoiding any GI issues. 

And of course, because everyone should set big goals, I wanted to beat my 2016 time. I really didn’t want to tell many people this goal. So I didn’t. 

Why didn’t I? Fear had some to do with it, but when I set my goals I didn’t even think it was realistic. I was so far away from any resemblance of “in-IronMan-shape” post baby that I couldn’t even entertain the idea … at least not out loud. 

It wasn’t until September that I actually thought it might be possible. I was having incredible training days. My running felt as strong as it ever has in my life. I was running times I had NEVER ran before. 

I now believed it was possible. But I still didn’t want to say it out loud. Running the entire marathon without GI issues would be so monumental I put my focus there. It grounded me mentally and emotionally as I prepared for race day. 

Then outside of goals… I had my own concerns. I barely swam in preparation for this race. I strength trained a ton and got in 10-12 open water swims. I never swam in a pool. I never did swim intervals. I didn’t have access or time. 

I knew weather would be a factor. We trained in some brutal wind this summer so I felt like I had done what I needed to be prepared. BUT, I just never risk riding in rain. So, how would it go? 

And I had recently found out the run course was hilly 😂 yes, I’m serious. The week before the race I finally figured that out. 

So now all my goals and concerns are out in the open. I’m 99% happy. I’m sure you can guess my 1% unhappiness. But, maybe it is different than what you think. 

MY THOUGHTS

I crushed the swim. It was < 3 minutes slower than my best time. And that year I swam 3 days a week, an hour each time. Not to mention, the water was freezing and it took a long time for me to put my head in the water. Clearly that’s a huge win to start the day off. 

The bike was positive because I was peeing. I was staying hydrated and I felt good. And as much as the wind and rain had impacted my performance they hadn’t ruined it. I had no GI issues and I was feeling strong physically going into the run. 

As I started the run I had a candle lit for a faster time. It was all coming together through the sweat, rain and tears. 

But as you know I didn’t hit my time. I couldn’t find it within myself to run faster. Every part of my body knew I could run this slow pace for the entire marathon and accomplish that goal. That main, priority goal. And I was worried about running too hard and giving into walking. 

So that 1% I’m not happy about isn’t that my time wasn’t faster. Yes, that’s the measurable outcome. But not my race regret.  

It’s that I lost the mental battle. My self-belief wavered enough that I am left with a “what if”. 

What if I did push my pace? 

My sore muscles and fatigue have passed. Only indications of an IronMan that remains are tan lines and chaffing 🙃 

Cheers,

Chellie

Sculpt Your Goals: Dumbbell Only Workout Program

Sculpt Your Goals: Dumbbell Only Workout Program

Are you ready to start a new workout program that focuses on building strength in a simple and effective manner? Then you are in the right place! My Dumbbell Only Workout Program is your answer to achieving your fitness goals. Let's explore why my program is the...

read more
3 Reasons to Own Your Own Training Business

3 Reasons to Own Your Own Training Business

Owning your own training business can be an exciting and yet overwhelming thought. But ask yourself... Are you committed to the long term? Does passion and knowledge fuel your desire to work with clients everyday? Are you looking for more career advancement...

read more
fitness articles
lifestyle articles
nutrition articles
golf articles

SUBSCRIBE

Click to sign-up for weekly information and offers.

DISCLOSURE

We are a participant in the Amazon Services LLC Associates Program, an affiliate advertising program designed to provide a means for us to earn fees by linking to Amazon.com and affiliated sites.

Most Used Gym Equipment

Most Used Gym Equipment

Have you ever wondered what fitness equipment you really need? I am here to tell you the most used fitness equipment in our gym. These six items are used most often when working with clients and working out ourselves.

After each piece of equipment I give you a little background on why it is one of the most used fitness equipment pieces and how you can start using it.

If you have questions about the equipment or if you are considering buying it send a message or comment below. I am happy to provide more information when needed.

This post contains affiliate links, which means we make a commission if you purchase using these links at no cost to you.

Most Used Fitness Equipment As A Personal Trainer

MOST USED GYM EQUIPMEN

BOSU Ball

NERD ALERT – As a personal trainer the BOSU Ball is one of our most used fitness equipment pieces because it provides us the ability to open chain versus close chain. Something that should be included in programming, but often forgotten.

We also love the BOSU Ball from a position of balance and stability. We use this piece of most used fitness equipment with all ages and skill level. In very few circumstances do we find the BOSU ball obsolete.

That might mean nothing to you. So let me tell you why our clients like the BOSU Ball.

Our clients enjoy using the BOSU Ball because it is an added challenge to their workouts and/or it adds variety to what they have been doing. It is a simple way for us to change up the workout for our client and maintain a well balanced program.

If you are just starting out with a BOSU Ball we suggest that you use a stick for balance and start off with just body weight. Be prepared, your body will shake. But in time it will get better. That shaking is a result of your muscles firing rapidly learning how to stabilize on an unstable surface.

Read about how to use a bosu ball. 

CLICK HERE TO BUY YOUR BOSU BALL ON AMAZON

Yoga Mat

I think this one is pretty straight forward. Everyone should have a yoga mat for comfort. You can take that a step forward and say that a yoga mat can help performance.

You are probably thinking that makes no sense, but hear me out.

For activities like yoga, Pilates and mobility a mat can actually improve your performance. Good quality mats are designed to give you traction and comfort without sacrificing your balance and stability.

This yoga mat is our favorite mat because it does just that. It is also easy to clean and DOES NOT fall apart. I strongly dislike a crumbly yoga mat. Keep in mind, these awesome benefits are reflected in the price.

If you want to learn more about Pilates take a look at this article Pilates: What Is it? Should I be Doing it?

CLICK HERE TO BUY YOUR YOGA MAT ON AMAZON

Foam Roller

If you haven’t gotten on a foam roller yet I would stop reading now and go do it. Regardless of if you are a 5 day a week exerciser or if you are just starting. A foam roller will be one of your most used fitness equipment pieces.

One thing to consider is density. Foam rollers are sold in different density and sizes. I favor a medium to hard density because I am accustomed to foam roller and I am willing to suffer through the discomfort to get the results I want. I generally start my clients on a low density and move them up.

Remember I say that because I have a variety of foam rollers in different sizes and density. It is easy for me to offer variety. For my clients looking to buy for their home I suggest medium density. So I would point you in that direction too, but don’t come at me if it hurts!

I mentioned size. Well I like the longer foam rollers because I find them more functional for chest stretching. Which is one of my favorites. Take that for what it is – no size is perfect. But the longer length certainly gives you more versatility.

You can read more about my most used equipment for recovery in 5 Best Exercise Recovery Tools.

CLICK HERE TO BUY YOUR FOAM ROLLER ON AMAZON

Dumbbells – number 1 most used gym equipment

You need resistance when working out. Yes, you can use body weight. But if you really want to get some adaptations and results you need resistance. The most used gym equipment for resistance is hands down dumbbells. A close second would be a cable machine. But for the sake of space, budget and realism dumbbells win.

Dumbbells are so versatile in terms of what you can do with them, but they also offer so much from a programming perspective. You can work uni-lateral or bi-lateral. You can work in varies planes of motion (sagittal, transverse, frontal)  and muscle contractions (eccentric, concentric, isometric).

Do you need to know how to use dumbbells?

Well, not to be too frank, but you just add them in. If you are doing body weight squats, try holding a dumbbell. Lunges? Same thing.

Are you doing push-ups for your chest? With dumbbells you can do chest press and vary angles, reps and duration.

All my talk about programming is above what you need to know to get moving! If you crave that level of knowledge or intention in your workouts send me a message 🙂

CLICK HERE TO BUY YOUR DUMBBELLS ON AMAZON

Hip Circle – favorite most used gym equipment

This is our standard piece of equipment. Not a workout goes by that I don’t use it for myself. And rarely is there a reason not to use it with a client.

That being said it is used for muscle activation and increasing stability. It will not replace resistance training to gain strength, size and improve performance.

Our clients love the hip circle because they can instantly feel it working. They hate the hip circle because they can instantly feel it working. 🙂

In all seriousness, the hip circle is the perfect piece of equipment for warm-ups and for travel. It effectively targets the stabilizing muscles of your hips getting them ready for action on dynamic movements or under heavy work loads.

The hip circle is also very small and light weight making it easy to travel with. It can also serve as a substitute for heavy resistance when traveling and still give you a hard workout.

CLICK HERE TO BUY YOUR HIP CIRCLE ON AMAZON

TRX

The foundation of a good training program and really feeling good in general is range of motion and stability. The TRX is incredible for working on both of those areas no matter your fitness level.

I love to use the TRX with clients orthopedic limitations as a means to de-load movement and with high level athletes to challenge their stability and more importantly stability through a large range of motion.

Here is my only thought on a drawback – space. I love the TRX in my gym because I can use it in all directions including directly below. For many home exercisers you use the TRX with a closed door. Which can limit how far under the TRX you can get for exercises like rowing, planks and fall outs.

Read about training with a trx.

CLICK HERE TO BUY YOUR TRX ON AMAZON


Cheers,

Chellie

Sculpt Your Goals: Dumbbell Only Workout Program

Sculpt Your Goals: Dumbbell Only Workout Program

Are you ready to start a new workout program that focuses on building strength in a simple and effective manner? Then you are in the right place! My Dumbbell Only Workout Program is your answer to achieving your fitness goals. Let's explore why my program is the...

read more
3 Reasons to Own Your Own Training Business

3 Reasons to Own Your Own Training Business

Owning your own training business can be an exciting and yet overwhelming thought. But ask yourself... Are you committed to the long term? Does passion and knowledge fuel your desire to work with clients everyday? Are you looking for more career advancement...

read more
fitness articles
lifestyle articles
nutrition articles
golf articles

SUBSCRIBE

Click to sign-up for weekly information and offers.

DISCLOSURE

We are a participant in the Amazon Services LLC Associates Program, an affiliate advertising program designed to provide a means for us to earn fees by linking to Amazon.com and affiliated sites.

Mental Challenges of Training for an IronMan As a Mom

Mental Challenges of Training for an IronMan As a Mom

Last week was the hardest week of training for me. But probably not how you are thinking. The mental challenge of training for an IronMan is the most significant part for me and doing it as a new mom has been wild.

Physically I was fine. I mean sure i was tired. But last week I had one question on my mind.

What in the literal fuck am I doing?

This wave of emotion came over me. It wasn’t doubt, it wasn’t fear … it was time.

All this precious time I was spending training. Spending away from Freddy and Mike. And, well, maybe it was a bit of jealousy.

MANAGING THE MENTAL CHALLENGES OF TRAINING FOR AN IRONMAN

Jealousy is just ugly. It happens to us all, but it is still ugly. I can be the most competitive person in the room and stand out for being obnoxious, head strong, stubborn … but every time I realize my emotions are being driven by jealousy I shiver.

A chill actually goes up my spine.

Simply put, jealousy is a quality that I can’t stand. And when I feel jealousy creeping it’s ugly head into my life I try my best to turn it into respect and inspiration. The key here is to realize that your emotions are being drive by jealousy.

Unfortunately for me it took ALL week to put my finger on it.

I battled through shitty workouts and crappy feelings. Ignoring my desire to quit. And trying my best to remember why I signed up for this race.

MOMMA RAISED NO QUITTER.

While I embrace this mantra, I hate it. Because knowing when to stop and quitting get lumped together. I have worked really hard my whole life to learn when it is the right time to stop. I have gotten it wrong too many times to even begin to count.

With my stubborn personality battling these sneaky feelings of jealousy I tried to find solid mental ground to stand on.

I rode my bike inside instead of outside because that was easier. I demanded the bare minimum from myself. The house got messy. I asked for more help from my family. And I had numerous sassy and exploitive filled conversations with myself.

In the end, I gave myself grace.

Not because I’m some magical human that always ends on their feet like cats. But because I realized I was destroying my own goals. Complete and utter self-sabotage when I was less than 7 weeks out from my goal.

Believe me when I say this… I did not make this realization of self-sabotage and instantly become reinvigorated. I first had to be annoyed with myself. My jealousy turned into a bit of anger towards myself, which turned into energy I poured into my workouts.

After a few workouts I felt the stress, jealousy, anger lift.

My mental feet were back on the ground.

GET OUT OF YOUR OWN WAY

My story isn’t new. Jealousy has been knocking hardworking people down for centuries. But there is a broader message here that I live by. Sometimes the hardest thing we must do is get out of our own way.

Self-sabotage. Fear of failure. Excuses. There are a lot of ways we hold ourselves back. But with time spent in reflection or even simply with our own thoughts we can get out of own way and find balance and even the success we work for.

One of the biggest challenges I have faced is getting in all my workouts. And I know that I am not alone in that. It is a common theme for every person trying to train for an IronMan and have a job, family, hobby or any interest in life.

If you are really going to “get out of your own way” leaving the excuse of scheduling behind is necessary. I have shared a few of my training strategies in past blogs. If you feel overwhelmed by run training or just don’t like running long distances read my post How to Use Interval Training for A Successful IronMan Run.

And if you are struggling with getting into the pool to train for the swim read IronMan Strength Training for the Swim

.

MASTERING THE MENTAL CHALLENGES OF TRAINING FOR AN IRONMAN

Frankly, you don’t do an IronMan alone. You may think you train and race alone, but really you are surrounded by people who want you to succeed. They want you to cross that finish line.

I have found it very helpful to use the enneagram personality assessment to better understand myself, the motivation behind my decisions and goals and my approach to training. You can read more about it in this post Enneagram Types and Exercise: Finding What Your Type Means for Your Workout

.

LEAN ON YOUR SUPPORT NETWORK.

I spent Sunday planning every workout and every task this week. Getting my support network involved everywhere I could. To help me succeed.

Yes, I do have to give up some time with Freddy. But that means he gets more time with Mike and our family/friends. That is never a bad thing.

Parent guilt is a real thing I’m finding out. But IronMan helps me keep an identity I had before having Freddy. It helps me remember that having a child doesn’t mean giving up your goals or passions. And most importantly it helps me remember that life is hard.

NONE OF IT WILL BE EASY.

I’ve never had an easy workout. But I have had ones that felt incredible. That built me up. And isn’t that what life is?

Opportunities exist every day that won’t be easy. Some will make you feel incredible, and others will just be hard. But both will mold you. Both will help build your character, your you-ness.

If you have a bad week at training/work/school, maybe, just maybe, you need to get out of your own way.

Cheers to 7 more brutal weeks and 1 absolutely magical and unforgiving day!


Sculpt Your Goals: Dumbbell Only Workout Program

Sculpt Your Goals: Dumbbell Only Workout Program

Are you ready to start a new workout program that focuses on building strength in a simple and effective manner? Then you are in the right place! My Dumbbell Only Workout Program is your answer to achieving your fitness goals. Let's explore why my program is the...

read more
3 Reasons to Own Your Own Training Business

3 Reasons to Own Your Own Training Business

Owning your own training business can be an exciting and yet overwhelming thought. But ask yourself... Are you committed to the long term? Does passion and knowledge fuel your desire to work with clients everyday? Are you looking for more career advancement...

read more
fitness articles
lifestyle articles
nutrition articles
golf articles

SUBSCRIBE

Click to sign-up for weekly information and offers.

DISCLOSURE

We are a participant in the Amazon Services LLC Associates Program, an affiliate advertising program designed to provide a means for us to earn fees by linking to Amazon.com and affiliated sites.