TRAINING WITH A TRX

TRAINING WITH A TRX

Let’s do a simple breakdown on training with a TRX. I want to offer some perspective on how you can use the TRX for range of motion, stability and strength. Making it a great addition to any home gym or workout program.  And I also want to give you a place to start. So I have a few workouts for you to try at the end.


TABLE OF CONTENTS

  1. How a TRX Works
  2. Why You Should Use A TRX
  3. Strength Training
  4. Mobility Training
  5. Tips for Using the TRX
  6. Workouts to Download
  7. Equipment

HOW A TRX WORKS

In my mind, I put the TRX into two categories. One, is that you use the TRX to increase the intensity of an exercise by making it more challenging. Two, is that you use the TRX to de-load an exercise to successfully achieve proper muscle activation and/or range of motion. The results are improved flexibility/range of motion, increased stability/balance and growth in strength/power.

This is not to say that 1 and 2 can’t happen at the same time. They work synergistically. A great example would be a plyometric exercise like a squat jump. With the TRX we can increase range of motion in the squat portion which can allow us to develop more strength. You can also ensure that you can perform a quality explosive rep within that full range of motion by having the assistance of your arms. After all a squat jump with your hips going past parallel is a huge increase in difficulty.

This is also true of a more simple exercise like a squat. But for someone who’s own body weight is too much to control down and up in a squat pattern (making it a challenging exercise for THAT individual) the TRX becomes an avenue to de-load the movement while allowing them to work within the necessary range of motion.

Let’s not forget to touch on stability/balance. If you have used a TRX before you know this.  The straps can move in all directions giving the exerciser a challenge to their balance. A good example is a push-up. If your hands are holding on to the straps and your feet are on the ground there will be a lot of instability at your upper body. You will have to work very hard to keep your form as you perform the push-up. Which will cause stabilizing muscles around your shoulders and upper body to kick on and it will really fire your core.

Isn’t that interesting? Something simple as straps hanging can have such an impact on stimulating physiological adaptations?

WHY SHOULD YOU BE TRAINING WITH A TRX

I love the TRX because it can train strength, balance, flexibility and stability. But it also can help the user scale the exercise to fit their needs. Making it a top piece of equipment even for a home gym.

The TRX website clearly states why you want to use a TRX, “… to develop strength, balance, flexibility and core stability.” Let’s discuss flexibility and range of motion, stability and strength.

FLEXIBILITY AND RANGE OF MOTION

When we talk about flexibility we are talking about muscle lengthening to improve range of motion. The TRX can be used to help us move into a greater range of motion than we would be able to on our own. Why? Because you can use the TRX as a support system, de-load the exercise and ultimately increase range of motion.

And range of motion is directly correlated to power, which is the result of strength training. But how can range of motion be correlated to power? Let me explain.

Stored elastic energy is what allows us to be explosive and powerful, whether that be for running, jumping or swinging a club. This elastic energy is stored in your muscles and you can think of your muscles as rubber bands. We want them (your muscles) to lengthen like a rubber band and then “snap back” explosively. The more you pull/stretch the rubber band the more speed it snaps back with. So the more range of motion you can access in exercise, with proper stability, allows you to have the potential for greater stored elastic energy and therefore more power.

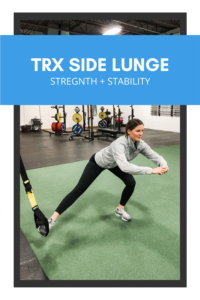
For the lower body that support comes in the form of holding on to the foam handles with your hands. Take a side lunge, for example. If you hold the handles in your hands you will be able to use your upper body to help you control the decent (lowering) and pull yourself back up. This support or de-loading will allow you to “sit into” a deeper range of motion. If done correctly, it can also help you use the proper muscles throughout the entire movement pattern.

If you put your foot into the loop and perform a side lunge the exercise will feel entirely different. That is because you are no longer supporting yourself to achieve a greater range of motion. You are now challenging your balance, stability and strength. I consider the foot in side lunge to be an advanced variation, and I would not recommend starting here for beginners.

It is worth saying that there should never be pain when working to improve your flexibility. If you have a previous or current injury pushing yourself into a new range of motion may make things worse. You should consult a professional before trying.

STABILITY

How a TRX is designed demands you have stability in order to perform the exercises. The more challenging the exercise the more stability is required as you use the straps while moving. Including variations like single leg, single arm and adding resistance like a dumbbell will all increase the stability demand of the movement.

The TRX can also be supportive. For someone who is unsteady or recovering from an injury the TRX can be used to give them more support to remain stable through their range of motion. A great example is the squat. If you struggle to sit down to a chair without “plopping” or using your hands, the TRX can help you gain the stability to control the movement. 

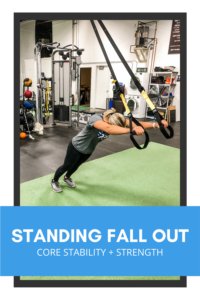
Improved core stability is another advantage of training with a TRX. You can use the TRX to challenge your core stability in exercises you are already doing, like a plank or mountain climbers. Or you can more advanced exercises like a fall out or complexes that include multiple movement patterns to really tap into your core stability and muscular endurance.

As a side note, in order to have good core stability you need ALL of your core muscles to be operating effectively AND synergistically. And your core stability is important because it helps transfer force from the lower to upper body (and back), and to keep your spine healthy (and keep good posture) and prevent injuries. 

STRENGTH

And of course the TRX can help increase your overall strength. Now, used by itself you aren’t going to build large muscles or an immense amount of strength because you are using your bodyweight as the resistance.

You can add additional resistance if needed. Holding on to one handle will doing just about any movement and holding a dumbbell in the other hand is an easy way to add resistance. Think of doing a side lunge, in the large range of motion you get from holding on to the handle, but adding more resistance by holding a weight in the other hand. Another example, this time for the upper body, would be a single arm row with a weight held at the chest. This will really challenge your core strength (anti-rotation) and your back muscles.


TRX STRENGTH TRAINING


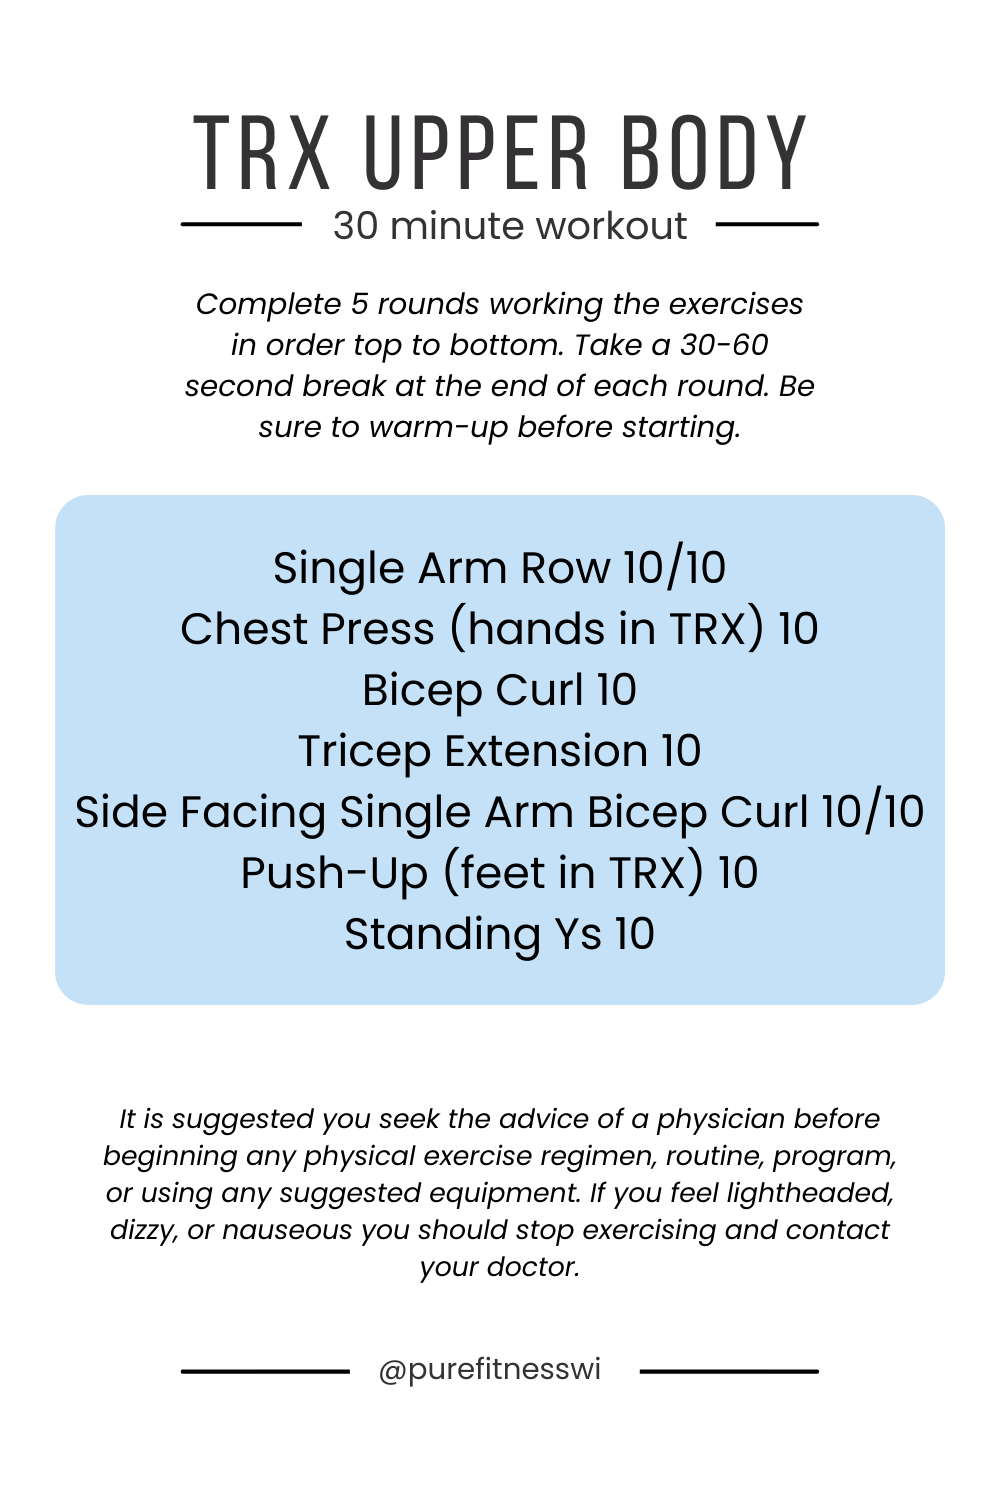
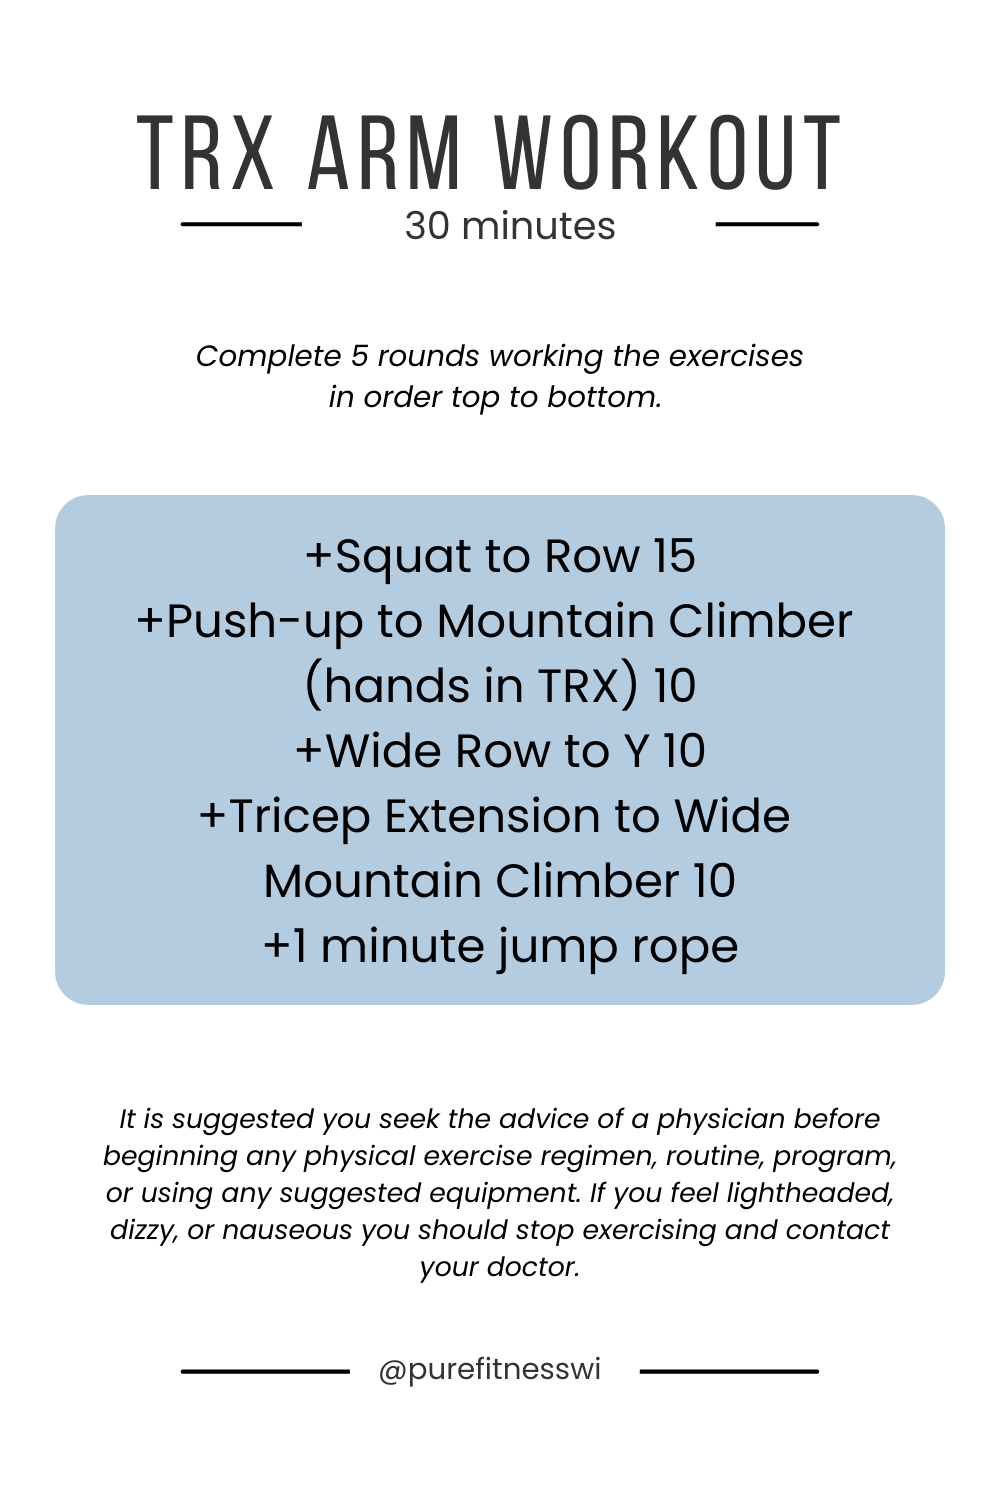
Upper Body Strength Exercises

  • Row on two feet, single foot or single arm (two feet and two arms shown)
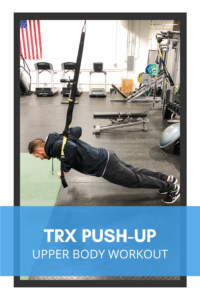
  • Push-up with feet in or hands in (hands in shown)
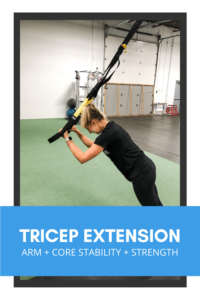
  • Tricep extension or tricep dip (extension shown)
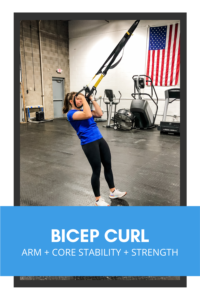
  • Squat and curl at top or bottom (top shown)

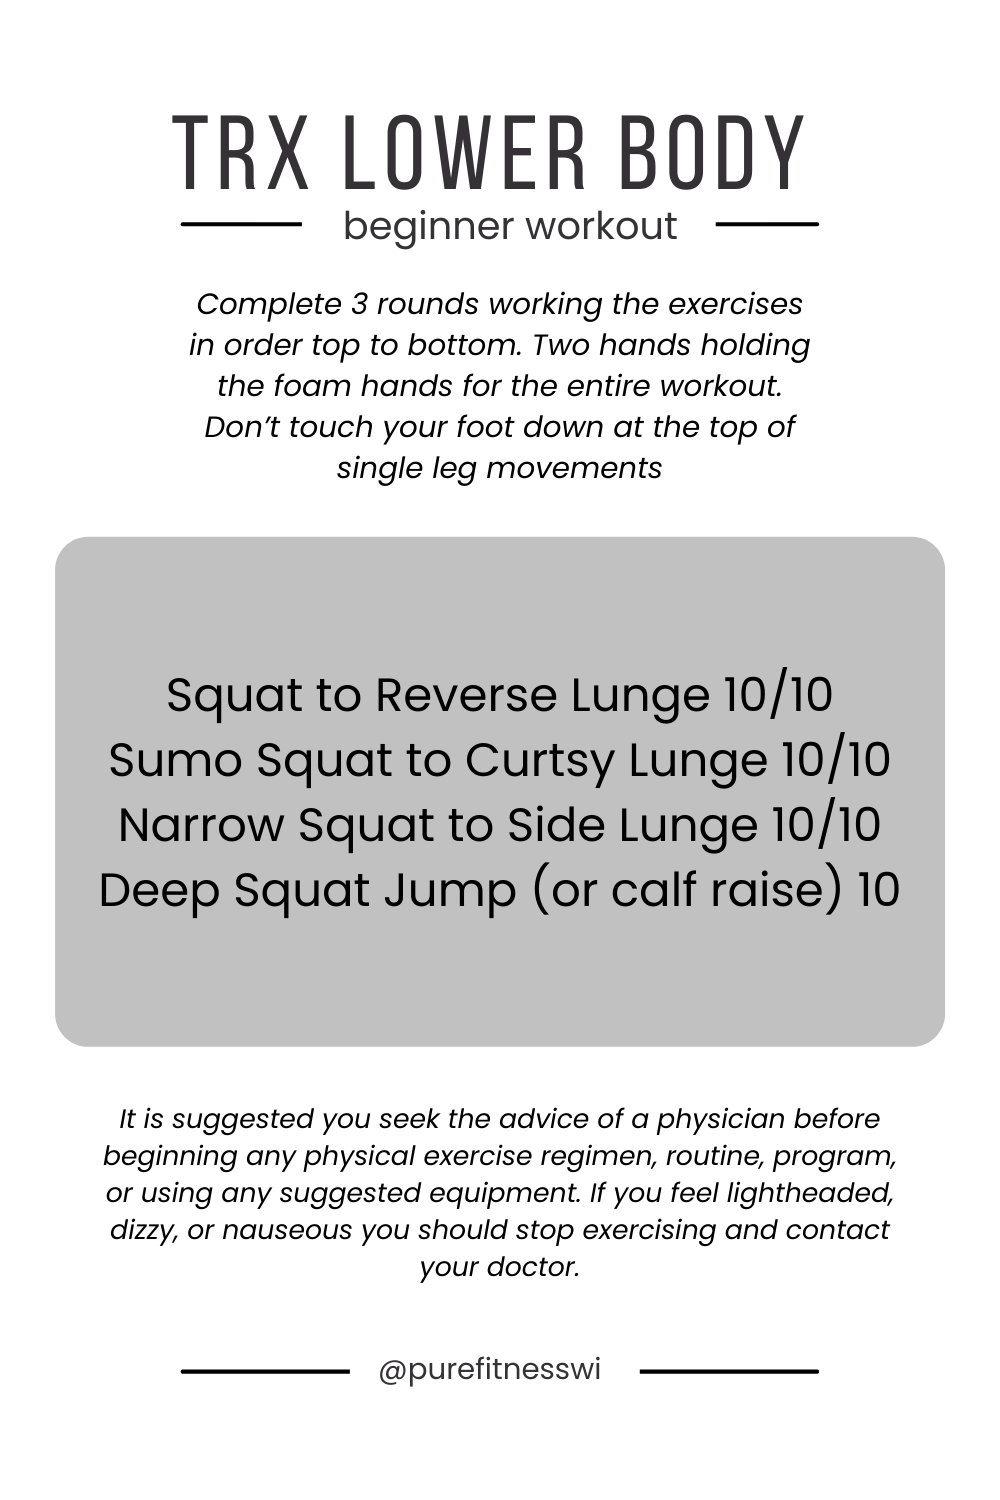
Lower Body Strength Exercises

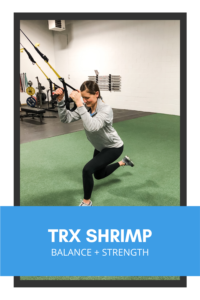
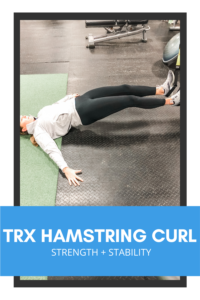
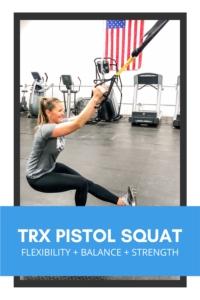
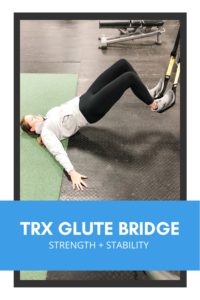
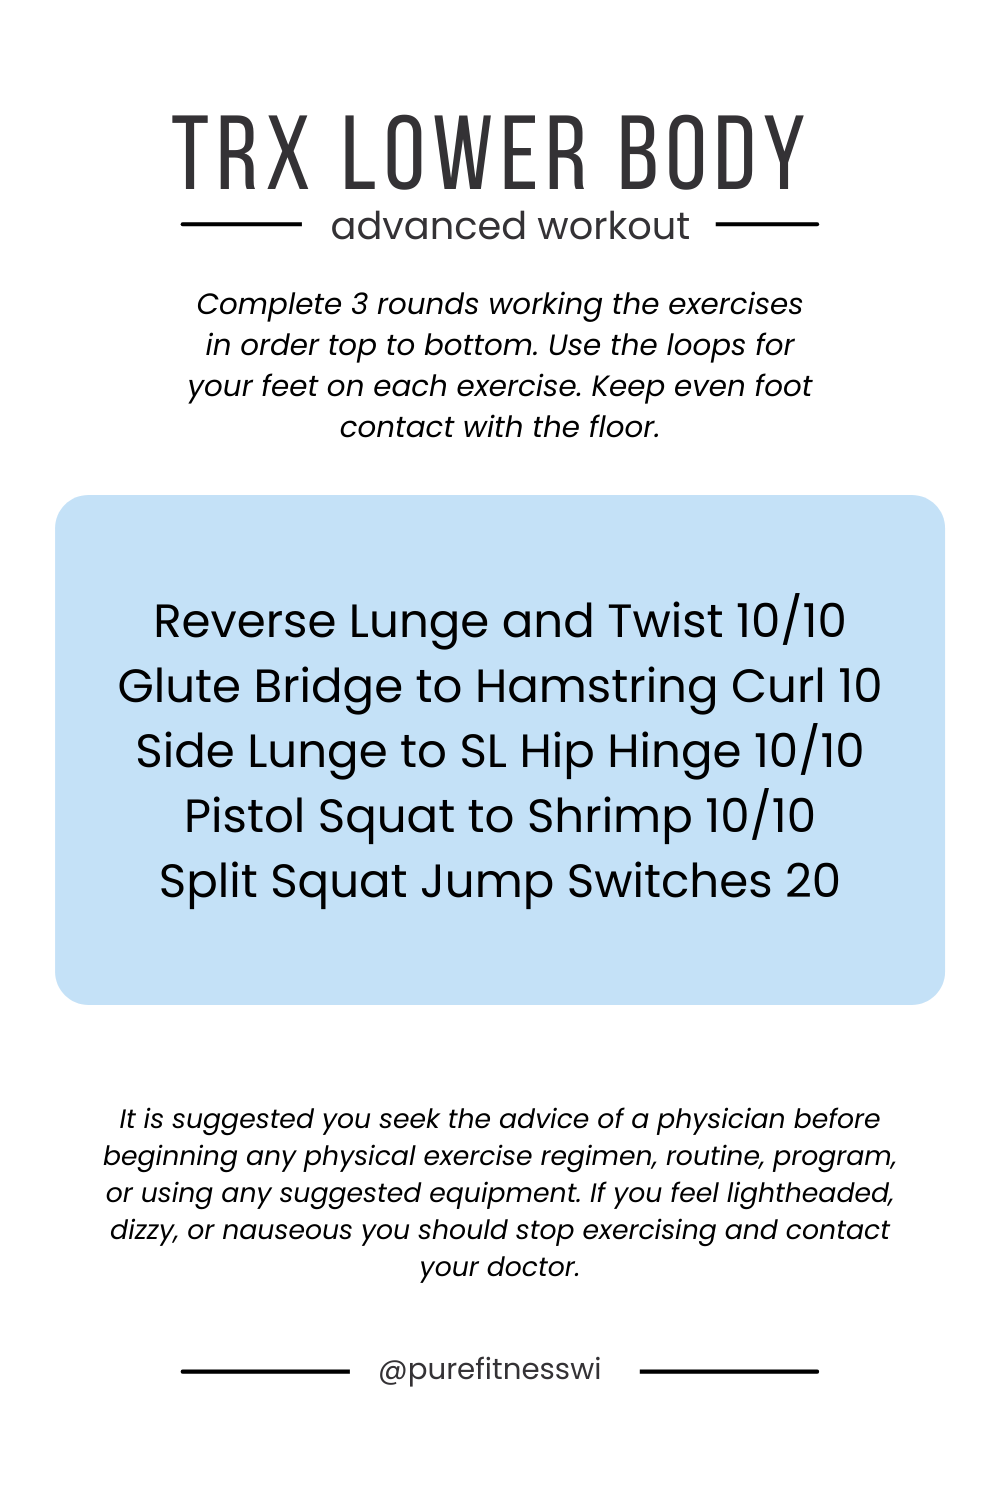
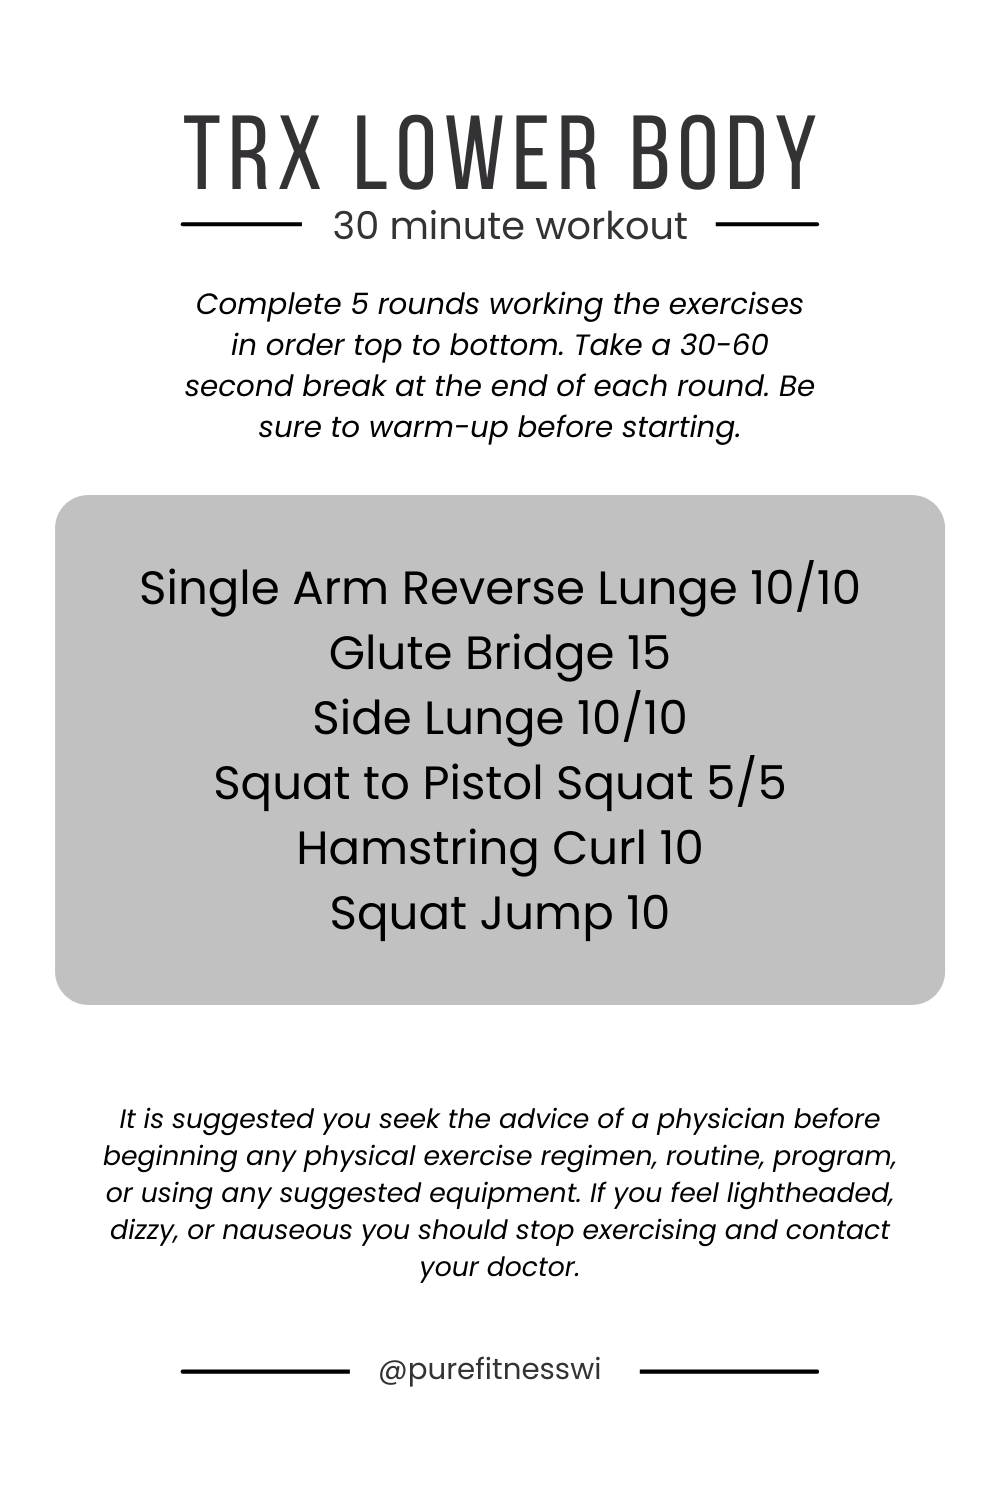
Here are five great exercises for the TRX at various difficulty levels. If you want to take these for a test drive I would recommend starting with the glute bridge or the shrimp. Why? Well, they are the “easiest” of the five.

  • Shrimp
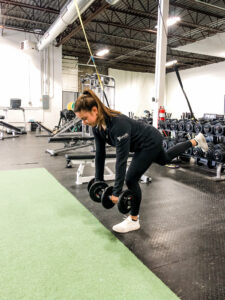
  • Hamstring Curl
  • Pistol Squat
  • Side Lunge
  • Glute Bridge

Core Strength Exercises

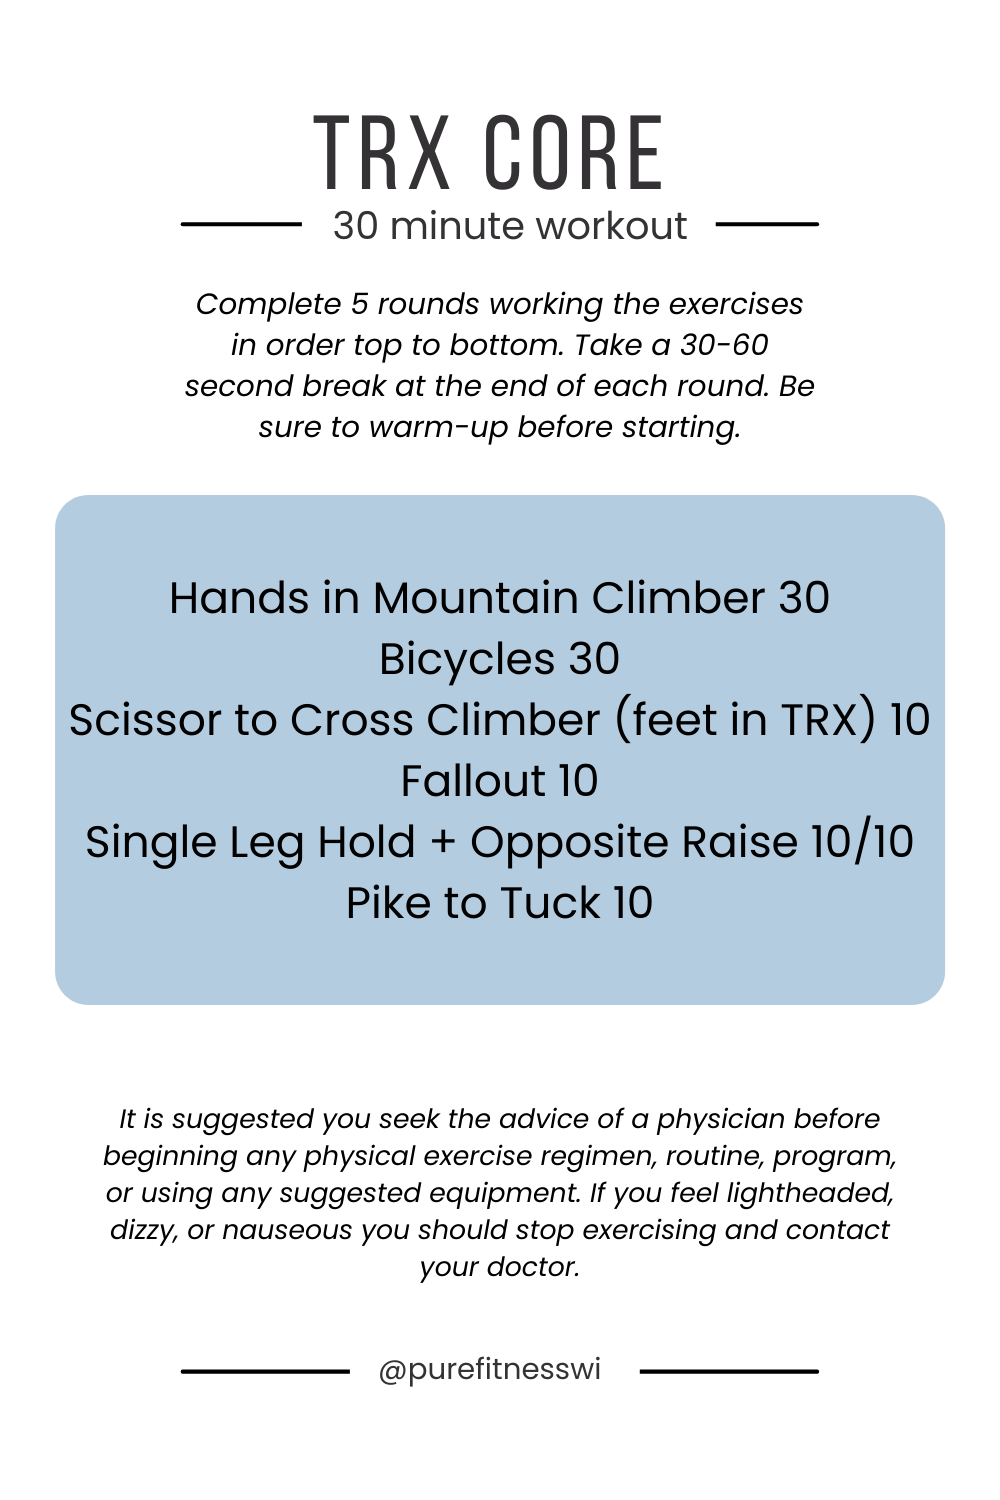
I think most people are familiar with using the TRX with feet in the straps to train your core. It’s challenging. It looks cool. But I would bet there are a few on this list that you haven’t seen before.

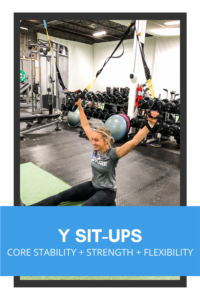
  • Y Sit-Ups
  • Standing Fall Out
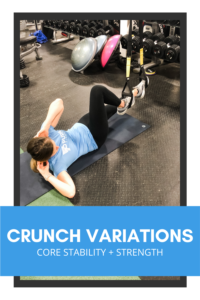
  • Leg Supported Crunch Variations
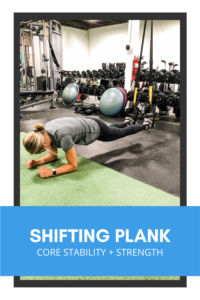
  • Shifting Plank
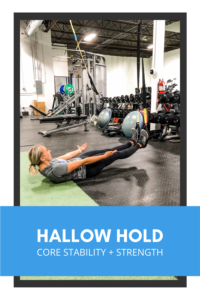
  • Supported Hallow Hold
  • Mountain Climber Variations
  • Pikes and Single Leg Variations
  • Plank Kick Through
  • Plank Tucks


TRX MOBILITY

We talk a lot about mobility. It has become increasingly important in our sedentary world. Our joints can become so tight when we sit for long periods of time or do the same motions over and over. Most commonly we see individuals with tight anterior upper bodies (chest) and tight hips/hamstrings.

One of the main ways we can alleviate some of these aches and pains is by restoring balance at the joint through flexibility/mobility and strengthening. And these need to happen in a cooperative way because you need to have range of motion at a joint, then stability and then power. Which is why mobility training should be a part of your week!

In the exercises below we are going to use the TRX to help provide traction as we reach the end of a range of motion or to help support our body weight to increase our range of motion.

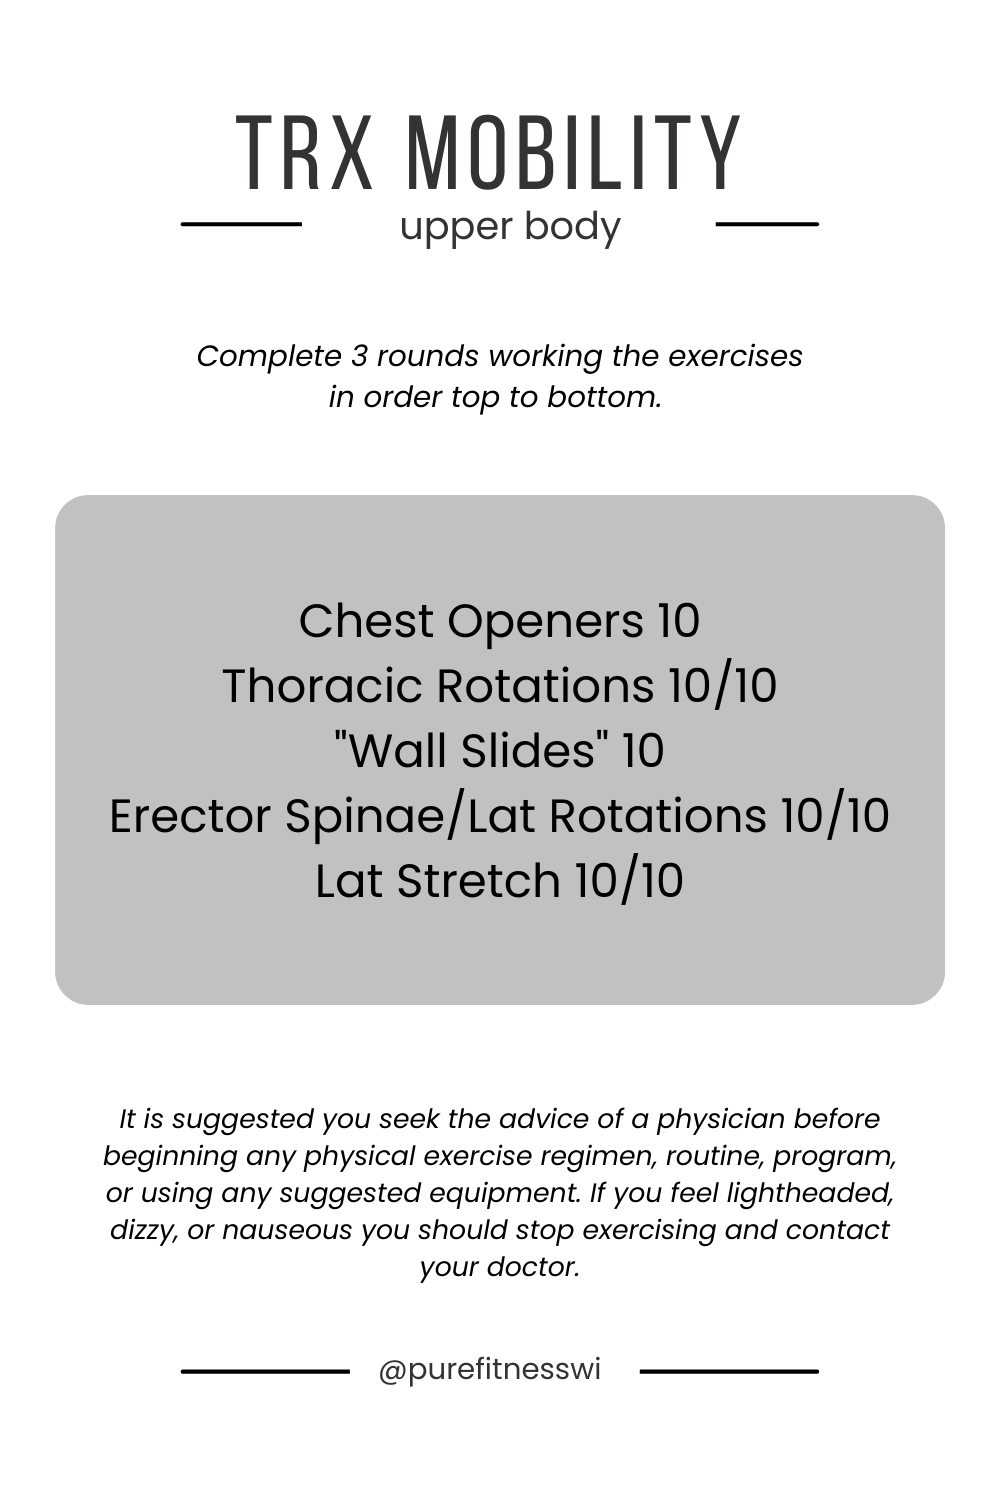
For upper body mobility we are going to target opening up the chest, releasing the lats, and working on upper back rotational mobility. The combination of these three is going to help release a lot of that tension built up from sitting, driving & everyday life. And it will feel great at the end of your workout.

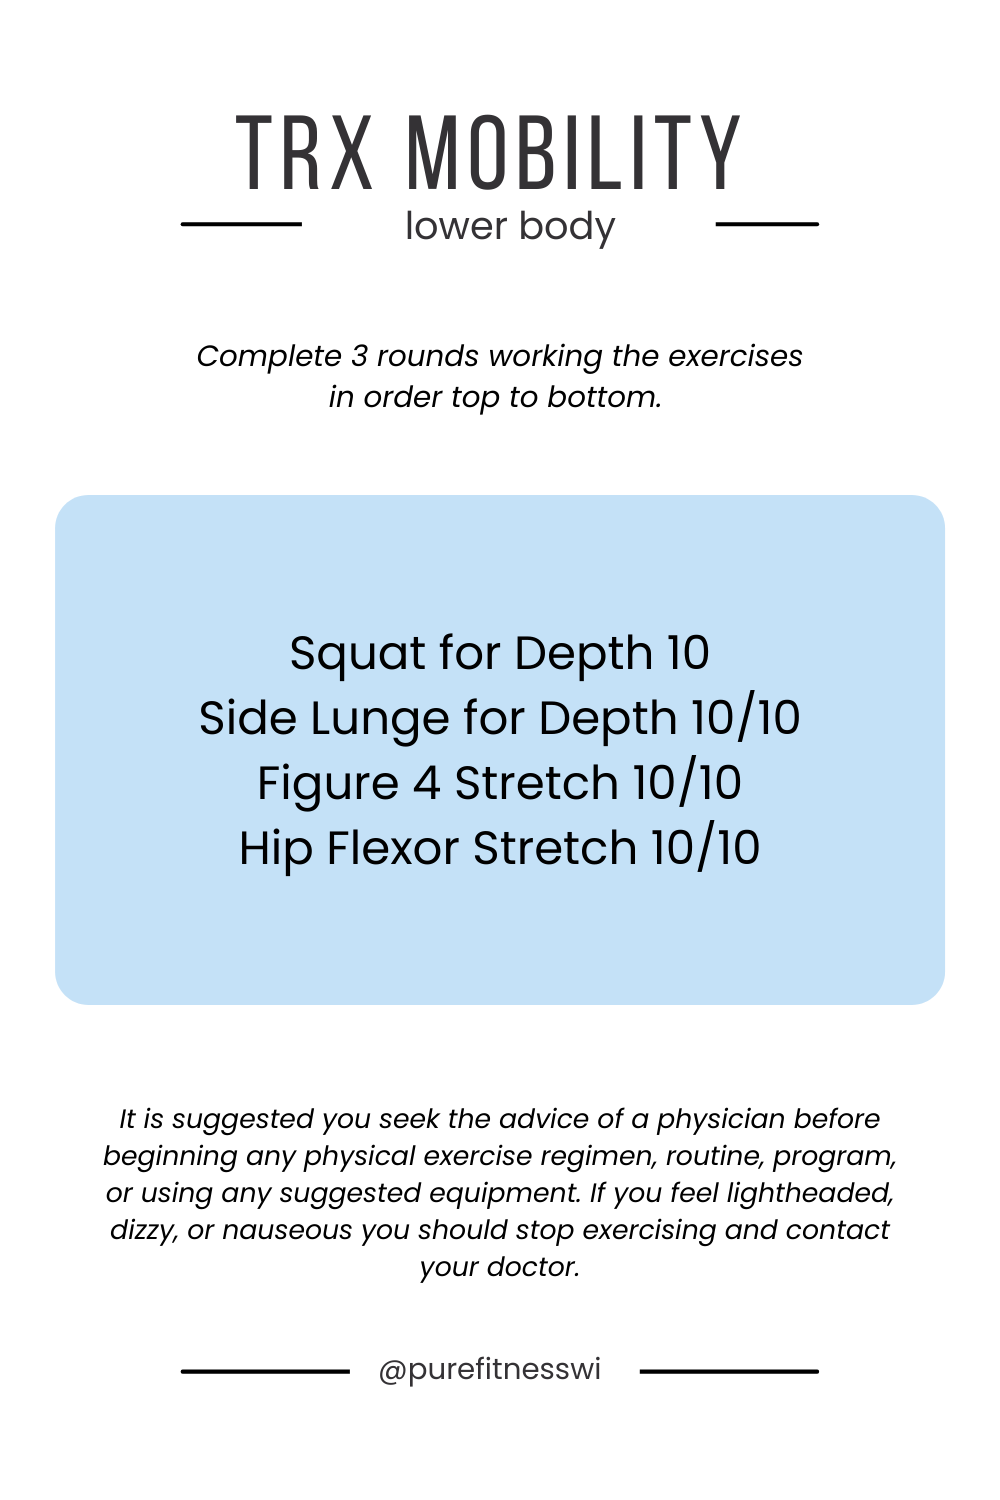
When we talk about lower body mobility we are mostly talking about mobility in and around the hips. Yes, you are going to gain some mobility in the range of motion at the knee joint, but since it is a uniaxial joint that only goes in one direction it will not see as much improvement as the hip will. Since the hip is a multiaxial joint, we have to work for range of motion in multiple directions and you will feel exactly what I’m talk about when you try these exercises.

Upper Body Mobility Exercises

  • Chest Openers
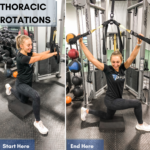
  • Thoracic Rotations
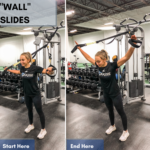
  • “Wall Slides”
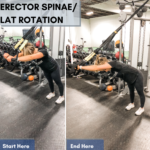
  • Erector Spinae/Lat Rotations
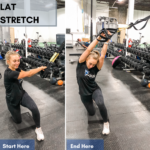
  • Lat Stretch

CHEST OPENERS

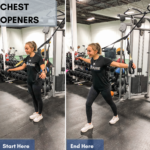
Start by having the TRX straps comfortably in hand and facing away from the anchor. Proceed with the mobility exercise by stepping forward and letting the straps gently pull your arms behind you. This will create a traction stretch within your anterior shoulder and chest. Alternate each foot you are stepping with and see if with a couple reps you can improve your range of motion.

THORACIC ROTATIONS

This is a favorite to do in our gym on the wall, but we love being able to use the TRX for an added stretch at the end. I would not recommend this until you are able to do half-kneeling thoracic rotations on the wall as seen in the PureForged Method (great for you golfers out there!).

Starting kneeling with the outside knee up and TRX straps in hand on the side. Begin by rotation away from the anchor. Keep your arms straight as you let your upper back (thoracic spine) rotate and your chest open up at the end. Keep your lower body as still as possible.

“WALL SLIDES”

Start with the TRX straps out to the side of your body as pictured above. You are going to slowly move your arms toward the ceiling while keeping your arms wide. This will allow you to work on shoulder mobility through the entire range of motion while getting some traction stretch in your shoulders toward the end.

ERECTOR SPINAE/LAT ROTATIONS

This next one is going to feel great on the lattisimus dorsi muscle (your lats) and your erector spinae muscle which runs through the middle of your back to your glutes. You are going start facing away from the anchor. Walk your feet back so that you are leaning into the straps and having a slight forward bend. Keeping your arms straight rotate from side to side to get a great traction stretch in both these muscles.

LAT STRETCH

Starting half kneeling with your knee closest to the TRX up, have the straps together as one. Grab onto the one handle with both hands and swing your arms up overhead and lean the outside hip away. This will create a great stretch down the side and through your lats.

Lower Body Mobility Exercises

  • Squat for Depth
  • Side Lunge/Squat for Depth
  • Figure 4 Stretch
  • Hip Flexor Stretch

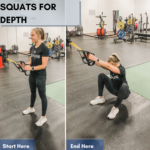
Squat for Depth

Starting with your hands in the handles with elbows bent at your side, take a comfortable squat stance. You may want to take your feet a bit wider to allow for greater mobility. Proceed as you would with a normal squat, sitting back with weight mid-foot to heel. Come back up using your legs with assistance from the TRX.

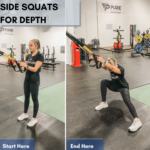
Side Lunge/Squat for Depth

Similar to the squat, the use of the TRX here is going to allow for greater depth in that side squat/lunge. Often times people are limited moving laterally because they feel like their hip stops them. The use of the TRX is going to allow your hip to go deep, almost deeper than the knee. This is going to create a glute stretch.

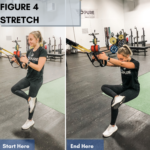
Figure 4 Stretch

This is another great glute stretch that is going to allow your lower back to release as well. Start standing with the TRX straps in hand with your elbows at your side and standing on one leg. Take the other leg and cross it over so that your ankle is over the other knee. Squat normally by sitting back into your glute. You should feel a great stretch in your glutes.

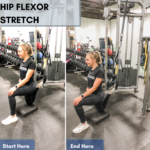
Hip Flexor Stretch

This one is one of our go-tos because it is great to open up the hip flexor. You are going to start in a half-kneeling position with your back foot inside the TRX. This is going to create traction for the hip flexor to help it open up. To create a great mobility stretch, have your hips go forward by squeezing your glutes and shifting your weight forward. This will also start to work in a quad stretch. Your body will stretch what it needs to, so whichever is tighter will feel the greatest difference.

TIPS FOR USING THE TRX

  1. Keep tension on the straps. The whole point is to use the TRX for exercise. A helpful tip is to find the end point of your range of motion when you are training with a TRX. Make sure there is tension and you are in the proper stance or position.
  2. Remember the intention of the movement. I see a lot of people going crazy when they use a TRX. This results in sawing of the handles, or them sliding back and forth. It also causes a lot of sagging in the low back when doing core work.
  3. The TRX also shouldn’t rub against your arms. If that is happening you need to adjust your positioning.
  4. Make the adjustments. If the three above didn’t hammer it home let me be clear. You can make easy adjustments while using the TRX. If your angle is too hard or steep, change it and finish your reps don’t quit. If you can’t keep tension on the straps, stop adjust your positioning and resume your reps. Oh, you can’t control your hips from sagging, or the straps from swinging, or the rubbing on your arms? Stop and adjust. As always with exercise quality comes first.

TRX WORKOUTS

There are various workouts for mobility, upper, lower and core. One of my favorite things to do is mix in cardio intervals after every round. When I am doing a strength workout this breaks up the strength sets and increase my stamina. And when I am doing mobility it helps to keep variation in the workout and keep my body temperature and blood flow to muscles high.

EQUIPMENT – WHERE TO BUY A TRX

These are affiliate links. While there is no cost to you when you order through them, I do make a commission. Your support, by ordering through them, is greatly appreciated!

You can find a TRX all over the place. But if you want to support me and the Pure Fitness team you can order through this link on Amazon 😃

Now for some items you will want to use with your TRX. A high quality exercise mat. My favorite brand is Manduka because it has lasted years, I don’t slip and it is easy to clean. I linked the one I use here.

If you have a space dedicated to a home gym I would get the TRX wall anchor. This way you don’t have to worry about moving your TRX in and out of a doorway every time you want to start and end your workout.

Sculpt Your Goals: Dumbbell Only Workout Program

Sculpt Your Goals: Dumbbell Only Workout Program

Are you ready to start a new workout program that focuses on building strength in a simple and effective manner? Then you are in the right place! My Dumbbell Only Workout Program is your answer to achieving your fitness goals. Let's explore why my program is the...

read more
3 Reasons to Own Your Own Training Business

3 Reasons to Own Your Own Training Business

Owning your own training business can be an exciting and yet overwhelming thought. But ask yourself... Are you committed to the long term? Does passion and knowledge fuel your desire to work with clients everyday? Are you looking for more career advancement...

read more
fitness articles
lifestyle articles
nutrition articles
golf articles

SUBSCRIBE

Click to sign-up for weekly information and offers.

DISCLOSURE

We are a participant in the Amazon Services LLC Associates Program, an affiliate advertising program designed to provide a means for us to earn fees by linking to Amazon.com and affiliated sites.

EXERCISE AS YOU AGE: WHAT DOES THE SCIENCE SAY?

EXERCISE AS YOU AGE: WHAT DOES THE SCIENCE SAY?

From the time we are young the importance of being physically active is instilled into our brains. Part of me is still convinced that this is just so kids can get their energy out 😊. The things that are important at this age are developing balance, coordination, mental engagement, and healthy bones. Would you believe me if I told you these are the exact same things that need to be developed as you age? Exercise as you age isn’t different, we just scale the intensity.

I would like to be clear; this article is not to target only those of you seeing the 80s and 90s approaching. The information and science presented here can be applied to every person from 22 to 60. In fact, the decline in both muscle and bone strength begins at age 30! One of the causes is physical inactivity for both of these.

There are a lot of misconceptions out there about what you should be doing with your workouts the older you get. Of course, we need to develop these habits throughout the years of physical activity and exercise. The longer you put it off, the more difficult it is going to be to start. Keep in mind it is never too late, the best time to start is now. The question is, how do you know what you need?

THE KEYS TO DEVELOPING A PROGRAM AS YOU AGE

Our philosophy at the gym tailors to the 3-step progression we want all of our clients to meet as we program for them specifically. These are the building blocks of any program regardless of age, experience, or goals. These include range of motion, stability, and strength, in that order.

Range of Motion

The first is getting range of motion. As we see throughout our lifetime our joint mobility and muscle flexibility pretty much goes down the drain. From desk jobs to years of bad posture and poor mechanics, we see a steady decline. This loss of range of motion is often the cause of many of those aches and pains you experience throughout the day.

The best method here is prevention, but I understand that for most who felt mobile and agile in their twenties, likely didn’t make it a habit to practice great stretching routines. And now at age 50 you are looking in the rearview mirror wishing you had done more.

Good news! As I said, it is never too late to start. If you have been following along with our many discussions about stretching, it does not take much. Stretching twice a day for 20-30 seconds each stretch will definitely help you see the improvements you are looking for. This will also relieve pain in the common areas if done correctly.

Once we are able to gain more flexibility, we can focus on using it to gain more range of motions in the exercises we do. With the use of a TRX or putting a swiss ball between us and the wall we are able to assist in stability to get a greater range of motion. Adding mobility exercises (active stretching) to your workout routine will also expand the movements in your exercises.

The combination of this stretching, mobility, and assistance in exercises is going to set you up for success when building range of motion.

Stability

This next one is going perhaps one of the most important aspects when exercising as you age. One of the biggest causes of falls, dislocations, and injuries in older populations is due to a lack of balance and stability. Therefore, starting early and developing this balance in a controlled setting is very important to your overall health as you age.

One of the ways this is done is through creating instability. This can be as simple as doing upper body exercises using a split stance with the legs. To advance it you can go onto a single leg balance. The older we get, this may be sufficient enough for creating instability.

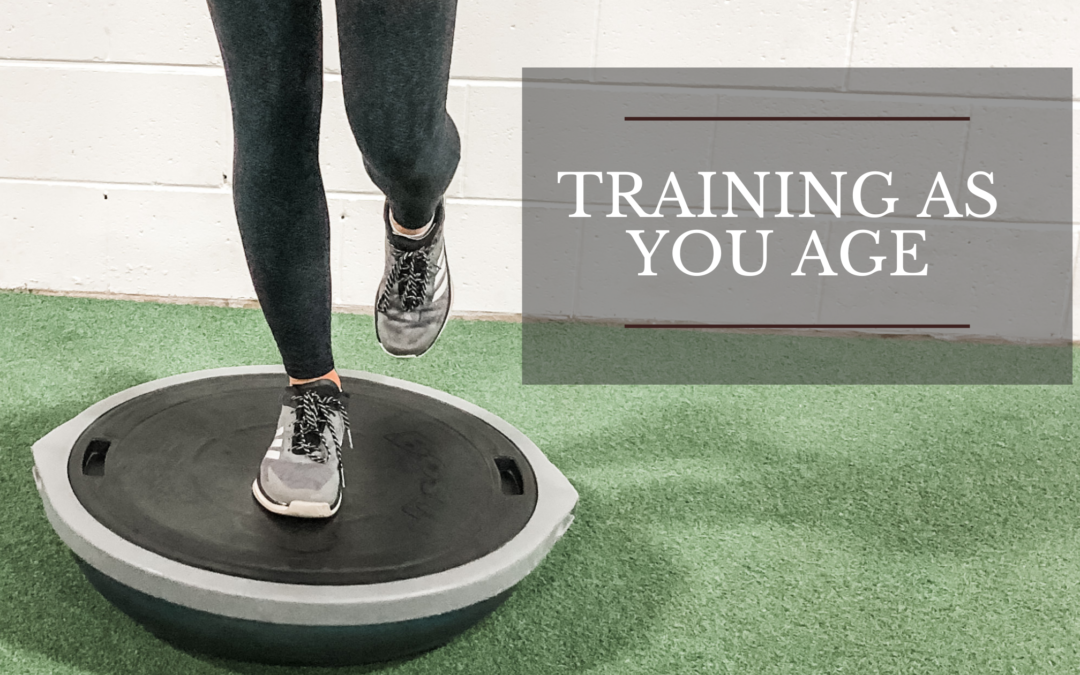
However, if you are starting early and are advanced in your balance technique you can an unstable object. This may include the use of a stability pad or a bosu ball which are our favorites in the gym. Start by using a double leg balance on them, and then as you get better you can move to two.

It is important to note that advancing too much too fast can result in injury. Only do so when advised by a professional. Improving your ability to balance in instable situations will only improve your ability to do so in your everyday life. This could be the difference between feeling healthy or getting a fractured bone.

Strength

Once the flexibility and stability have been established, strength is the next one to be developed within the individual. This is not to say that we stop working on the first two all-together but need to keep working on them as we continue to build strength.

Although much of our muscle strength and power declines as we age, our body’s ability to adapt to resistance training remains the same. Resistance training in older adults has a huge positive impact on bone health and helps adults’ ability to function through everyday activities such as climbing stairs, sitting down and standing, and even reactionary functions.

Just as you would for an individual, it is important to scale the amount of weight to the capabilities of the exerciser. We do not want to overtask the musculoskeletal systems in older adults, so weight selection is very important!

Some of the best exercises for adults in older populations include:

  • Squats (assisted with TRX or a swiss ball if needed) These are great of building range of motion especially in the hips. It is imperative to build strength in this range of motion for functions like sitting in a chair or getting in and out of bed
  • Rows (using a cable machine or resistance bands) These are great for strengthening the back to proper posture and helping to get rid of shoulder pain. Combining these with chest stretching will help the individual improve everyday functioning. Upper body strength can also be built with the use of dumbbells.
  • Core: In the form of a core rotator (read more about it here) or simply incorporating proper core engagement in all exercises, is vital for eliminating back pain. It is important to recognize that using excessive amounts of core bracing (Valsalva maneuver) can illicit various responses due to a raise in blood pressure that can occur. Avoid holding your breath and stop exercising if you feel dizzy or light headed.

OTHER CONSIDERATIONS

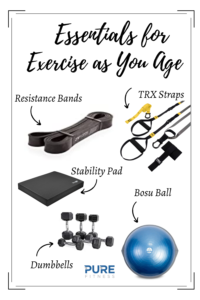
For exercising in older adults, it is important to consider the following things, especially if you are trying to create a program on your own. You should consider consulting a physician, no pain, warm-up properly, include strength and cardiovascular exercise, and give yourself rest. Look at the image to the left for more information!

These are all important to note as you venture into the exercise world or continue exercising as you age. But I want to call special attention to the first item on the list. The primary thing to consider is that you are cleared by your physician. Quickly followed by the fact that you are pain free when exercising in your range of motion.

The benefits of being active are immense as you age. They come from not only in walking and aerobic capacity, but in flexibility, balance, and resistance training. Structure your program to include them all. It can be the difference between a sedative lifestyle or living with minimal pain and doing the things you love!

Sculpt Your Goals: Dumbbell Only Workout Program

Sculpt Your Goals: Dumbbell Only Workout Program

Are you ready to start a new workout program that focuses on building strength in a simple and effective manner? Then you are in the right place! My Dumbbell Only Workout Program is your answer to achieving your fitness goals. Let's explore why my program is the...

read more
3 Reasons to Own Your Own Training Business

3 Reasons to Own Your Own Training Business

Owning your own training business can be an exciting and yet overwhelming thought. But ask yourself... Are you committed to the long term? Does passion and knowledge fuel your desire to work with clients everyday? Are you looking for more career advancement...
read more
fitness articles
lifestyle articles
nutrition articles
golf articles

SUBSCRIBE

Click to sign-up for weekly information and offers.

DISCLOSURE

We are a participant in the Amazon Services LLC Associates Program, an affiliate advertising program designed to provide a means for us to earn fees by linking to Amazon.com and affiliated sites.

GOLF FITNESS POWER

GOLF FITNESS POWER

Power and explosiveness within full range of motion

In steps 1 and 2 we covered flexibility and stability respectfully. Step 3 takes us into the development of power through periodized programming and plyometrics. However, if you haven’t read and implemented steps 1 and 2 stop now.

Read Golf Fitness Flexibility and start implementing a regular stretching routine.

Then read Golf Fitness Stability and start incorporating those exercises to build a strong foundation.

Now back to power development for golf performance.

Step 3 is where you can separate yourself from others on the course. Top end, professional athletes are using this step to take their performance to the next level. So if you, like professional athletes, are looking to increase distance and swing speeds keep reading.

Full Range of Motion

This is the foundation of healthy movement for everything. Golf is no exception.

Being able to move through the entire ROM in a golf swing simply means the ability to develop speed. And speed means distance. We all want distance.

Along with speed another huge benefit of full ROM is pain free movement. In many cases people who have limited ROM will also have pain. This pain can be anywhere in their body. It is caused by the body continuously trying to compensate for the lack of ROM.

In golf we repetitively swing the club. If our ROM is limited in that movement patter – anywhere from you shoulders to your hips, your body will compensate. You will still create movement, but your body will load and fire incorrectly. Stress will be put on areas that should not be feeling it. The end results will be pain and if it is not address quickly, chronic pain. For a golfer this limited ROM presents most commonly as chronic low back pain.

So it’s simple, achieve full range of motion and increase speed and play pain free. Who wouldn’t want to do that?!

Not sure how to achieve full range of motion. Well, go read step 1 like I said at the start.

Power

Power within full ROM is the third step in the process of taking your game to the next level.

Remember Step 1 ROM, Step 2 Stability.

In a power development phase l periodize your training program to build and peak at specific times. This process optimizes your performance and translates the work in the gym to the speed and distance on the course.

Yes, I just told you that simply having full ROM will give you speed, but this step is where people separate themselves.

It is imperative that this power phase is focused on training and strengthening the FULL ROM and not just parts of it. In order to maximize your results your body needs to build strength throughout the entire movement pattern (s). Otherwise, you just wasted the time you spent on step 1 and step 2 and you will limit your potential.

This phase is also a good time to incorporate training under unstable conditions for the purpose of power development. I use a bosu ball and stability pad with my clients.

These are affiliate links. I earn a commission when you shop through them, but there is no increased cost for you. Your support is appreciated!

Explosiveness

Explosiveness often gets interchanged with power and they are quite different. Both can give you the same end result but by training different physiological adaptations. Both are important to golf performance. And when used synergistically will get you the best results.

Power is strengthening the muscle itself, where explosiveness is teaching the body how to use it. Properly training some for explosiveness means teaching their body how to use stored elastic energy. Taking advantage of the stretch reflex component and golgi tendon organ (GTI).

The easiest way to do this is through plyometrics, when done correctly. Often plyometric exercises turn into cardio sessions. Simply put, thats a waste of time. It takes zero advantage of the training modality.

Quality over quantity always takes precedent in plyometrics. Iv’e said it in other articles, but I’ll say it again. Quality fast movement throughout the entire ROM is the key. Teach the body how to use stored elastic energy and train it properly and you just took your full ROM and created a monster off the tee box.

Periodization

I think it’s important to quickly talk about periodization as power and explosiveness require it in order to ensure maximum results.

Just going into the gym and doing the same rep counts with the same weights won’t maximize your full potential. Through proper periodization you can and will maximize top end strength to peak when you want it to. Which will give you that club speed and distance we have been talking about.

Periodization also allows your muscles to hypertrophy over a period of time without going through phases of overreaching (the precursor to over training) which would cause a loss in strength. And we want hypertrophy because it is what allows us to build strength to be used as explosive power.

On paper, periodization is simple. Following a progressive cycle of 6-12 weeks in length that adjusts intensity and volume to maximize top end strength at a specific time. However, many people don’t know how to properly periodize an individual, or more importantly don’t know when to make the appropriate adjustments during the training cycle. There is a scientific approach to periodization and if you don’t follow it, you are wasting your time.

Also an important note for readers who want to follow this style of program is that you have to be on a consistent schedule 3-5 days per week. You cannot train for a week and then take one off, or two weeks and then take a week off. These are the types of programs that you need to be all in on in order to reach your highest potential.

You can read about my number one power exercise to increase distance in this article.

Put it all together

Now you know our 3 step PureForged Method.

  1. Flexibility and Range of Motion
  2. Stability and Balance
  3. Power and Explosiveness

Follow this system step by step and watch your game sky rocket. Reach out to us for an assessment, programming or one-on-one training.

Sculpt Your Goals: Dumbbell Only Workout Program

Sculpt Your Goals: Dumbbell Only Workout Program

Are you ready to start a new workout program that focuses on building strength in a simple and effective manner? Then you are in the right place! My Dumbbell Only Workout Program is your answer to achieving your fitness goals. Let's explore why my program is the...

read more
3 Reasons to Own Your Own Training Business

3 Reasons to Own Your Own Training Business

Owning your own training business can be an exciting and yet overwhelming thought. But ask yourself... Are you committed to the long term? Does passion and knowledge fuel your desire to work with clients everyday? Are you looking for more career advancement...
read more
fitness articles
lifestyle articles
nutrition articles
golf articles

SUBSCRIBE

Click to sign-up for weekly information and offers.

DISCLOSURE

We are a participant in the Amazon Services LLC Associates Program, an affiliate advertising program designed to provide a means for us to earn fees by linking to Amazon.com and affiliated sites.

GOLF: TOP 5 EXERCISES FOR INCREASING YOUR SWING SPEED

GOLF: TOP 5 EXERCISES FOR INCREASING YOUR SWING SPEED

People that love the game of golf regardless of how good they are all wish for one thing, more distance. Why? Because distance matters. More distance, when controlled, can mean less strokes to get to the green. Which cans clearly mean a lower score. (If you can putt.) And to get more distance you need to improve your swing speed.

HOW DO YOU INCREASE GOLF SWING SPEED?

Thats the million dollar questions. And I have a free answer for you. You are going to be shocked because it is simple. 

Strength. 

You need to have more strength to be able to produce more power to be able to drive the ball further. A, B, C. That’s it. 

personal trainer mequon wisconsin

WHAT’S THE CATCH?

But if it was really that simple wouldn’t we all have incredible golf swing speed and driving distance. Logic serves that if we all just get stronger we can all have more distance. Well you are right. Go ahead get stronger. 

Here is the catch.

Educated and experienced personal trainers, like myself, exist not just to be a therapist or make sure you show up to your workout. We have specific training & knowledge that allows us to increase your strength and translate it to sport performance. That’s why the guy that can squat 400 pounds and bicep curl 50s isn’t necessarily the best golfer. Sometimes that guy is all show and no go.

This process WILL look different depending on your health history and current physical fitness. After all, if there was just one exact way to get stronger and hit the ball further that applied to every person, I wouldn’t have a job or a leg to stand on.

BUT, every person has to go through the same progression to get to strength and power. In previous posts we touched on our approach that we use with every golfer – flexibility/range of motion, stability and then power. If you try to do 2 before 1 or 3 before 2 you won’t get the results you are looking for. Which is where we come in as personal trainers. Follow the right progression based on where your body and you get the right results. Simple.

TOP 5 STRENGTH EXERCISES FOR SWING SPEED IN GOLF

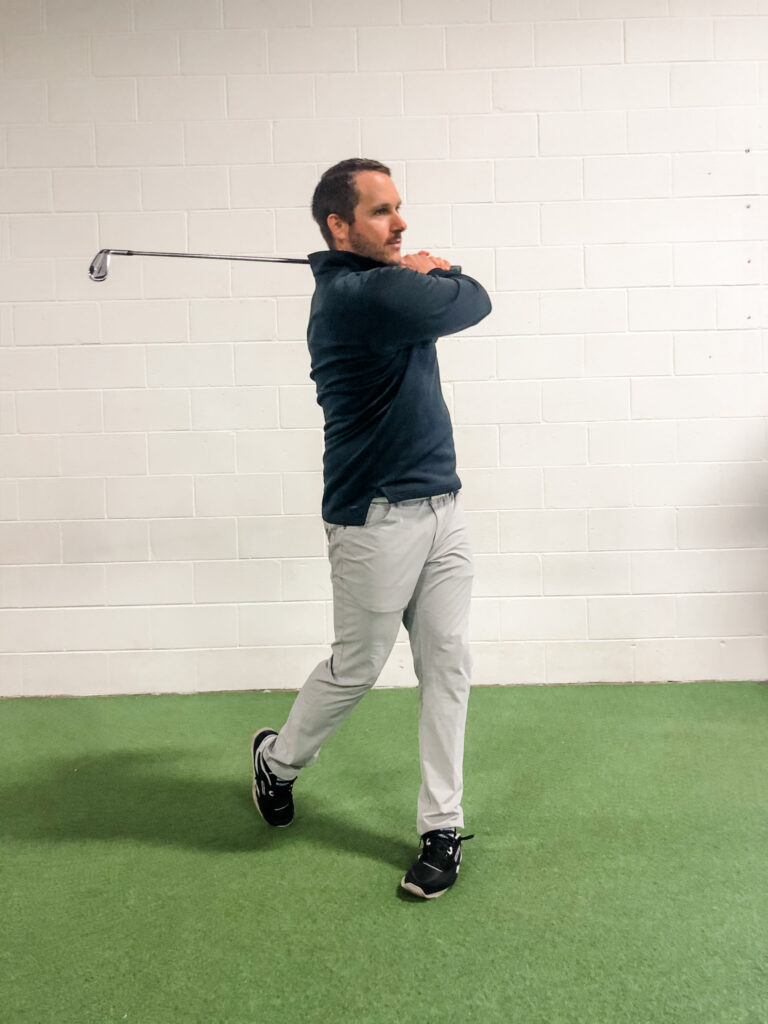
If you already follow an exercise program or like to work out here are a list of my top 5 exercises to improve your golf swing speed. How they are implemented within the program obviously make a difference, as mentioned above. But just implementing them into your routine in any manner will help immediately. You will notice that 3 of the 5 exercises are lower body, this is because the stronger and more stable you are in your legs will allow you to swing harder without a loss in stability which will give you speed immediately.

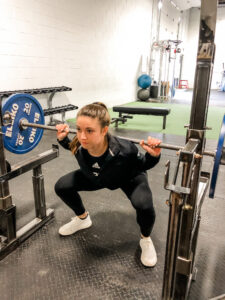
Back Squat

Power from the swing starts from the ground up, if you know how to use force from the ground up and understand how to load properly you will hit the ball further. This is why the back squat is so beneficial for distance.

  • TIP: the back squat is a technical lift, start light and master the mechanics to get the best results in the long run.

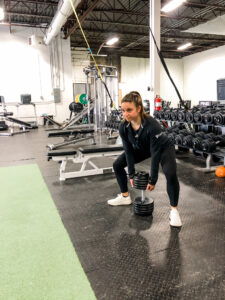
DB Deadlift

Again, same reasoning as the back squat, however, it is an easier exercise to accomplish. And arguably easier place to start with all golfers. The drawback is that it is not quite as efficient as the back squat. It can’t be loaded as much because you are restricted by the weight of the dumbbell. In our gym that goes up to 100 pounds. It also works the muscles in a different capacity than the back squat because the load is below your waist instead of on your back. This differentiates it from the back squat, giving it a place in your training program. 

  • TIP: form is of the highest concern. Poor form can lead to low back aggravation and tightness. Maintaining core bracing is and a flat back is essential.

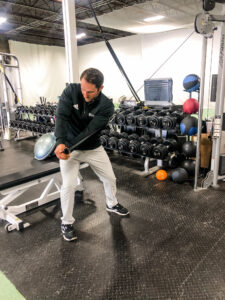
High to Low Core Rotator

This movement teaches the appropriate kinematic sequence while mimicking the downswing. This allows us to train the translation of power from ground through core and to the club. 

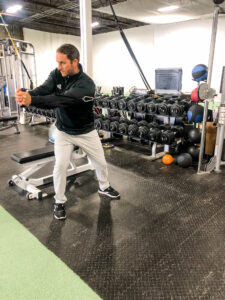
  • TIP: your arms are the lever in this exercise. The further away from your body line you can keep them the more load you place on your core. The more load you place on your core the stronger it can get.

Single Leg RDL

Again, teaching the body how to load properly is the foundation of power in the swing. This exercise helps give you stability while also being able to focus on power and speed.

  • TIP: your range of motion will be limited backs on hamstring flexibility. Tight hamstrings will impact your ability to balance, or be stable. If this exercise is difficult you likely need to implement a stretching routine. Check out our golf specific stretching routine here.

Eccentric Core Rotator

This teaches the body how to isolate the eccentric muscle contraction phase and will help increase force production right away. Not an easy way to isolate the muscle but gives a fantastic output for speed and power.

  • TIP: proper eccentric load is all above maximizing the time spent in the muscle lengthening phase. Perform this exercise with even more control than usual to get the maximal results.

WHERE TO START

If you are familiar with the exercises or perhaps you are already working with a trainer. Find a way to incorporate these into your weekly training program. In the event that you don’t know how to add these exercises to your workout, reach out to us for an appointment. We are eager to help you develop the distance you have always dreamed of. We work both face-to-face and in online training formats. 

And if that is not possible, the safest place, with the largest impact would be flexibility. I didn’t talk much about it here because I have an entire article dedicated to the topic. Go read Golf Flexibility now. Implement those stretches and you will feel better, move better and play better.

Sign-up for our newsletter and we will send you 5 golf mobility exercises that will have you feeling better and playing better in just a few minutes.


Sculpt Your Goals: Dumbbell Only Workout Program

Sculpt Your Goals: Dumbbell Only Workout Program

Are you ready to start a new workout program that focuses on building strength in a simple and effective manner? Then you are in the right place! My Dumbbell Only Workout Program is your answer to achieving your fitness goals. Let's explore why my program is the...

read more
3 Reasons to Own Your Own Training Business

3 Reasons to Own Your Own Training Business

Owning your own training business can be an exciting and yet overwhelming thought. But ask yourself... Are you committed to the long term? Does passion and knowledge fuel your desire to work with clients everyday? Are you looking for more career advancement...
read more
fitness articles
lifestyle articles
nutrition articles
golf articles

SUBSCRIBE

Click to sign-up for weekly information and offers.

DISCLOSURE

We are a participant in the Amazon Services LLC Associates Program, an affiliate advertising program designed to provide a means for us to earn fees by linking to Amazon.com and affiliated sites.

INCREASE YOUR BACK SQUAT WITH THESE EXERCISES

INCREASE YOUR BACK SQUAT WITH THESE EXERCISES

When starting out, the squat can seem like a very simple movement, right? And it is, but if you are looking to increase you strength in the squat pattern there is a little more you will need to know.

So, let’s start with the basics, almost everyone does a form of a squat everyday. But odds are most of those squats are not performed with pristine form. When it comes to a sport like powerlifting or any time you are trying to move as much weight as possible, things can go wrong if you are not thinking about your form.

The more weight you are doing, the more technical the lift becomes. And any strength imbalances or deficiencies become glaringly apparent. That could mean your form is holding you back from lifting as much as possible. Or even worse, will cause an injury. My goal in writing this article is to help you avoid any pain and squat as much weight as possible.

At some point throughout my powerlifting career I have struggled with every single one of the issues that I will talk about below. Through experience and education, I have learned what I need to do to make my squat as efficient as possible. And I still don’t have it all figured out. But I hope to share with you what I have learned so hopefully you can avoid my mistakes.

After reading this article I hope that you will have a better understanding of how the body moves during a squat and why auxiliary and supporting exercises are so important to increase you squat numbers!

tips for a bigger back squat from a personal trainer

Primary Muscles Involved In The Back Squat

Let’s start by reviewing the primary muscles used in the back squat. This will help you to understand why you want to train each of those muscles individually and how it will help your back squat.

Quadriceps – The quads consists of four muscles on the anterior of the thigh. As knee extensors and hip flexors, the quads are active in both the decent and accent of the squat helping to control the movement.

HamstringsThe hamstrings are made up of three muscles on the posterior of the thigh. Your hamstrings control hip extension and knee flexion, keeping them involved in both the decent and accent of the squat. 

GlutesThere are three muscles that make up the glutes and they act as extensors at the hip. They are critical to hitting lockout at your hips when finishing the squat.

So in the squat pattern your quads, hamstrings, and glutes are working together to move your body through the correct muscle pattern which allow the muscles to work to their maximum potential allowing you to reach high numbers in the back squat.

If you want to an inside look at my training auxiliaries check out my glute and hamstring exercises.

Main Dysfunctions Seen During The Back Squat 

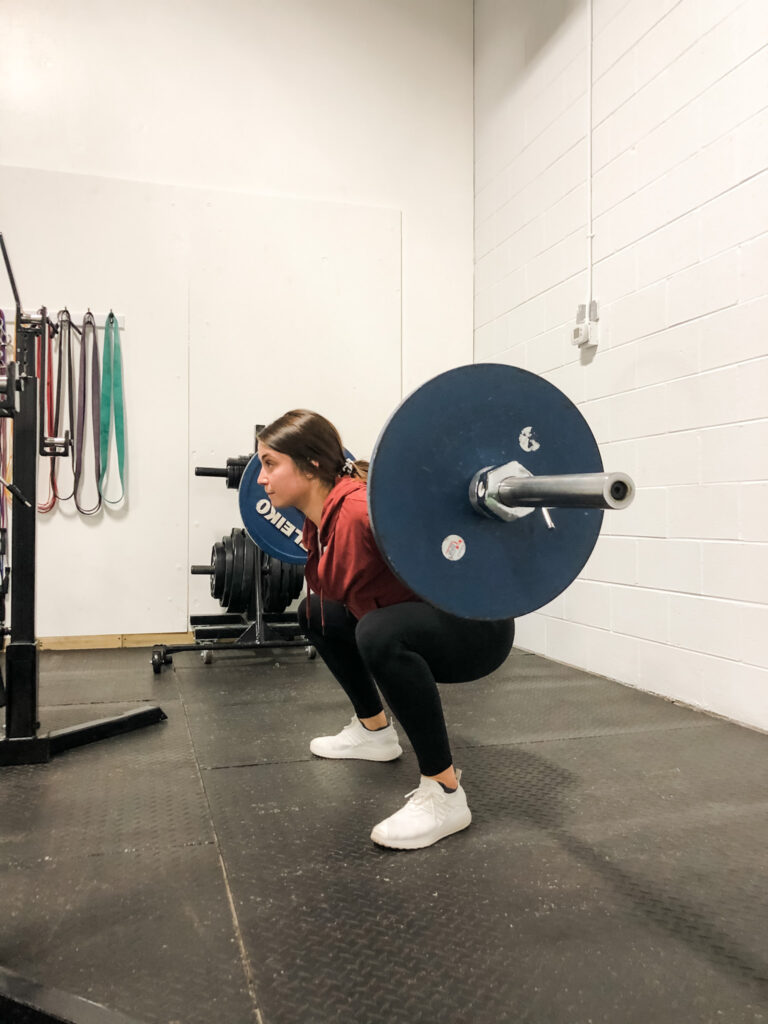
Sometimes I find that it is easier to start a conversation by addressing common mistakes. Pointing out common dysfunctions in the squat will allow the lifter to be more aware of their body and decrease risk of injury from these common mistakes. So let’s talk about a few of the most common dysfunctions and what can help it.

Unable to hit depth

If you are unable to hit depth this is often due to flexibility in the hip, knee, or ankle and your stability during the movement. Stretching/ mobility training and consistently practicing the correct form will help to solve this issue.

Rounding of the back

Your instinct is probably to assume that rounding of the back is due to the weight of the bar. You are not wrong, but you aren’t entirely right either. The weight on the bar is causing your back to round, but it has to do with your core strength and bracing. If your core is not engaged, or you start the squat with a poor set up, it will be easy to round your back and/or lean forward during the squat. Rounding commonly causes issues with hitting depth and holding you back from squatting the maximum amount of weight. So make sure you have a strong set up and walk out before every lift.

Knees caving in 

This is a very common issue and easily fixable. It is caused by weak adductors. To fix this, exercises like a wall sit with med ball squeezes can help or squatting patterns that have a toe out set-up.

Auxiliary Exercises That Can Help Increase Your Back Squat

increase your back squat with a personal trainer

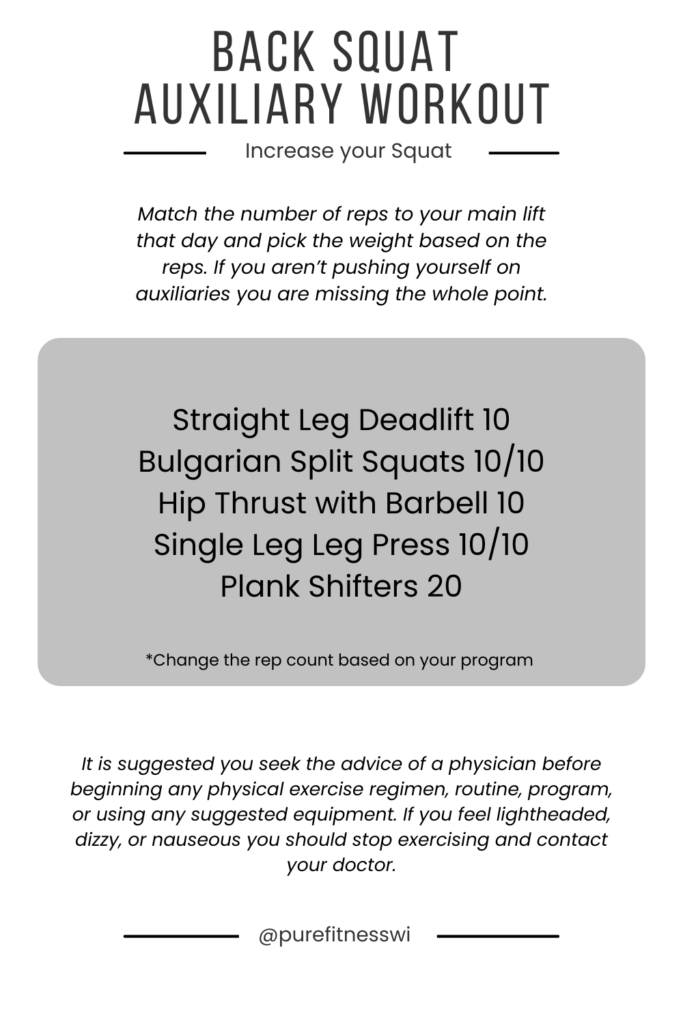
If you are looking to increase your back squat you are going to have to start by including auxiliaries into you workout that address your weaknesses. Check out the list I have below. These are some of my favorite and most effective exercises that are categorized by muscle group. Try them out in your next workout and let me know what you think!

Remember that auxiliaries need to stimulate a physiological adaptation. And that requires you work to a maximal level. Similar to you wanting to work to a 1 rep max in the squat. To summarize, if you aren’t pushing yourself on auxiliaries you are missing the whole point.

Exercises to Strengthening your Hamstrings

  • Hamstring Curl
  • Glute Ham Raise
  • Straight Leg Deadlifts

Exercises to Strengthening your Quadriceps

  • Split Squats
  • Front Squats
  • Bulgarian Split Squats
  • Lunges
  • Step-ups

Exercises to strengthening your Glutes

  • Band Walks
  • Glute Bridge
  • Hip Thrusts With Barbell

Exercises to strengthening your Core

  • Deadbugs
  • Planks
  • V-Sits

I can’t really say enough about training your core. It is the number one missing link that I see with clients and I have personally experienced the different of a weak and strong core while back squatting. Maximal effort lifting is an extension of your core strength. Focus your attention on building a strong core and following a consistent training schedule and your lifts will come along. Do the opposite and you will likely experience plateaus and injuries.

Auxiliary Squat Workout

Stretches to include in your workout:

While we focus a lot on what strength exercises will get us to our end goal, you should still consider your recovery exercises in your program. These are my four standard stretches that you should include after a lower body workout day.

  • Standing Hamstring Stretch
  • Standing Side Hamstring Stretch
  • Thoracic Stretch
  • Quad Stretch

Key Points to help increase your back Squat

back squat tips

Keeping your core engaged is key! Tension in your core and throughout your entire body will help with proper form and aid in hitting depth. Eventually leading to increased strength in the squat pattern.

Focus on your breathing. This will help keep tension (mentioned above) in your body. If you use a belt, taking a deep breath before the squat will put pressure against the belt keeping you tight and strong.

Sit back onto your heels and push your butt back. This is the very basics for a squat, but sometimes when the weight is on your back people try and compensate, which might help initially, but it will cause a chain reaction that can cause injury and limit your potential strength gains.

Shoulders back and chest up! Again, this is just proper form, but if your setup is funky, it is going to mess up the whole lift. In this case, if you don’t set up strong, you are going to end up rounding your back which will cause you to “taco.” Or if you are able to fight the weight, it will be limiting when trying to max out.

Other Main Lifts

Because of my powerlifting background I associated squat and the other two main lifts of powerlifting. which are bench and deadlift. They each contain their own unique muscular demands, but the philosophy behind training is no different. I have put together an article just like this one on the bench and the deadlift. Follow the links below to get specific information you can start applying to your workouts today.

How to Increase Your Bench

How to Increase Your Deadlift

Or CONTACT ME directly and I’ll get you going with a written program and online coaching

increase your back squat with a personal trainer


WHAT I’M WEARING  SWEATSHIRT | TELETIES HAIR TIES | ATHLETA LEGGINGS | LANE EIGHT SHOES | NALGENE WATER BOTTLE

fitness articles
lifestyle articles
nutrition articles
golf articles
Sculpt Your Goals: Dumbbell Only Workout Program

Sculpt Your Goals: Dumbbell Only Workout Program

Are you ready to start a new workout program that focuses on building strength in a simple and effective manner? Then you are in the right place! My Dumbbell Only Workout Program is your answer to achieving your fitness goals. Let's explore why my program is the...

read more
3 Reasons to Own Your Own Training Business

3 Reasons to Own Your Own Training Business

Owning your own training business can be an exciting and yet overwhelming thought. But ask yourself... Are you committed to the long term? Does passion and knowledge fuel your desire to work with clients everyday? Are you looking for more career advancement...
read more

SUBSCRIBE

Click to sign-up for weekly information and offers.
DISCLOSURE

We are a participant in the Amazon Services LLC Associates Program, an affiliate advertising program designed to provide a means for us to earn fees by linking to Amazon.com and affiliated sites.