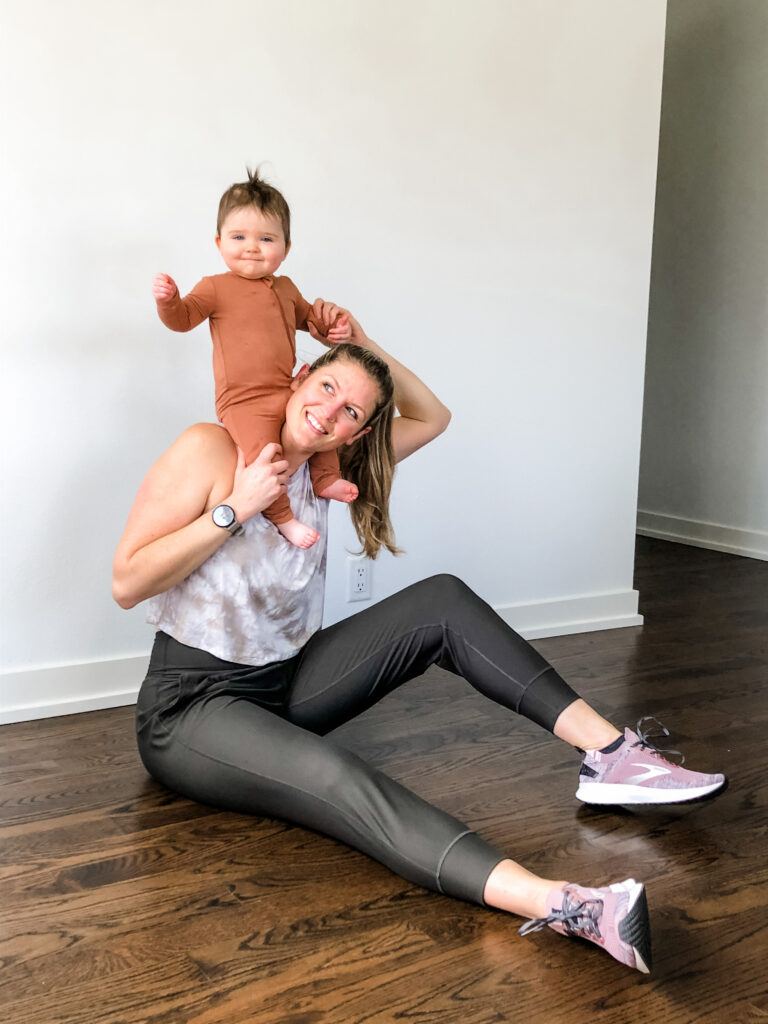
Let’s be honest: parenting is an all-consuming 24 hour role with no breaks. Between school drop-offs, meal prepping and cooking, laundry piles, and trying to keep tiny humans alive, finding time for yourself feels like a luxury. And if you are like me, you can think...
How To Recover From Your Workouts
Exercise and recovery go hand in hand. They work cooperatively and feed performance. Whether you are recovering from an injury, playing high level sports, trying to improve your overall health, or anywhere in between. Recovery has to be a part of your exercise program. And a well rounded approach requires multiple mediums.
You should think of recovery from your workouts as hands on methods like stretching and foam rolling, as well as commonly overlooked methods like sleep and nutrition.
Table of Contents
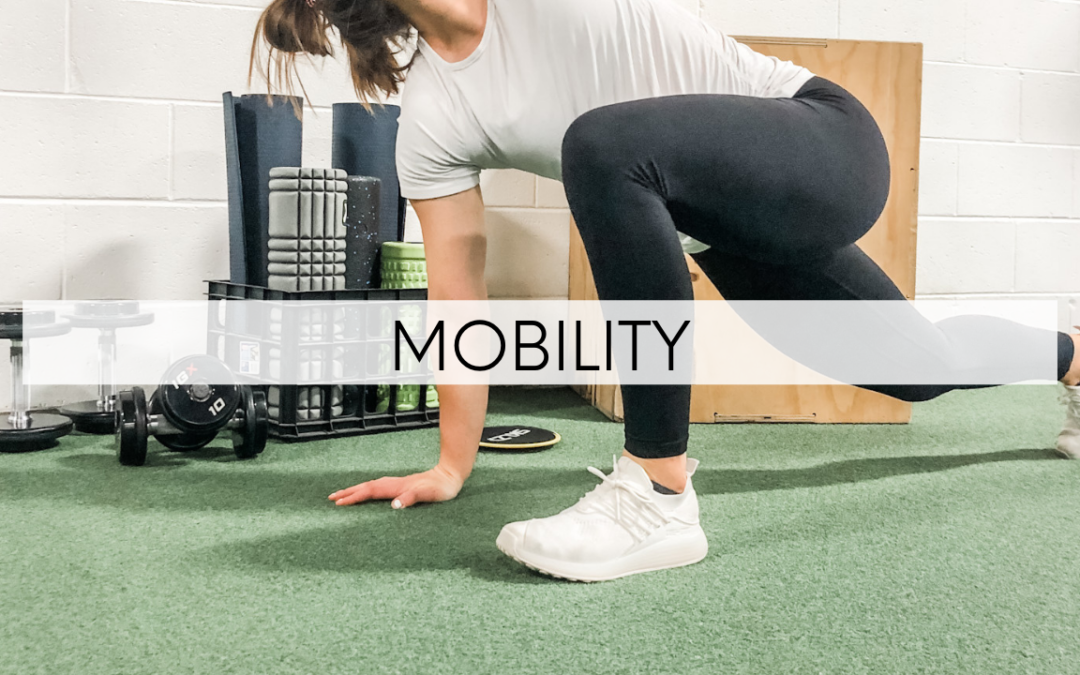
STATIC STRETCHING
When we talk about range of motion we are talking about the movement allowed at a joint. There is a standard range of motion that a joint can produce and it does vary. For example the elbow is a hinge joint and has a range of motion based on flexion and extension. Where the hip joint is a ball and socket allowing for circumduction, which includes flexion, extension, adduction and abduction.
We use mobility and flexibility training to change our range of motion to alleviate pain and improve performance. To simplify things think mobility exercises address the joint, flexibility exercises (stretching) address the muscles, and mobility and flexibility work synergistically to improve range of motion.
There are also many different types of stretching – static, dynamic and pre-contraction. Of course there are also sub categories to those types. For the sake of this article we are looking at static stretching, where a stretch (or muscle lengthening) is being held for a period of time.
Static stretching is either active or passive. You can translate that to be being done by yourself or with assistance. The assistance you use can be a wide variety of things like a strap or another person.
The maximal benefit comes from holding a static stretch for 20-30 seconds each. And following posture guidelines and listening to your body (aka avoiding pain) are necessary to see results in your flexibility, mobility and pain relief.
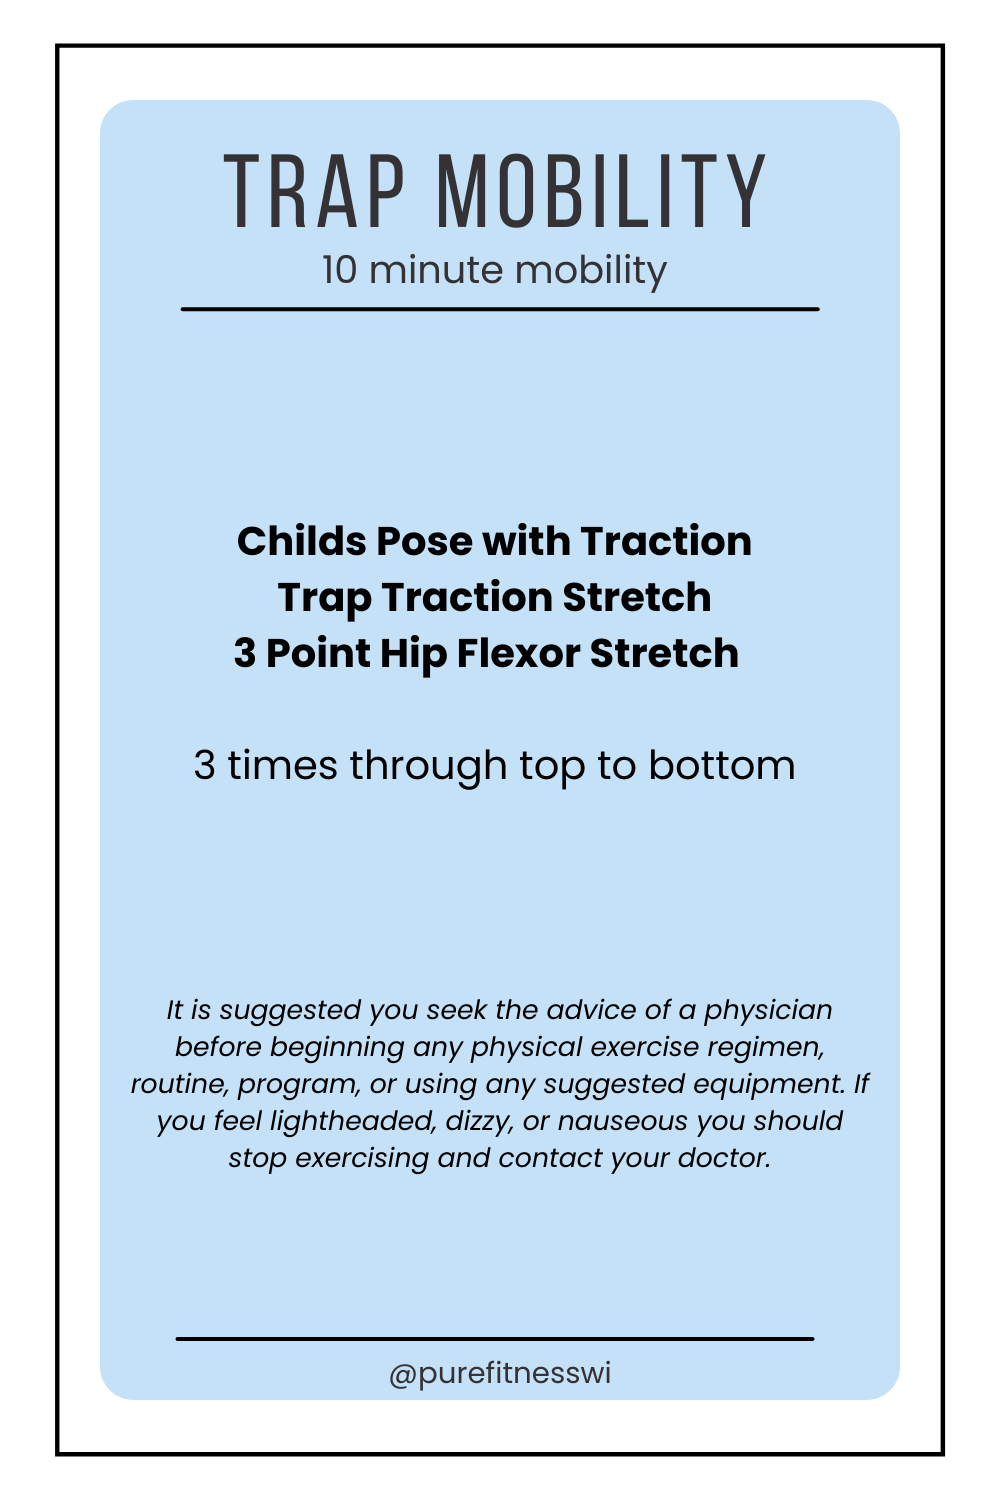
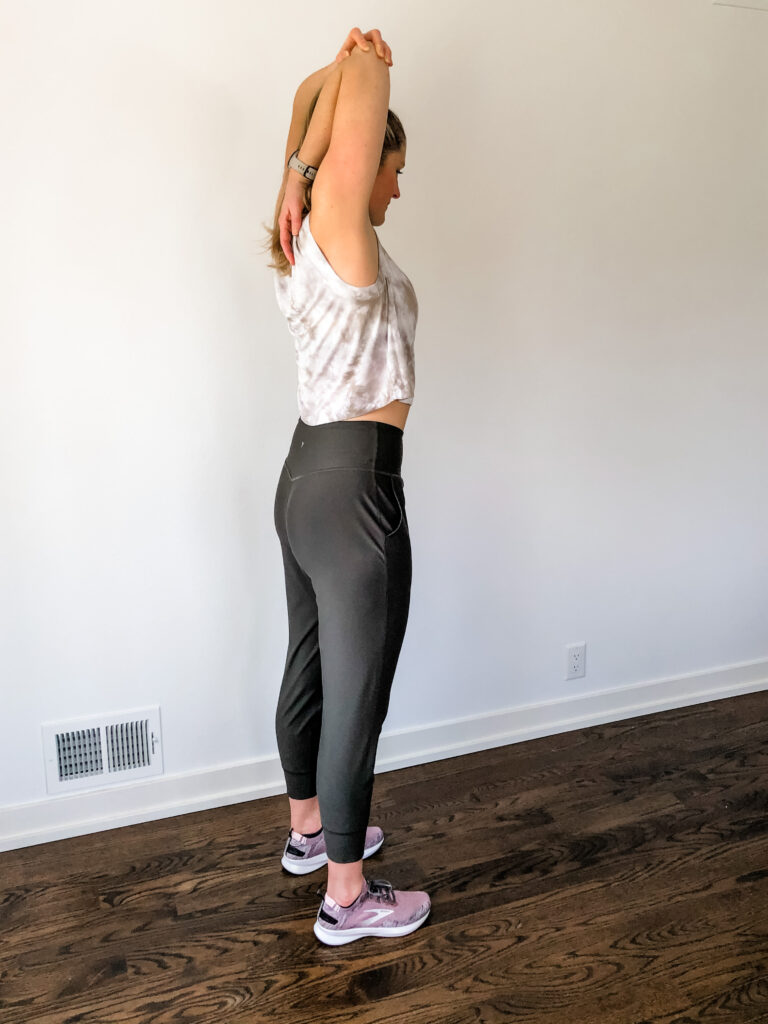
TRACTION STRETCHING
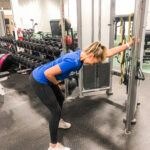
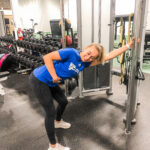
Traction stretching is a type of passive static stretch where by holding onto an object you create traction at the desired joint stretching the associated muscle(s). A good example of this is a lat traction stretch where you hold onto an object with one hand, bend your knees, and shift your hips backwards to provide traction at your shoulder as you hold on to the stationary object. Rotate your shoulders as needed to find the best stretch.
Traction stretching is highly effective for muscles of the upper body where you can use your hands as anchors.
LOW BACK STRETCHES
*Disclaimer! If you have a diagnosed herniated disk or other spinal problems, that is much different from the muscles in your low back being tight! It is also wise to look to your hamstrings first. If they are tight, stretching them will also help your low back.
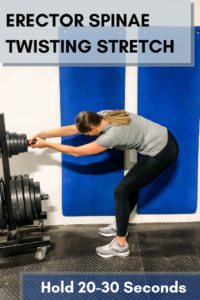
Erector Spinae Twisting Stretch
This one is sure to feel amazing on low back. Holding on to a pole, chair, or anything you have at home, bend forward with your chest parallel to the ground. Rotate your hips to one side. The leg that is on the open side should have the straighter leg while the other one bends. You should feel the stretch on the side you are opening up to.
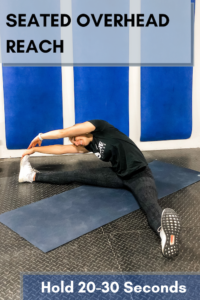
Seated OH Reach
This is one of my personal favorites for targeting my lower back. I always feel like it targets that exact spot I need. Seated with legs spread apart (only at your comfort level). Place both hands overhead. Reach toward one toe or however far you can reach. Focus on the top arm to get the most stretch through your lat and lower back.
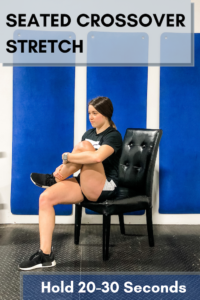
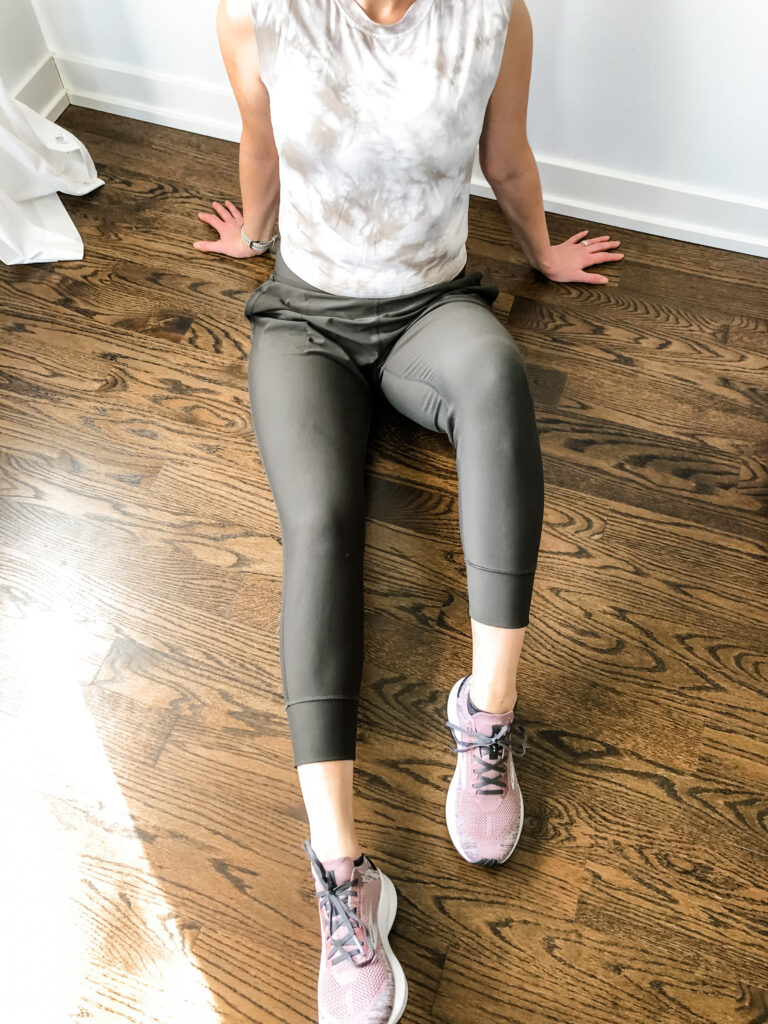
Seated Crossover Stretch
Seated on a chair, sit with your legs about shoulder width apart and bent at 90 degrees. Take one leg and place the ankle of it on top of the other leg. Proceed to pull your knee toward your opposite shoulder. You should feel a stretch through the top of your glute to your lower back. If you need more of a stretch, walk your bottom foot outward a bit.
SHOULDER STRETCHES
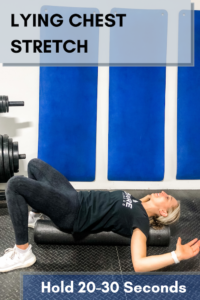
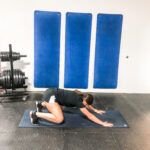
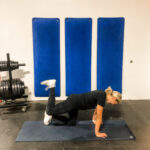
Lying Chest Stretch
Lying on a bench or foam roller (Foam Roller), be sure it is centered on your back and you have room to let your arms hang off over the side. Have your core tight and back pushed into the surface you are on (this can also be done on the floor). Let your arms fall out to the side, keeping your elbows bent at 90 degrees. You should feel a great stretch in your chest.
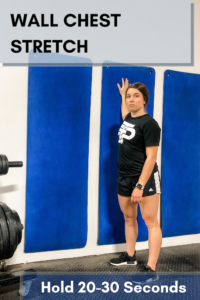
Wall Chest Stretch
Stand next to any wall with your side facing the wall. Place your hand closest to the wall on it with your elbow bent. Within your range of motion and comfort level slowly rotate away from the wall until you feel a light stretch in your shoulder/chest. Be sure not to try and push your range of motion past what you have.
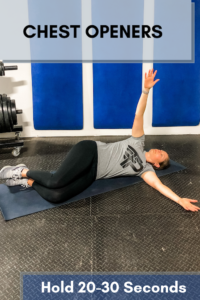
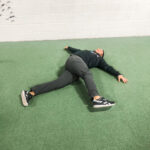
Chest Openers
Lying on your side with your knees bent and legs stacked on top of each other, start with both your arms out in front of you also stacked on each other. Open up with the top arm to reach toward the floor behind you. It is important to keep this arm in line with the other one. Again, be sure you do not push your range of motion past what you have.
HIP STRETCHES
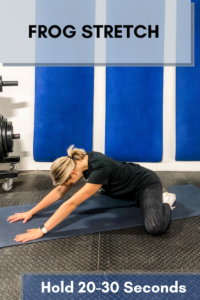
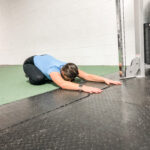
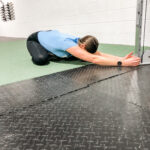
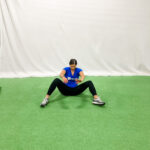
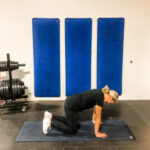
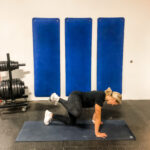
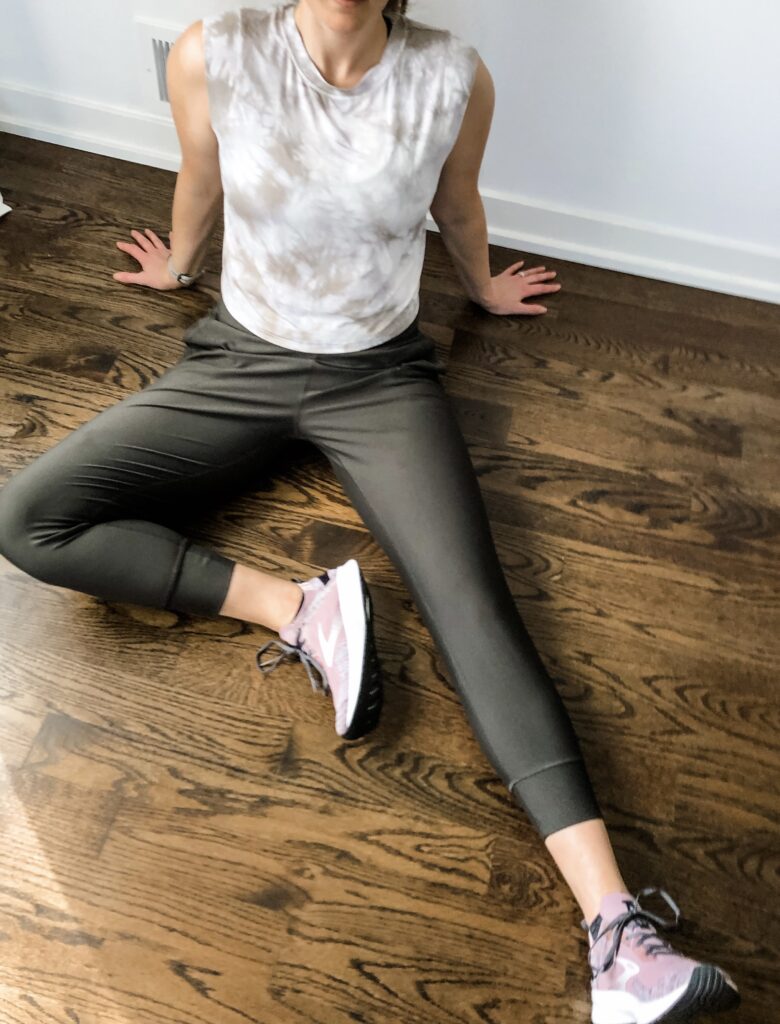
Frog Stretch
One of my absolute favorites for hips! Start by kneeling on the floor and then take your knees as wide as you can within your range of motion. Your feet (toes, mainly) should stay together as you do this. Reach out on the ground in front of you and allow your glutes to sink back into your heels.
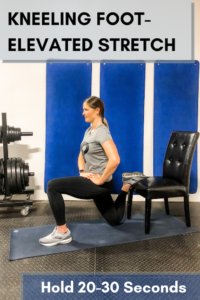
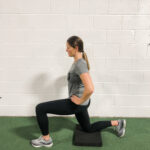
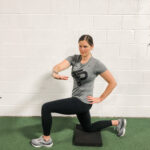
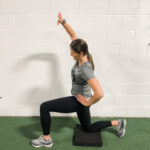
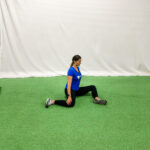
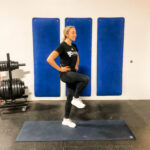
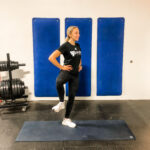
Kneeling Foot-Elevated Stretch
Grab a chair or coffee table, whatever height is comfortable enough for you to take a half-kneeling position and have your back foot on it. If you need a cushion for that knee use a stability pad or a blanket! Push your hips forward without arching your back and squeeze your glutes to get a great hip flexor stretch!
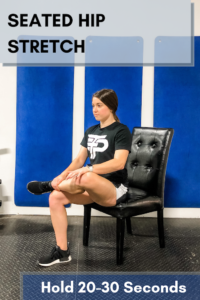
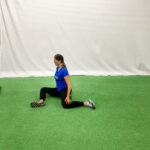
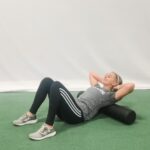
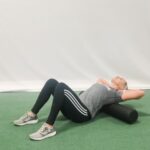
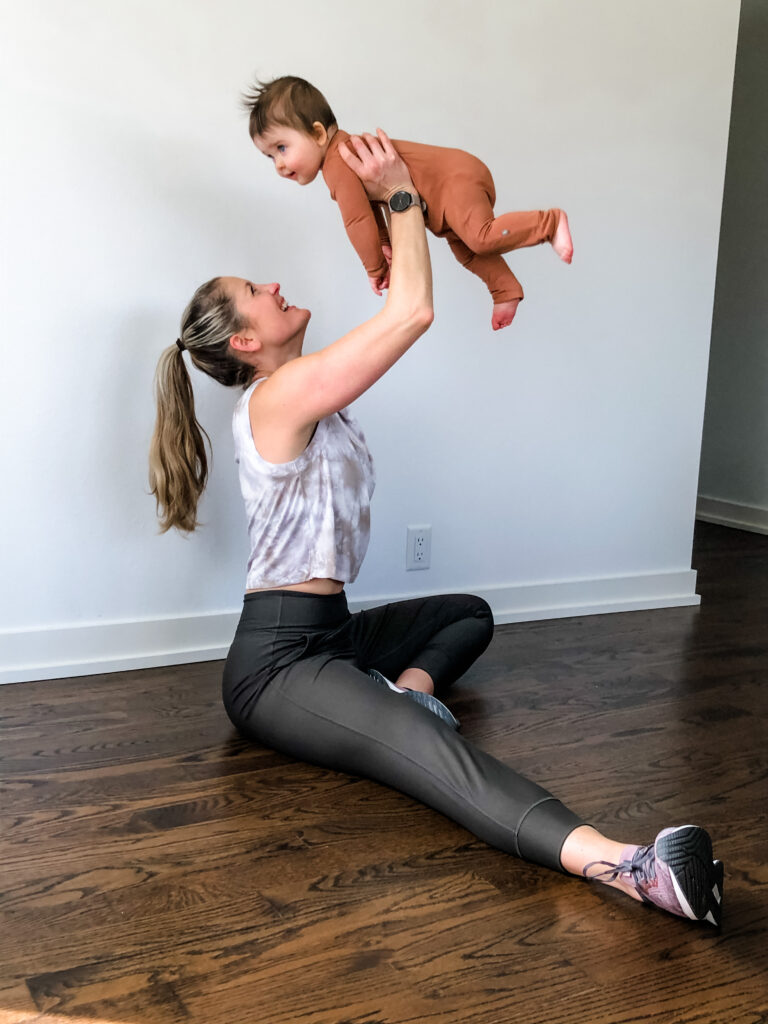
Seated Hip Stretch
Sitting on a chair, bring one leg up over the other just as you did for the seated crossover stretch. Instead of hugging that knee to your chest, you are going to push that knee down away from your body for a stretch in your hip flexor. Be sure to keep a tight core and neutral spine to not lean forward into the stretch.
RECOVERY TOOLS
All recovery tools below are used to accomplish myofascial release. Simply put this is an alternative medicine therapy used to treat immobility and tight muscles. By relaxing those muscles, through gentle sustained pressure, we can relieve pain and restore movement. The primary variations between products are in size, density and ergonomics.
These are a lot of different varieties on the market and tons of new ones coming out everyday. Some of them will absolutely be worth the money. Others could be a hoax. What we suggest to all of our clients is that if it sounds too good to be true, it probably is.
These are affiliate links. While there is no cost to you when you order through them, I do make a commission. Your support, by ordering through them, is greatly appreciated!
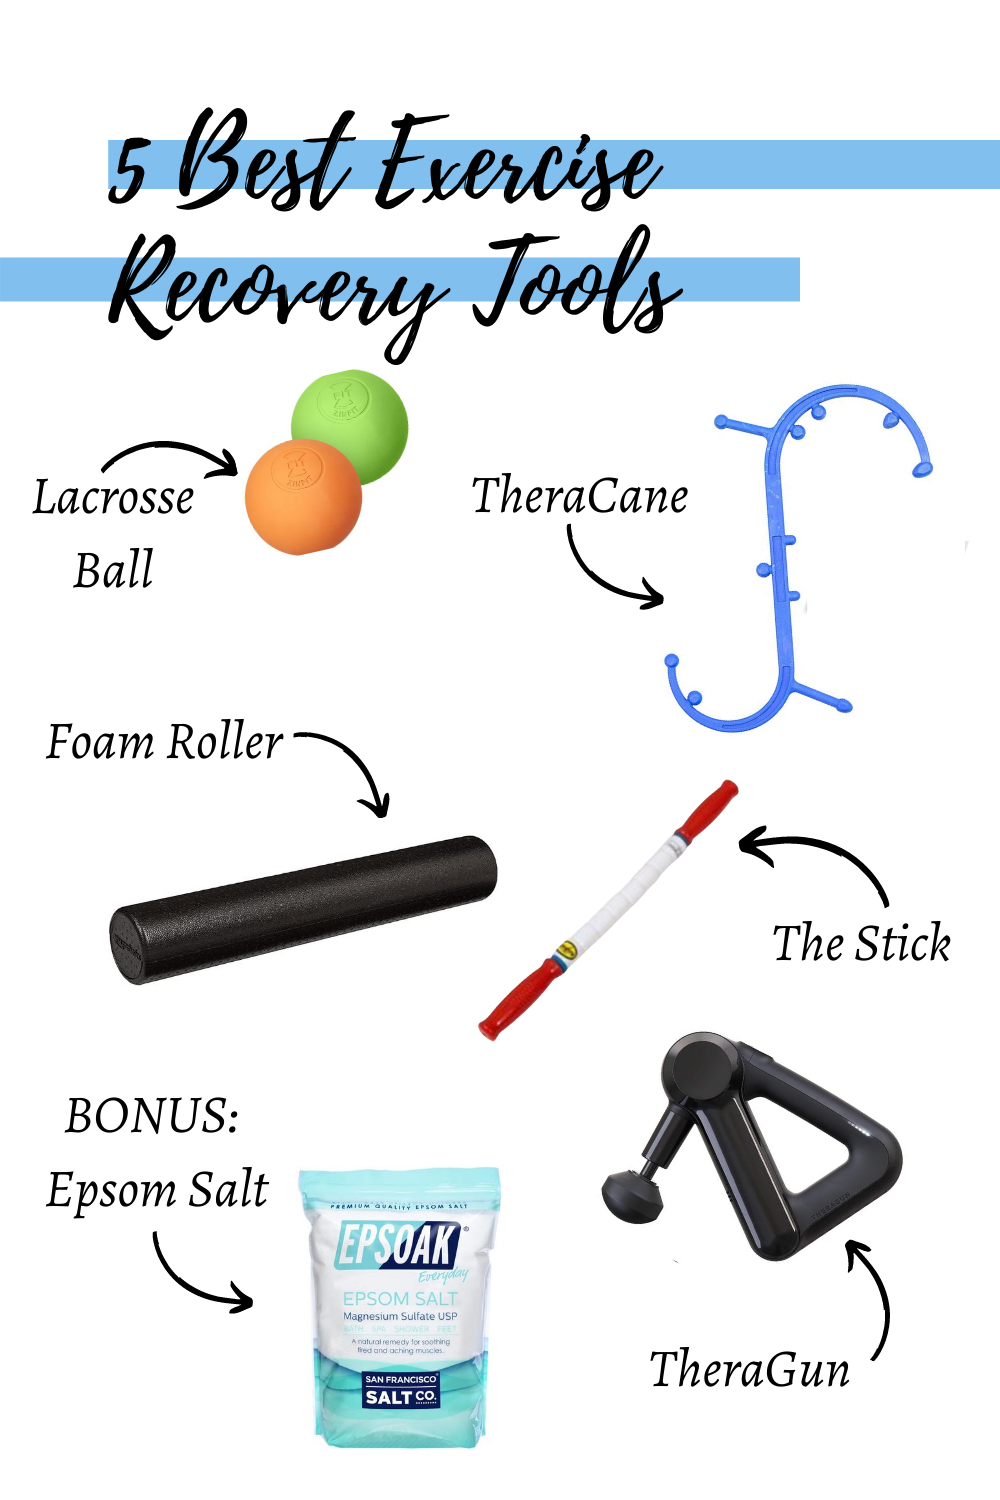
THERACANE
I still remember the first time I saw this recovery tool. I felt like I was looking at torture contraption. Then a very kind physical therapist showed me how to use it on my neck and back to release my tight muscles from working at a computer, swimming, volleyball, etc. I fell in love. I carry stress in my shoulders – from my traps to rhomboids. This baby squeezes in there and can hit all those tough to find spots that you ask your massage therapist to get to. But you are doing it all yourself! Easy to store under a bed or in a closet.
REASONS TO OWN A THERACANE
- Easiest way to target the neck and shoulders.
- Sleek design is easy to store.
Click here to see it on amazon.
THE STICK
I can’t emphasize this product enough for runners and volleyball players. As a runner myself nothing has been as effective as The Stick in targeting the tension in my shins and calves. As a former competitive volleyball player The Stick was great to have on hand during long tournaments. Very effective for the large muscles in the lower body – quads & hamstrings. For on the go muscle tension relief this has been a go to for me. It easily fits in a gym bag or backpack. Making it a perfect companion for most sports.
REASONS TO OWN THE STICK
- Great for targeting the lower body, especially for runners.
- Easy to travel with – gym, competitions, vacation.
Click here to see it on amazon.
FOAM ROLLER
This is a stand by that I would recommend everyone have. It can not only be used for myofasical release, but also for mobility. You can check out our YouTube channel for mobility and recovery workouts focused on using a foam roller. We like this foam roller because it is high density, but that may not be everyone’s preference. First timers to foam rolling may find this too hard, that it is uncomfortable. Try to control your pressure on it and know that it gets better with time. Under $30 and highly functional.
REASONS TO OWN A FOAM ROLLER
- Versatility – both mobility and myofasical release.
- Effective – tons of data to support the use of a foam roller to improve muscle tension.
Click here to see it on amazon.
LACROSSE BALL
Simple and effective we keep a bag of lacrosse balls in our gym. I even keep one in my training bag. And I gave them as stocking stuffer gifts to my family two years ago. The size and firmness is effective at reaching deep muscles and pin pointing tight muscles. It is amazing on the arches of your feet. Low cost investment, easy to store and highly effective.
REASONS TO OWN A LACROSSE BALL
- Size – small enough to travel, easy to store (and lose) but highly effective at targeting small or deep muscles.
- Doubles as a dog toy 😜
Click here to see it on amazon.
THERAGUN G3
I would consider this the “cadillac” of recovery tools. It carries the highest price point by far, but it also has the ability effectively target your entire body. The changing attachments allow you to reach large and small muscles all over. If I had to name a draw back, you can’t easily use this on your back yourself. But I’m sure your housemate, spouse, or workout buddy would be glad to trade “massages”.
REASONS TO OWN A THERAGUN
- Percussive technology – a new approach to myofasical release that is easier to “administer” than most other recovery tools.
- Various attachments that allow you to work muscles, large and small, all over your body.
Click here to see it on amazon.
BONUS – EPSOM SALT
Personally, I would volunteer for a bath at any moment of any day. So why not maximize my time in the bath with some epsom salt to help pull tension out of my muscles? Just kick back and enjoy the bath! Remember to drink plenty of water if you take a hot bath. Hydration is an important part to recovery during training.
NUTRITION
There is a lot of information out there saying drink this, eat that and promising some incredible results for sports performance and weight loss. In fact there is so much information that I think we have actually lost sight of food. We have lost sight of the joy of cooking. The joy of sharing a table with family and friends. The joy of food.
Yes, it is true. Food is fuel. We literally need it in order to keep our body running.
And yes, there is an entire science built around nutrition for peak athletic performance, nutrition that can treat the sick, and the nutrition we need to survive just to name a few. However, food is so many other things. It is social … creative … delicious.
On a macro level your body needs carbohydrates, proteins and lipids (fats). And when you workout you deplete your carbohydrate stores. Which are in high demand to continue functioning the rest of the day. Your muscles also breakdown under the stress of exercise and protein repairs and builds them. So after a workout you should be consuming both carbohydrates and protein to help your body recover.
That’s it.
I truly encourage you to keep it simple. Find some balance. And most of all have fun with food.
OTHER VARIABLES
This by no means is an exhaustive list. Rather these are areas of recovery that I am educated enough to speak on and that I think are actionable items. Other variables to consider in your workout recovery could be things like sleep, stress, hydration and total training volume.
Nutrition is also a large component of recovery that I touched on, but it is a science of its own and I am no expert. If you have put your best foot further in all the other variables and can’t seem to nail down recovery or maybe even progress in the gym I would highly recommend speaking with a registered dietician.
MANAGING LOW BACK PAIN
One of the most common complaints I hear from my clients is low back pain or discomfort. And do you know what? The majority of them just need a stretching and recovery program to offset their lifestyle.
I have seen the most relief from incorporating a recovery program that focuses on the muscles above and below the hip. There are a decent number of muscles that are in or around your hips – 4 quad muscles, 3 hamstrings, 4 glute muscles, adductors, abductors, not to mention the muscles of the low back like your QL, lats and erector spinae and more.
Our body is one big chain reaction, inside systems and between systems. Since we are talking about the muscular system, let’s look at physical habits. When we do one habit chronically our body will have a chronic response and overtime this can cause problems, think regularly sitting for extend periods of time.
When we sit our hips and, therefore, the anterior muscles are put into flexion. That means that there is a reaction in the body where the opposite happens. In this case is it extension (the opposite of flexion) of the posterior (the opposite of anterior) muscles of the hip. When we stay in that position for regular and long intervals the muscular starts to adapt.
The muscles in flexion start to shorten. The muscles in extension start to lengthen. So you get tight in the front and loose in the back. This change in tension impacts the position of the pelvis. Which in turn creates another chain reaction. And often times you end up with low back pain.
If you are experiencing low back pain I suggest you take stock of your daily habits and see what can be adjusted to avoid chronic habits that may be negatively impacting you. In addition, I would encourage you to add activities like foam rolling, joint mobility and stretching to your week.


How to Balance Parenthood and Fitness Without Losing Your Mind
read more

Debunking Common Fitness Myths to Get Real Results
Sorting Through Fitness Myths: What Really Works? If you’ve ever tried to get fit, you’ve probably encountered a flood of conflicting information. One day, carbs are the enemy; the next, they’re essential. Some say cardio is the best way to lose weight, while others...

How Personal Trainers Can Compete with Established Trainers
Starting as a business as a personal trainer can feel overwhelming, especially when competing with experienced trainers who already have a strong client base. Thankfully, with a few marketing tips, an intentional plan and consistency you can build your reputation and...


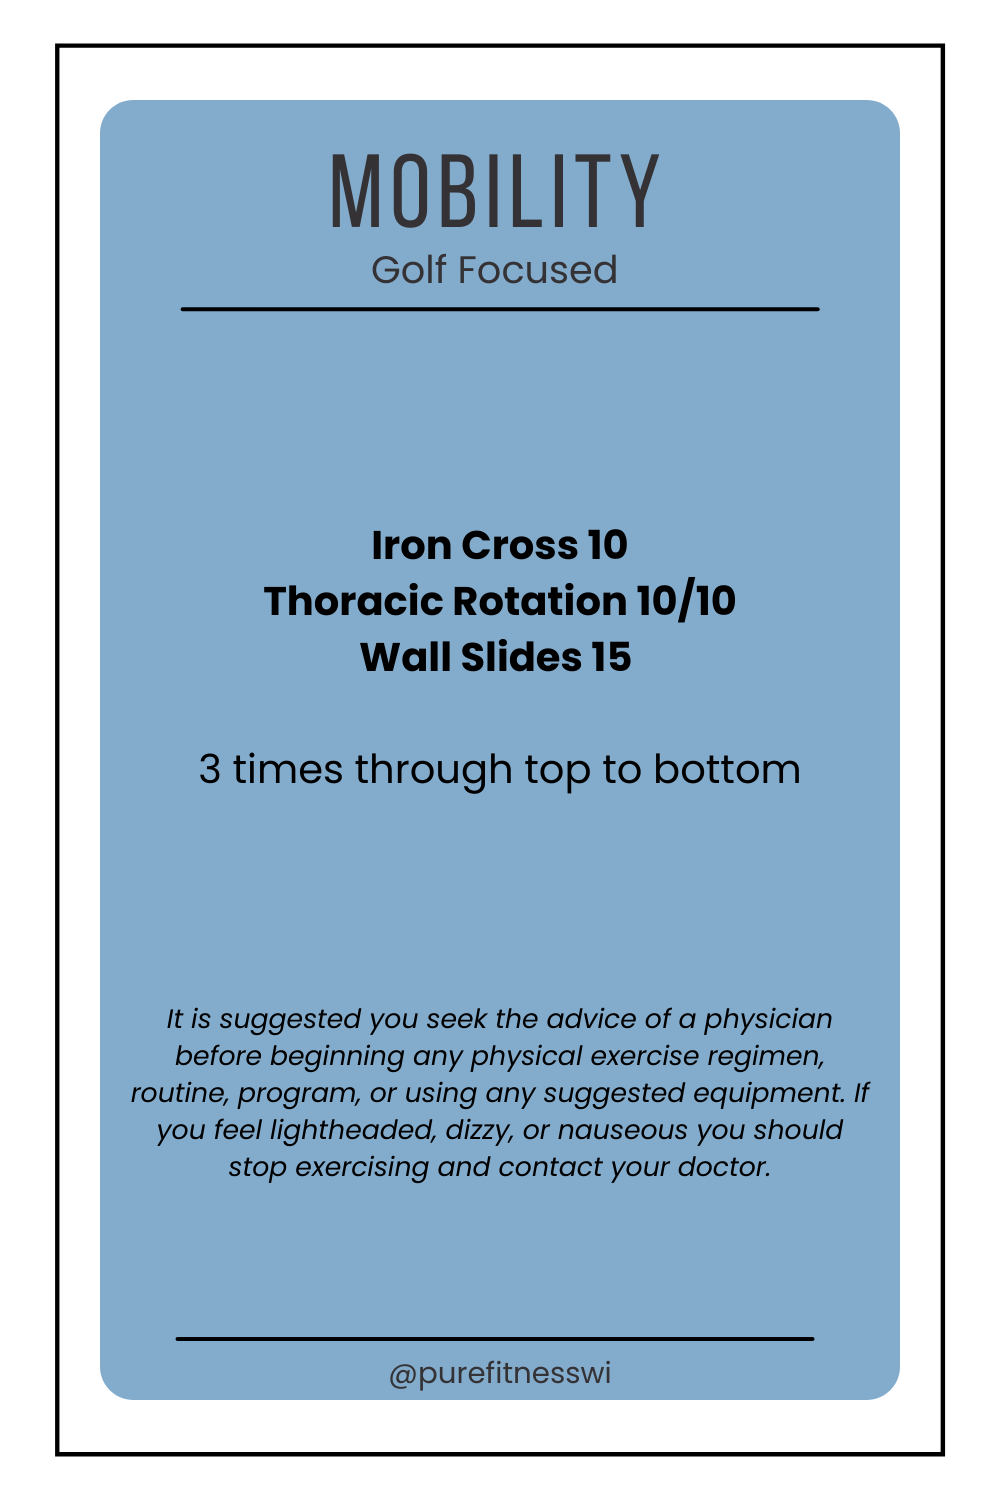
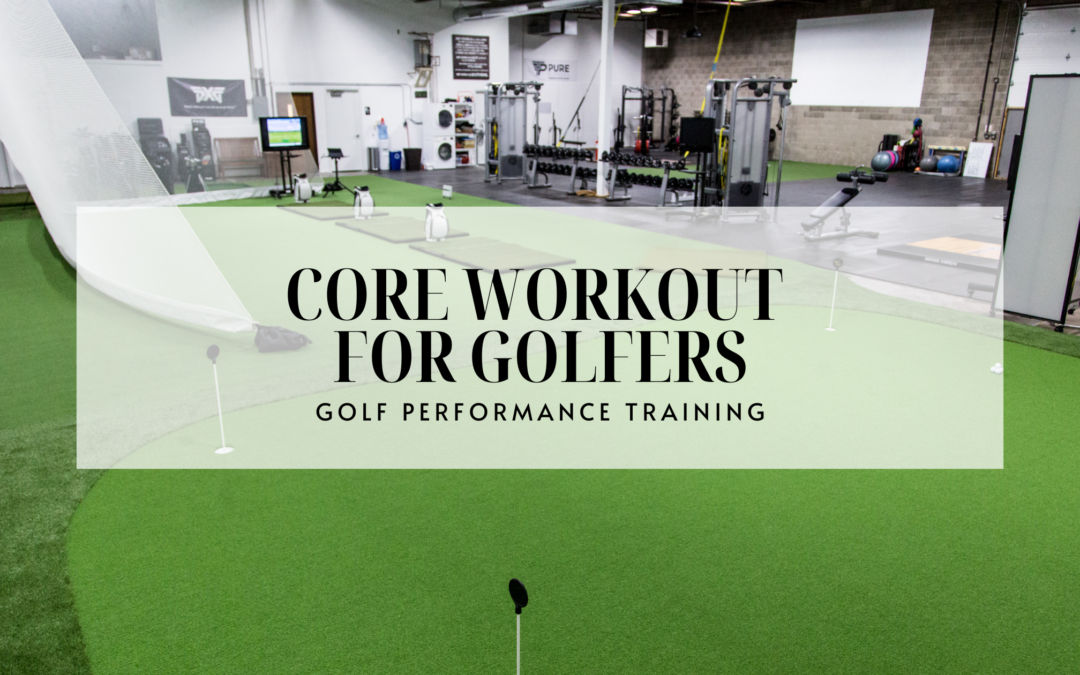
 There are two top reasons why if you want to positively impact your golf game you should be training your core. And they are the two most common reasons golfers come to see us. They want to relieve back pain or stiffness that they have before playing golf and worsens as they play, or that starts as soon as they swing a club a few times, or that knocks them out of commission for a few days after playing a round.
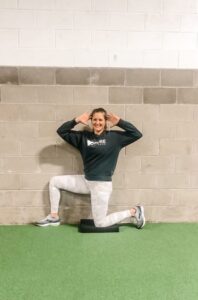 As discussed above golf is a rotational sport, starting from the ground up. So when we are looking to take power from the very bottom of our body and release it through our upper body there are a lot of transfer points.