Building a thriving personal training business is no small feat, and for many trainers, the fear of not attracting enough clients is all too real. Consistently bringing in new clients while keeping current ones loyal is the key to growing your fitness business and...

Creating Brand Loyalty as Trainer
Standing out in the market is important. And offering a competitive service and price are effective at capturing customer’s attention. But taking that attention and turning it into repeat clients with brand loyalty is critical to your long-term success. So let’s discuss key steps you can take for creating brand loyalty as a personal trainer.
- Establish your brand // Build brand awareness.
- Deliver your brand // Grow your brand.
- Earn referrals // Create brand loyalty.
HOW TO ESTABLISH YOUR PERSONAL TRAINING BRAND
You can think of a brand as an identity. It is more than what is on the outside – it is the experience. What is the culture, the vibe, the feeling you get from walking into the building, seeing your trainer and working out.
Creating a brand is done with intention. Research the market – who is your target market and who are your competitors? Where can you speak to your target market? How are you different than your competitors?
Then, answer the question, why should your ideal client pick you?
And you have found your message.
Get your message out into the community and start building brand awareness. Let your clients experience your message and grow your brand.
RESOURCES TO SHARE YOUR BRAND
- Website / Online Listings
- Social Media
- Community Organizations / Publications
- Email Campaigns
- Events / Open House
If you are already an established personal trainer looking to change your current career trajectory. You might want to consider some new ways to improve your career satisfaction.
HOW TO CONSISTENTLY DELIVER A BRAND EXPERIENCE
Have a system. Keep yourself accountable. Do the little things.
Working in a system to onboard new clients, evaluate client progress, maintain records, and communicate with clients will make you more successful. Keep yourself organized so you spend less time managing and more time delivering. And set firm boundaries that define your clients experience and use the system to ensure they are held.
Remember personal training is a relationship based job, cultivate strong relationships as an extension of your brand.
STANDARDS YOU CAN SET
- New client inquiries are answered within 48 hours. Making an impression before you even have made them a client.
- Have branded paperwork and a process for before, during and after a clients first session.
- Follow-up with your clients, answer texts/e-mails, and research additional information.
WHY EARNING REFERRALS IS AN INDICATOR OF BRAND LOYALTY
Only a client with brand loyalty will be referring you new business. Having your clients act as brand ambassadors, getting your name on the minds of people in the community, sending you referrals is an effective way to gauge your success as a personal trainer.
Asking for referrals can be awkward, which is why I believe in sharing with your clients what you need. By simply telling them you are looking for 1-2 new clients, or have a specific time slot that opened up can trigger a referral.
SELF-EMPLOYED VS EMPLOYED
In our industry, clients are generally loyal to a trainer and not a gym. So whether you work for yourself or someone else, your brand loyalty is important.
But both of those career paths have obstacles. Pure Fitness is offering a new opportunity to personal trainers. A cost-effective way of owning their own business. To truly take control of the career growth and earning potential through a studio rental. And minimize overhead expenses, alleviate a lot of financial risk and stress associated to ownership and allows full control over their business.
If you are in the Milwaukee area use the contact form below to get more information.
MORE DETAILS
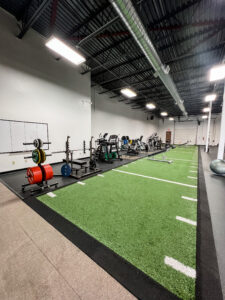
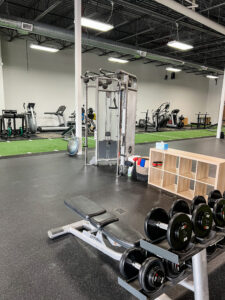
A monthly lease payment at Pure Fitness covers all overhead expenses, we guarantee there will be no surprises. Rent, internet, cleaning, garbage, landscaping/snow removal, music, utilities and more are all covered in the monthly payment. It also gives you access to your own dedicated, fully equipped training space and a common area with cardio equipment and additional strength training equipment.
GET MORE INFORMATION


How Personal Trainers Can Attract Clients Consistently
read more

How to Maintain Golf Fitness During the Off-Season
The off-season is a crucial time for golfers to focus on maintaining and even improving their fitness levels. Staying in shape during this period not only helps prevent injury when the season resumes but also gives you a competitive edge. We are going to walk through...

Effective Workouts for Busy Women: Stay Fit with Limited Time
Does anyone know why it is so easy for us to identify the reasons NOT to do something? If you asked someone what are some reasons working out is hard for you, they could list 10 reasons in 30 seconds. “I work long hours, I have kids, gym memberships are expensive,...
10950 N. Buntrock Ave, Mequon, WI 53092