Let’s be honest: parenting is an all-consuming 24 hour role with no breaks. Between school drop-offs, meal prepping and cooking, laundry piles, and trying to keep tiny humans alive, finding time for yourself feels like a luxury. And if you are like me, you can think...
TRAINING YOUR CORE FOR GOLF PERFORMANCE
In a previous article we discussed training your legs to put power behind your swing and distance on the ball. If we follow along the kinematic sequence of the golf swing we should discuss the importance of training your core for golf performance. I am not talking about crunches and six packs. Rather the transfer of power, range of motion, stability and rotational strength.
WHY TRAIN YOUR CORE FOR GOLF PERFORMANCE
 There are two top reasons why if you want to positively impact your golf game you should be training your core. And they are the two most common reasons golfers come to see us. They want to relieve back pain or stiffness that they have before playing golf and worsens as they play, or that starts as soon as they swing a club a few times, or that knocks them out of commission for a few days after playing a round.
The second reason is distance. Golfers always want to add distance on to their swing. Spoiler alert – consistency is the only way to get here. Work a properly developed program with intention discipline and you will see distance. Don’t jump around from new idea to new idea thinking there is a short cut or the next greatest thing will be the answer. Now, lets dive into this a little more.
PROTECT YOUR BACK
One of the most common compensations our bodies make is for the muscles in the low back to turn on and handle a work load that is suppose to be covered by the core. Generally speaking this is a result of a weak core and/or flexibility issue, which could be the result of a chronically weak core or poor posture or prolonged sitting. But back to golf.
Golf is no exception. A weak core or poor flexibility/ range of motion can and will lead to low back pain. Appropriately training your core for range of motion, stability and then strength is essential to relieving back pain and improving your golf performance.
This brings us to the second reason to train your core.
CORE IS THE KEY TO ROTATIONAL STRENGTH
That statement, “core is the key to rotational strength”, can seem a bit obvious because clearly the core has to be strong to have strength. But there is so much more to it. Simply put the muscles used to rotate the body through the mid section will be limited in their strength abilities due to their size, purpose and range of motion. One of their true intentions is to create stability for the rest of our body. To be the foundation on which movement is built.
If we really want to be able to produce a lot of power in a rotational capacity additional muscles are going to be required. That why we discussed the importance of training your legs for golf performance last week. Power is developed from the lower body and transferred through the core. The more stability the core has the more power it can successfully transfer. And the more power transferred the more rotational strength you will have.
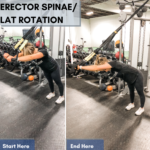
Your core, thinking shoulders to hips, really needs to have great range of motion + stability first. We spoke about disassociation in our last article. But it become extremely important in the core, since that is where the movement is occurring. Proper range of motion at your T-spine is needed for rotational strength.
FLEXIBILITY, STABILITY + POWER
 As discussed above golf is a rotational sport, starting from the ground up. So when we are looking to take power from the very bottom of our body and release it through our upper body there are a lot of transfer points.
Proper flexibility will allow the golfer to get into the ideal range of motion to have the potential to generate maximal power. Ensuring that there is immense stability within that range of motion is essential to successfully transferring power.
The core is the main transfer point between the upper and lower body. Ensuring range of motion (flexibility) and stability here is necessary to get all of the power from your lower body to the club. And you have to consider more than just ab muscles and crunches.
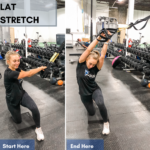
Tight hamstrings will limit your ability to get into your back swing. This will decrease your range of motion and therefor ability to generate power. Poor thoracic rotation, which can be limited by a number of muscles, directly hinders your ability to access rotational strength. Your shoulder mobility will also impact how you swing a club and the demands placed on muscles. We often see low back pain stemming from poor shoulder mobility due to compensation in the swing.
When we put together a periodized program for our golfers we are looking at it from three perspectives – flexibility, stability and power. These are the pillars of our training philosophy. All three work synergistically to get the most out of your performance. A limitation in any one of them is a limitation in all of them..
We covered the basics – flexibility, stability and power – in our Pure Forged Method Series. Take a look at this article, Golf Fitness Training, for a broad overview of the topic and links to specific exercises and programs.
HOW TO TRAIN YOUR CORE FOR GOLF PERFORMANCE
This is no longer a secret, hopefully. We try to hammer it home in everything we write. To properly train for ANYTHING you need to follow the progression of range of motion, stability and then strength. Go read the sections above again and click on some of the links if you aren’t sure you understand.
Now within each of those steps your program should consider training in all planes of movement (sagittal, frontal + transverse) and using all types of muscle contractions (concentric, eccentric + isometric) to access the full potential of the muscular system. As you progress the complexity of movements and physical demands will increase to continue challenging the three pillars.
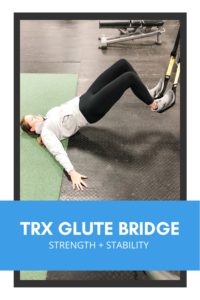
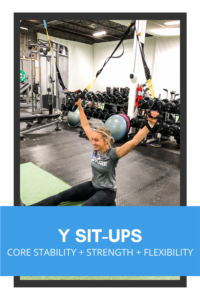
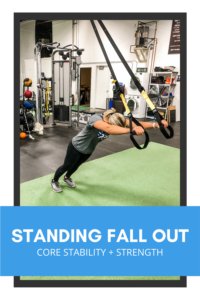
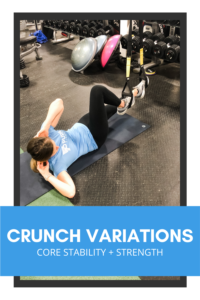
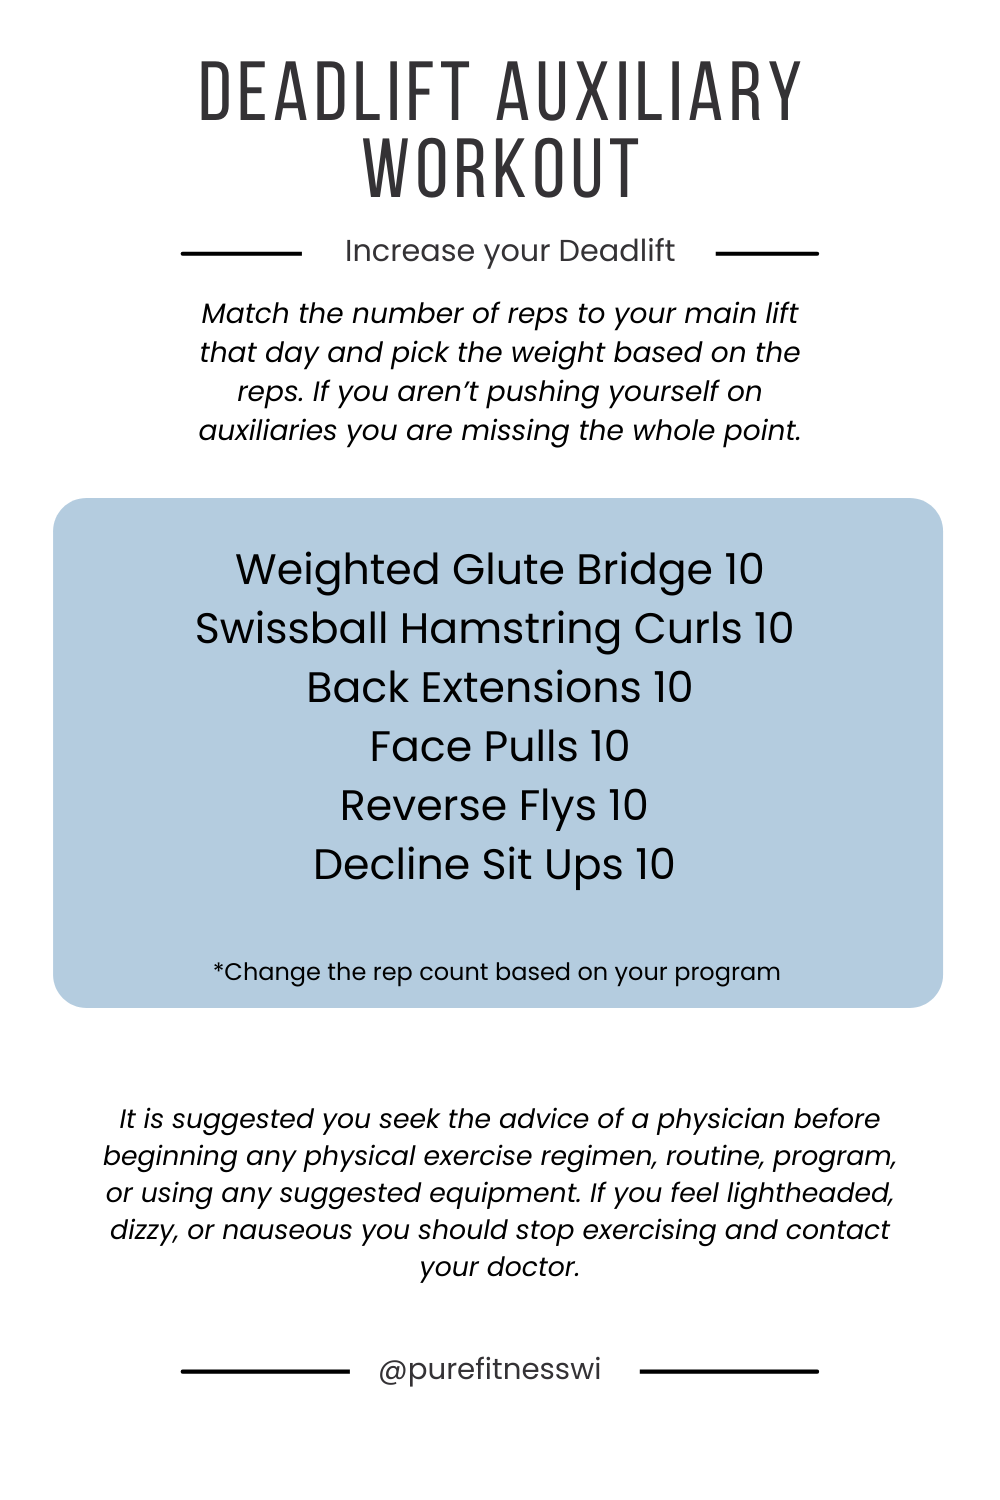
Take a look at some of our preferred exercises for disassociation and core below. Keep in mind that we like to manipulate these movements to work in various planes of movement and muscle contractions. What is listed below can be considered an outline. You want to be working in a periodized program tailored to your individual needs.
You can find our simple guide to golf performance training in our Pure Forged Method. We break it down into 3 steps mimicking the three pillars. Start here with step 1.
If you aren’t sure where to start with your own program reach out to us using the contact us button. We would love to help.
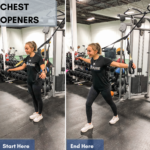
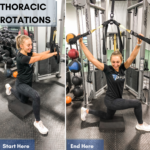
EXERCISES FOR DISASSOCIATION
Remember that the intention of disassociation drills is to get your upper and lower body to rotate independently of each other. So keep your shoulders still and rotate your hips or vice versa. If you can’t do it standing make establishing that range of motion a priority in your programming.
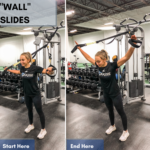
- Kneeling Cable Pull to Push
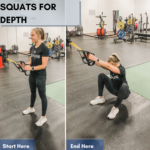
- Split Stance Straight Arm Core Rotator (BOSU optional)
- Hanging Side Tucks
Eccentric CORE Exercises
Keep in mind that in order to really maximize this phase of the muscle contraction you want to work slow and controlled on a 5 count during the muscle lengthening phase.
- In to Out Core Rotator
- Negative Decline Sit-Ups
- 5 Count Out Ab Wheel
Concentric CORE Exercises
You should always be exercising with control and focus. Make sure you are aware of your form and muscle activation to ensure proper muscle loading and firing patterns.
- Straight Bar Swing Rotation
- Flexed Hang Kick-Ups or Tucks
- Cable Pull to Push
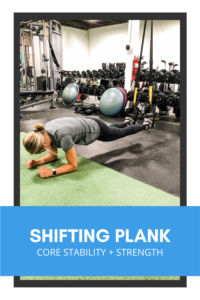
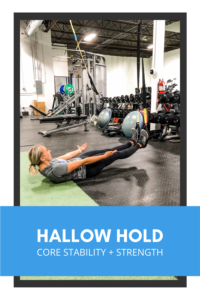
Isometric CORE Exercises
A true isometric exercise has no movement at the intended muscle. The contraction is simply being held – no additional lengthening and shortening allowed.
- BOSU Plank (feet on)
- Paloff Press (held in arm extended position)
- Decline Bench Hold with MB Press


How to Balance Parenthood and Fitness Without Losing Your Mind
read more

Debunking Common Fitness Myths to Get Real Results
Sorting Through Fitness Myths: What Really Works? If you’ve ever tried to get fit, you’ve probably encountered a flood of conflicting information. One day, carbs are the enemy; the next, they’re essential. Some say cardio is the best way to lose weight, while others...

How Personal Trainers Can Compete with Established Trainers
Starting as a business as a personal trainer can feel overwhelming, especially when competing with experienced trainers who already have a strong client base. Thankfully, with a few marketing tips, an intentional plan and consistency you can build your reputation and...