STATIC STRETCHING
When we talk about range of motion we are talking about the movement allowed at a joint. There is a standard range of motion that a joint can produce and it does vary. For example the elbow is a hinge joint and has a range of motion based on flexion and extension. Where the hip joint is a ball and socket allowing for circumduction, which includes flexion, extension, adduction and abduction.
We use mobility and flexibility training to change our range of motion to alleviate pain and improve performance. To simplify things think mobility exercises address the joint, flexibility exercises (stretching) address the muscles, and mobility and flexibility work synergistically to improve range of motion.
There are also many different types of stretching – static, dynamic and pre-contraction. Of course there are also sub categories to those types. For the sake of this article we are looking at static stretching, where a stretch (or muscle lengthening) is being held for a period of time.
Static stretching is either active or passive. You can translate that to be being done by yourself or with assistance. The assistance you use can be a wide variety of things like a strap or another person.
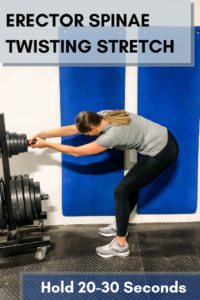
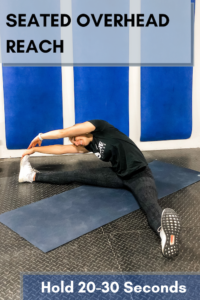
The maximal benefit comes from holding a static stretch for 20-30 seconds each. And following posture guidelines and listening to your body (aka avoiding pain) are necessary to see results in your flexibility, mobility and pain relief.
TRACTION STRETCHING
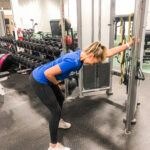
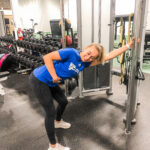
Traction stretching is a type of passive static stretch where by holding onto an object you create traction at the desired joint stretching the associated muscle(s). A good example of this is a lat traction stretch where you hold onto an object with one hand, bend your knees, and shift your hips backwards to provide traction at your shoulder as you hold on to the stationary object. Rotate your shoulders as needed to find the best stretch.
Traction stretching is highly effective for muscles of the upper body where you can use your hands as anchors.
LOW BACK STRETCHES
*Disclaimer! If you have a diagnosed herniated disk or other spinal problems, that is much different from the muscles in your low back being tight! It is also wise to look to your hamstrings first. If they are tight, stretching them will also help your low back.
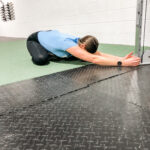
Erector Spinae Twisting Stretch
This one is sure to feel amazing on low back. Holding on to a pole, chair, or anything you have at home, bend forward with your chest parallel to the ground. Rotate your hips to one side. The leg that is on the open side should have the straighter leg while the other one bends. You should feel the stretch on the side you are opening up to.
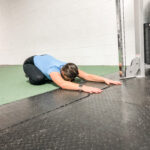
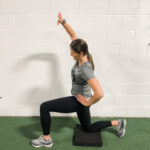
Seated OH Reach
This is one of my personal favorites for targeting my lower back. I always feel like it targets that exact spot I need. Seated with legs spread apart (only at your comfort level). Place both hands overhead. Reach toward one toe or however far you can reach. Focus on the top arm to get the most stretch through your lat and lower back.
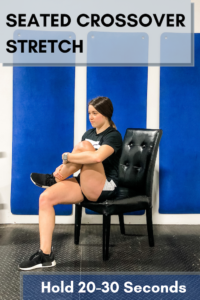
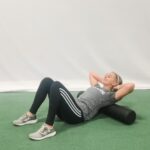
Seated Crossover Stretch
Seated on a chair, sit with your legs about shoulder width apart and bent at 90 degrees. Take one leg and place the ankle of it on top of the other leg. Proceed to pull your knee toward your opposite shoulder. You should feel a stretch through the top of your glute to your lower back. If you need more of a stretch, walk your bottom foot outward a bit.
SHOULDER STRETCHES
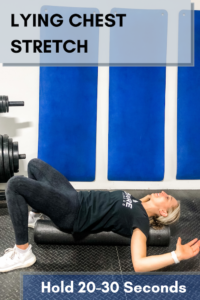
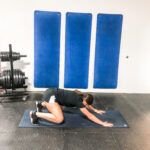
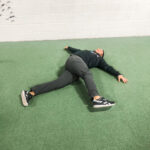
Lying Chest Stretch
Lying on a bench or foam roller (Foam Roller), be sure it is centered on your back and you have room to let your arms hang off over the side. Have your core tight and back pushed into the surface you are on (this can also be done on the floor). Let your arms fall out to the side, keeping your elbows bent at 90 degrees. You should feel a great stretch in your chest.
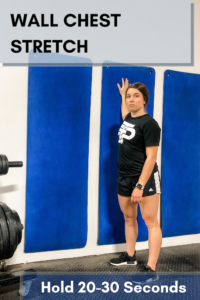
Wall Chest Stretch
Stand next to any wall with your side facing the wall. Place your hand closest to the wall on it with your elbow bent. Within your range of motion and comfort level slowly rotate away from the wall until you feel a light stretch in your shoulder/chest. Be sure not to try and push your range of motion past what you have.
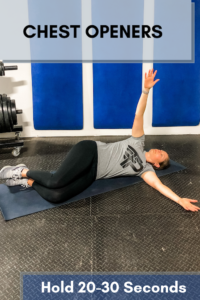
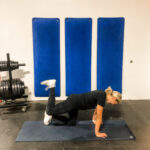
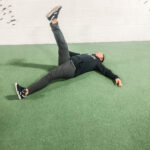
Chest Openers
Lying on your side with your knees bent and legs stacked on top of each other, start with both your arms out in front of you also stacked on each other. Open up with the top arm to reach toward the floor behind you. It is important to keep this arm in line with the other one. Again, be sure you do not push your range of motion past what you have.
HIP STRETCHES
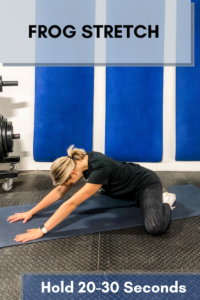
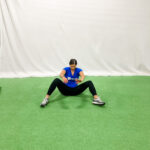
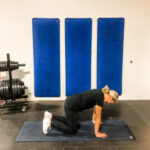
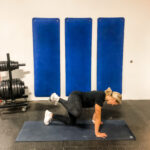
Frog Stretch
One of my absolute favorites for hips! Start by kneeling on the floor and then take your knees as wide as you can within your range of motion. Your feet (toes, mainly) should stay together as you do this. Reach out on the ground in front of you and allow your glutes to sink back into your heels.
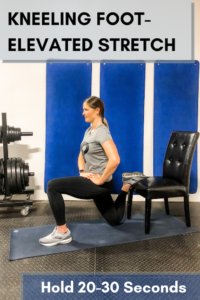
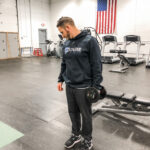
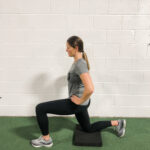
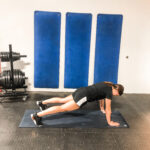
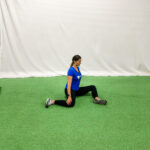
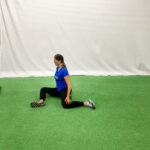
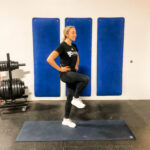
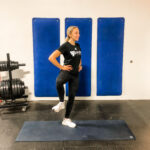
Kneeling Foot-Elevated Stretch
Grab a chair or coffee table, whatever height is comfortable enough for you to take a half-kneeling position and have your back foot on it. If you need a cushion for that knee use a stability pad or a blanket! Push your hips forward without arching your back and squeeze your glutes to get a great hip flexor stretch!
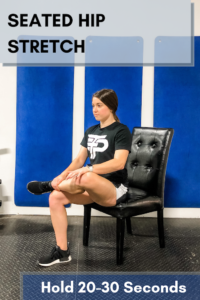
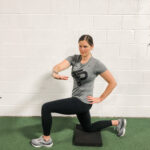
Seated Hip Stretch
Sitting on a chair, bring one leg up over the other just as you did for the seated crossover stretch. Instead of hugging that knee to your chest, you are going to push that knee down away from your body for a stretch in your hip flexor. Be sure to keep a tight core and neutral spine to not lean forward into the stretch.