30 Minute Workout Program

30 Minute Workout Program

I have a great workout program for you. You can scroll down if you aren’t interested in why I made this program. But it you are let’s have a quick chat.

Why is it easier to skip a workout than to actually do the workout?

In my opinion it has a lot to do with how you frame the workout. More specifically, what your expectations and perceptions are.

EXPECTATIONS AND PERCEPTIONS FOR YOUR WORKOUT

  1. Stop watching other people and comparing yourself. Instead of getting caught up listening to what everyone else is telling you to do, listen to yourself. Have a conversation with yourself about what you want (expectations) and how you can get there (perception).
  2. Keep it simple. I found that what worked for me and my clients was simple. Literally, simple workouts without all the pizzaz that has become popular. No hype. No one-upping. Just consistently showing up and putting in the work.
  3. Keep your focus on the long-term and work with consistency. Make a realistic plan. Focus on small steps towards the big goal and be realistic about your time frame.

THE EASY WORKOUT PROGRAM

The solution I created were three easy and simple workouts that I knew my clients could do. Truly, an answer for those seeking guidance on their own. I also wanted them to be scalable, meaning a variety of fitness experiences and levels could use it.

They can be used at home or at the gym. And are each 30 minutes long.

I have is almost 15 yeas of industry experience as a trainer and gym owner. And a passion to share what I have learned with you. Take a look below.


Fit Finds: The Ultimate 2023 Fitness Gift Guide

Fit Finds: The Ultimate 2023 Fitness Gift Guide

Welcome to the world of fitness and wellness gifting! As we gear up for 2023, it's time to start setting goals and looking for resources to help us succeed. Whether you're a fitness fanatic or seeking the perfect gift for one, our Ultimate 2023 Fitness Gift Guide is...

read more
The Power of Social Proof In Personal Training

The Power of Social Proof In Personal Training

In the world of personal training, where trust and credibility play pivotal roles, the concept of social proof functions as an authentic way to connect with your audience. Social proof, the influence created when individuals see others engaging in a particular...

read more

RESOURCES

BLOG

MONTHLY EMAIL

DIGITAL PRODUCTS

10950 N. Buntrock Ave, Mequon, WI 53092

One Month of Gym Workouts

One Month of Gym Workouts

One month of gym workouts with us three 🙂 . We love sharing our workouts and hearing how much you love them. Click each image to go to the workout video and workout with us!

Cheers,

Chellie

Fit Finds: The Ultimate 2023 Fitness Gift Guide

Fit Finds: The Ultimate 2023 Fitness Gift Guide

Welcome to the world of fitness and wellness gifting! As we gear up for 2023, it's time to start setting goals and looking for resources to help us succeed. Whether you're a fitness fanatic or seeking the perfect gift for one, our Ultimate 2023 Fitness Gift Guide is...

read more
The Power of Social Proof In Personal Training

The Power of Social Proof In Personal Training

In the world of personal training, where trust and credibility play pivotal roles, the concept of social proof functions as an authentic way to connect with your audience. Social proof, the influence created when individuals see others engaging in a particular...

read more

SUBSCRIBE

Click to sign-up for weekly information and offers.

DISCLOSURE

We are a participant in the Amazon Services LLC Associates Program, an affiliate advertising program designed to provide a means for us to earn fees by linking to Amazon.com and affiliated sites.

6 Exercises To Create A Stronger You Today

6 Exercises To Create A Stronger You Today

We use on a regular basis with our clients and that we think are very valuable. These 6 exercises to create a stronger you today when worked routinely will have a measurable impact on your fitness. Read how to do each movement safely and check out the downloadable workouts at the end for a place to get started.


TABLE OF CONTENTS

  1. Ab Wheel
  2. Bent Over Row
  3. Wall Sit
  4. High to Low Core Rotator
  5. Tricep Dip
  6. Band Walks
  7. Downloadable Workouts

AB WHEEL

The ab wheel is almost a standard in our gym. Not that everyone “should” be able to do it, but that it is an example of core strength and stability. Performing the ab wheel correctly, pain free is a benchmark that we can measure core strength by. Again, we do NOT use it with everyone, but healthy individuals, especially look for improve athletic performance you better bet your bottom dollar we do.

If those individuals can give 15-20 exceptional ab wheel reps then we hit them with some progressions. Like putting a weight on your back or performing the reps from your toes. Both show a high level of core & shoulder strength & stability.

HOW TO PERFORM AN AB WHEEL

First off you are going to need to have an ab wheel. If you don’t skip over to your nearest store or order one up off of amazon (affiliate link). Next up is something for your knees. We have the stability pads (affiliate link) that we use at the gym, but if you don’t have one on hand you can use a towel or pillow. I would 10 for 10 recommend the stability pad, we use it for so many exercises from core to balance. But I am against having a bunch of stuff laying around – so make sure you have a place for it. Otherwise grab the pillow of your couch and get going.

STEPS FOR AN AB WHEEL

  1. Start on your knees with the ab wheel on the ground under your shoulders.
  2. Brace your core and push from your knees and hands to move the ab wheel forward.
  3. Once you have reached YOUR maximal range of motion pull the wheel back to the starting position by equally pulling in from your arms and hips.

WHAT TO AVOID WHEN DOING THE AB WHEEL

In no way is this an “entry level” core exercise. Most common mistake we see is continuing to perform this exercise incorrectly. The exerciser either creates an issue (pain) or exacerbates one. Make sure you are strong enough by doing plenty of core exercises with great form, to failure.

  1. Arching low back or sagging butt – this is an ab exercise, brace your core!
  2. Only moving your arms – your torso should come forward with your arms.
  3. Only moving your hips/torso – your arms should extend forward at the same time.

TIPS FOR THE AB WHEEL

  • Control your pelvis. Arching in the low back is the number one cause of pain or discomfort with this exercise. It indicates that your abdominals are not staying engaged. Keeping your hips tucked can help you engage your low abdominals and prevent the low back from arching. But the more neutral spine you can stay the better.
  • Equal Movement. We want to see your hips and shoulders extending simultaneously in both directions. The movement should be smooth and equal.
  • Range of Motion. The end goal of this exercise is a full extension. However, that isn’t where you start. Most people will have to shorten their range of motion in order to keep their pelvis tucked/ back neutral and equal movement from the hips and shoulders.

CORE REGRESSION & PROGRESSION EXERCISES

With the ab wheel being an advanced core exercise you may need some other exercises to supplement. Try planks with upper body movements like shoulder taps and plank step-ups to work on strength in the end range of motion of an ab wheel. Sit-up variations on the decline bench or v-sit variations to work on hip flexor strength and low abdominals.

If you want to make the exercise hard you can work on angles out to the side, add a weight to your back or try from your toes. BUT we caution these moves unless you are truly doing 15-20 really high quality, full range of motion reps.

BENT OVER ROW

It may be a basic, simple, old exercise, but everyone should be familiar with a bent over row. And if you already know the bent over row, how many other back exercises can you think of? Hopefully 2 or 3 times as many chest exercises.

Training your back muscles should 100% be a priority during your workouts. We live in a forward dominant world – meaning life we do most of our activities in the front of our body. Exercise should work to maintain balance in our bodies, which means we need to do more back work to manage the impact of our lifestyle habits.

HOW TO PERFORM A BENT OVER ROW

Let’s start by recognizing the posture of a bent over row. It is important to understand that this bent over posture puts a large load on the core – back and abdominals. Maintaining core engagement while in this posture will help maximize your results and keep your back pain free.

Second piece about posture is that the more parallel to the ground you are able to get your chest the better. That is from the perspective that we want to load more of the mid back and less of the upper back. Of course, there will be times you want to load the upper back, but that’s not right now.

An added bonus for the bent over row is that it requires your lower body to work isometrically to hold the hip hinge posture.

Finally, because I can’t say the word posture enough … the bent over row will help improve your posture. Any back exercise, done properly, will help your posture. You will notice you stand up straighter, walk taller and have a more elongated appearance in the mirror. But, that will only happen by putting in the work and following a regular, consistent program.

STEPS FOR A BENT OVER ROW

  1. Holding weights at your hips, set your feet in a comfortable stance. Try to go no wider than shoulder width.
  2. Brace your core and slightly bend your knees.
  3. Hinge at your hips, keeping your core tight and your spine neutral as you lower your chest to parallel with the ground.
  4. Once in position the weights should hang directly below your shoulders (see picture).
  5. Pinch your shoulder blades together and “row” or pull the weights toward your chest.
  6. Control the weights back down to the starting position and repeat.

WHAT TO AVOID WHEN DOING A BENT OVER ROW

  • Arching & rounding of the spine/back.
  • Curling of the wrists.
  • Lifting chest out of parallel posture.

TIPS FOR A BENT OVER ROW

  • Focus on your shoulder blades, not the distance your weight travel. Retracting or pinching your shoulder blades as the first motion in a row is critical to recruiting your back muscles over your biceps. Try to “grab a pencil” between your shoulder blades to help visualize your shoulder blades retracting/pinching.
  • In a bent over, or hip hinged, posture you are increasing the demand on your trunk. Keeping a neutral spine and core engaged the entire time will keep your low back from becoming over worked. Work to keep your back parallel to the ground the entire time.
  • Keep your core braced and spine neutral through the entire movement. Tendency is to allow your back to arch as you pull the weight to your chest and round as you lower it towards the ground. Fight that tendency!
  • Far too often we see extension or arching in the mid-to-low back upon movement. This will cause irritation of the low back and decrease the use of your abdominals. Squeeze your core!
  • Change your grip and arm positioning to target your back differently. I like wide bent over rows with a palm down position and an underhand grip bent over row the best.

OTHER BACK EXERCISES AND BENT OVER ROW VARIATIONS

There are a significant amount of variations to a bent over row. Too many to name, but you can add a stability component and stand on single leg, you can make it unilateral and perform it single arm. You can do it from a plank position to increase the challenge on your core. Make your choice based on your ability to perform quality reps and the end goal (or adaptation) you are trying to achieve.

A few of the common exercises I use to train my back are pull-ups because there is no better exercise for your back. You may need to start with a modification (heavy seated row or lat pull down) or assistance, but being able to do pull-ups is an excellent measurement of back strength and overall fitness.

I also love reverse fly and bent over Ys because they effectively target the smaller posterior muscles of the shoulder that keep your shoulders back. Which translates to the appearance of walking tall or walking with confidence as you consistently hold your shoulders back, keeping your chest upright and open.

WALL SIT

The wall sit is an isometric exercise. If you are wondering what in the heck isometric is, or if it is even English, let me explain. Isometric is essentially a muscle contraction that produces no movement. In fact, you are likely doing isometric work in the form of a plank or a v-sit hold.

The biggest reason you should be doing isometric exercises is for the stability benefits. Whether you are a teenage athlete, avid runner or in the aging population stability is your friend. It should be your best friend.

You will also experience an improvement in muscle endurance by regularly incorporating isometric exercises. This is once again great for athletes, injury prevention and the aging body.

How to Perform A Wall Sit isometric exercise

  1. Find yourself a wall.
  2. Sit against it.

It really is that simple. However, we have some guidelines to follow or work towards.

  1. Try to get 90 degrees of flexion at your hips and knees. This depth mirrors a squat depth and has a direction translation to muscle fiber recruitment for proper muscle firing within the movement.
  2. Keeping your feet around hip width and knees over your ankles. We want to avoid excessive internal rotation, letting our knees knock in, and rolling onto the side of our foot, picking up our big toe, and lifting our heels off the ground. Focus on a consistent foot contact with the ground.
  3. Maintain contact with the wall at your head, shoulders, back and butt by bracing your upper body into the wall. This will make your wall sit more of a total body exercise and help the neurological connection between your lower and upper body in the squatting pattern.

What to Avoid when doing a Wall Sit

  • Lifting your heels off the ground (for a standard variation)
  • Letting your knees cave in
  • Rolling on to the outside of your foot
  • Leaning forward and rest your elbows on your thighs

Other Isometric Exercises and wall sit variations

A plank is a great upper body isometric exercise, but the sky is the limit. You can take any muscle contraction and make it isometric. Just think of an exercise you like. Here is a common one – a bicep curl. Simply hold the weight with your elbow(s) at 90 degrees. You can time the exercise, or do it while holding a lunge for an isometric lower body burn too. Alternately you could be doing a full reverse lunge and working the concentric and eccentric phase.

Here are a few of my favorite isometric exercises:

  1. Plank Variations: movement in the lower body like knee drives, pikes, scissors, kick throughs, or change the surface of the plank to be on a Bosu Ball, medicine ball, stability ball.
  2. Wall Sit Variations: add movement in your upper body with resistance bands or free weights, hold a medicine ball between your knees, march or wear a band and use your glutes to drive into the band.
  3. Upper Body Variations: chin up hold, flexed arm hold, single arm hold and perform reps with the other arm (ex – bench press with one arm locked out at the top).
  4. Lower Body Variations: split squat position, hold the bottom position of a RDL, glute bridge hold (optional single leg), calf raise hold, single leg squat with alternating toe tap.

HIGH TO LOW CORE ROTATOR

The high to low core rotator is functional rotational exercise targeting your core, including shoulders and hips. We consider it one of the best rotational exercises because of how effective it is at targeting specific phases of muscle contraction and focused movement patterns. The variations you can take from plane of movement, stance, unilateral vs. bilateral … they feel limitless. This really allows us to follow the principal of variability to increase stability throughout the core.

It is important to note that your core as we refer to it includes abdominals, posterior muscles of the trunk, glutes and shoulders. Additionally, if you focus on the abdominal muscles you will find that rotation requires multiple muscles, not just one like some ab exercises. The high to low core rotator is trunk rotation with flexion meaning we are getting obliques, transverse abdominis and rectus abdominis to name a few.

HOW TO PERFORM A HIGH TO LOW CORE ROTATOR

We love to use core rotator variations in our programming because they scale easily to meet the individual where they are, they are highly functional and the amount of variations make them applicable to everything from sports performance to injury prevention/rehabilitation.

The high to low core rotator we would consider a starting point. A basic, entry level movement that can provide us with feedback on client abilities and challenge a client’s strength, proprioception and range of motion.

STEPS FOR A HIGH TO LOW CORE ROTATOR

  1. Set your cable attachment at the top of the pulley machine so that it is above your head.
  2. Start perpendicular to and offset from the cable machine so that the machine is slightly in front of you. You can start on facing either side, as long as the cable machine is slightly in front of you.
  3. Hold on to a single handle with the inside hand, or the hand closest to the cable machine. Wrap the opposite hand around the top of that hand. And take a few steps away, from the cable so the weights are not resting.
  4. Set your feet shoulder width apart and bend your knees, pushing your weight into the midfoot – heel, to load your hips and glutes.
  5. Brace your core by squeezing your abdominals, rotate from your hips and shoulders bringing the handle across your body to the opposite hip.
  6. Control the cable and your arms as your rotate back to the starting position, following the exact same path.
  7. Perform 10 reps on one side and then switch sides.

WHAT TO AVOID WHEN DOING A HIGH TO LOW CORE ROTATOR

The cable should follow an angled path from high to low (hence the name). If you do not bring your arms down on an angle as you come across your body line the cable will hit you in the face or throat.

Your back should remain neutral as you rotate through this movement. Any extending or arching in your back will cause discomfort. This exercise is designed to use flexion and rotation, flex and squeeze your abs!

Keep your weight even between your left and right foot. Allowing your weight to shift or leaning to the side can cause you to loose balance.

HOW TO PROGRESS A HIGH TO LOW CORE ROTATOR

We have mentioned that there are almost limitless possibilities for a high to low core rotator, right? Well that makes it hard to tell you how to progress it. Here is our best advice:

  • Change the height – as you bring the cable pulley attachment down towards your chest, hips and then knees the exercise becomes increasingly more difficult. You should not be doing the same weight the entire time. Gravity isn’t helping you as you lower the cable. Which means you are now fighting gravity. Of course we don’t call these high to low core rotators anymore, but they are certainly harder variations.
  • Change your stance – you can move your feet around to work on different angles and in various stability situations like kneeling, half kneeling, single leg and more.
  • Change the grip – switching what hand is on the bottom and single arm versus double arm will change the difficulty and the demand of the exercise.

TRICEP DIP

Your triceps, or the muscle located on the back of your arms, are used more than you might think. The triceps muscle is responsible for straightening your elbow, which we do all day long. Like pushing yourself out of bed in the morning or off the ground, closing doors or cabinets or simply reaching for an item by straightening your arm.

We also use them in a lot of activities like push-ups, shoulder presses, chest presses, planks, swimming, volleyball, baseball and more. Just think of anytime you straighten your elbow to keep it straightened.

It is important to note that the triceps muscle has three heads. (An easy easy way to remember that is tri means three.) Training your triceps in a variety of movement patterns is needed to effectively target all three.

HOW TO PERFORM A TRICEP DIP

  1. Sit on the edge of a elevated flat surface with your hands resting, palms down on the surface.
    • You can use any stable surface that allows your feet to touch the ground. Think bench, box, chair, stair, coffee table, etc.
  2. Push through your hands and lift your butt off the surface while you walk your feet slightly away from you.
    • The hardest position is with your legs extended straight in front of you.
    • Keep in mind your hips should stay close to the surface you are using.
  3. Bend at your elbows and lower your hips towards the ground while keeping your chest upright and open.
    • Aim for a depth of 90 degrees at the elbows IF there is no shoulder discomfort and you can maintain good form.
  4. Drive through your hands and straighten your elbows to bring you back up to the starting position.
  5. Repeat for reps.

WHAT TO AVOID WHEN PERFORMING A TRICEP DIP

  • Minimal elbow bend – your triceps are responsible for extension at your elbow (straightening). The more intention you can put into bending your elbows to achieve the needed range of motion the more work you can put into your triceps.
  • Hips too far from surface – the further you allow your hips to drift away from the surface (box, bench, etc.) the more form challenges you will encounter. It will be harder to focus your intentions on bending at the elbow, there will likely be some shoulder discomfort, and your range of motion will change dramatically. 
  • Chest rounding forward – the round of your shoulders will change the range of motion, which will change the muscles used and the load you feel in your triceps. Focus on keeping your chest upright and open. 

Luckily all there of these pieces of advice work synergistically. If you focus on bending at the elbows you will have to keep your hips closer to the surface you are using and keep your chest upright. If you keep your hips closer to the surface you will be more inclined to bend at the elbows and more capable of keeping your chest upright. And, finally, if you keep your chest upright you will be able to keep your hips closer to the surface and bend at the elbows!

HOW TO PROGRESS A TRICEP DIP

Make sure you have mastered the straight leg tricep dip before moving on to a harder version. If you have been doing knees bent, straighten your legs for a bigger tricep load. This is because the force arm (your legs) is longer as you straighten your leg. Putting more load into your triceps.

If you can check straight leg tricep dip off the list check out these options:

  • Add a weight to the top of your thighs.
  • Elevate your feet onto another box, bench or chair.
  • Incorporate instability at your feet or hands by using a BOSU ball or TRX

OTHER TRICEP EXERCISES

  • Tricep Push-Up
  • Skull Crusher
  • Laying OH Extension
  • Standing Tricep Extension
  • Sklz Single Arm Extension
  • Narrow Floor Chest Press

BAND WALKS

Our training philosophy starts with establishing range of motion (ROM), building stability within ROM and then building strength and power. We follow this philosophy with all of our clients and for all joints. We use band walks to build and maintain stability at the hips.

HOW TO DO BAND WALKS

Band walks are done with a small circular band placed anywhere from the upper thighs to the ankles. This placement helps activate the muscles of your hip, building stability. The lower on the leg you place your band the hard the exercise will be. You can also get various levels of resistance which may change where you place the band.

I love to use the hip circle for myself and my clients It is a pretty great investment for $20. Shop here in this affiliate link.

Other factors like injury, orthopedic limitations or difficulty engaging the right muscles will dictate where you should place the band.

Two most common band walks are lateral and forward/backward, sometimes called monster walks.

  1. Select the location of your band and get it into place.
  2. For lateral band walks you will step sideways and for Monster walks you will step forwards. In both situations you are trying to maintain tension on the band every time your trail leg steps in. This means you are not allowing the band to pull your leg in, rather you are resisting that force.
  3. You continue to taking steps until you reach a desired location or rep count. I usually work my clients in sets of 20 in one direction. For monster walks my clients would walk forward 20 steps the backward 20 steps to the same starting position.

WHAT TO AVOID WHEN DOING BAND WALKS

One of the most common is an inward rotation or caving of the knees. The intention is for us to drive against the band activating our hip muscles. If we allow our knees to inwardly rotate or cave in we are being controlled by the band. Which is, generally speaking, a no-no in the training world.

You also want to avoid any back pain while doing band walks. Back pain can occur when you are straining against the band and moving into poor form to achieve movement. For example, if you are doing a glute bridge with the band on and experiencing back discomfort you are likely over extending (or arching) in your low back. Keeping a neutral spine and tight core while using the hip circle is necessary to get the most out of the exercise.

FAVORITE BANDED EXERCISES

Banded exercises are great for improving hip stability and good hip stability is impacted by more than external rotation and the glute muscles. There are a lot of supporting, stabilizing muscles of the hip including muscles of the inner thigh like adductors. While we use the hip circle to build hip stability we also incorporate other exercises designed to strengthen the muscles of internal rotation to keep the hip balanced.

  • Band Walk Variations
  • Squat Variations
  • Plank Variations
  • Glute Bridge Variations
  • Pulsing Wall Sit

WORKOUTS

There are many workouts for you to download and save. Scroll through them all to find which ones you want to try. 

Fit Finds: The Ultimate 2023 Fitness Gift Guide

Fit Finds: The Ultimate 2023 Fitness Gift Guide

Welcome to the world of fitness and wellness gifting! As we gear up for 2023, it's time to start setting goals and looking for resources to help us succeed. Whether you're a fitness fanatic or seeking the perfect gift for one, our Ultimate 2023 Fitness Gift Guide is...

read more
The Power of Social Proof In Personal Training

The Power of Social Proof In Personal Training

In the world of personal training, where trust and credibility play pivotal roles, the concept of social proof functions as an authentic way to connect with your audience. Social proof, the influence created when individuals see others engaging in a particular...

read more
fitness articles
lifestyle articles
nutrition articles
golf articles

SUBSCRIBE

Click to sign-up for weekly information and offers.

DISCLOSURE

We are a participant in the Amazon Services LLC Associates Program, an affiliate advertising program designed to provide a means for us to earn fees by linking to Amazon.com and affiliated sites.

5 TECHNIQUE TIPS TO GET THE MOST OUT OF YOUR WORKOUT

5 TECHNIQUE TIPS TO GET THE MOST OUT OF YOUR WORKOUT

I am a big believer in the saying, “if you are going to do something, do it well”. And to me that means giving 100% effort. My workouts are no different and I don’t think yours should be either.

But I am not talking about killing yourself in your workout.

Instead, I am ALMOST talking about the opposite.

What I want to share with you is how to get more out of what you are already doing. If you like high intensity 20 minute workouts, then apply these technique tips and you will feel better. But if you like a slower paced workout with more rest built in, then apply these techniques and get more results.

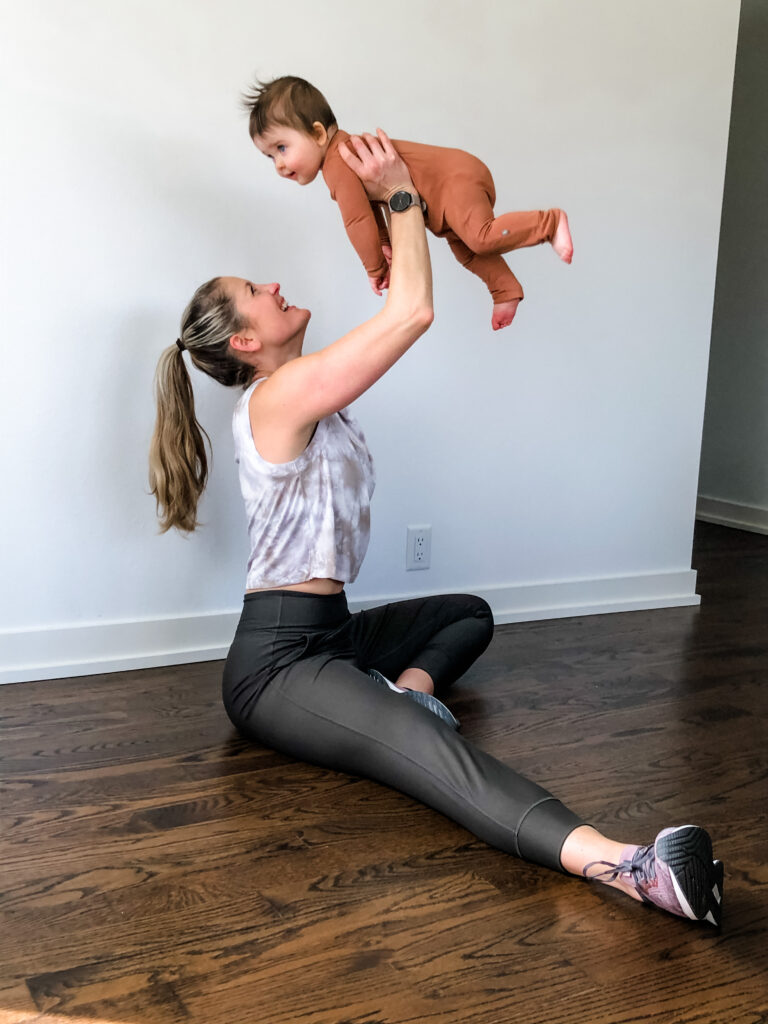
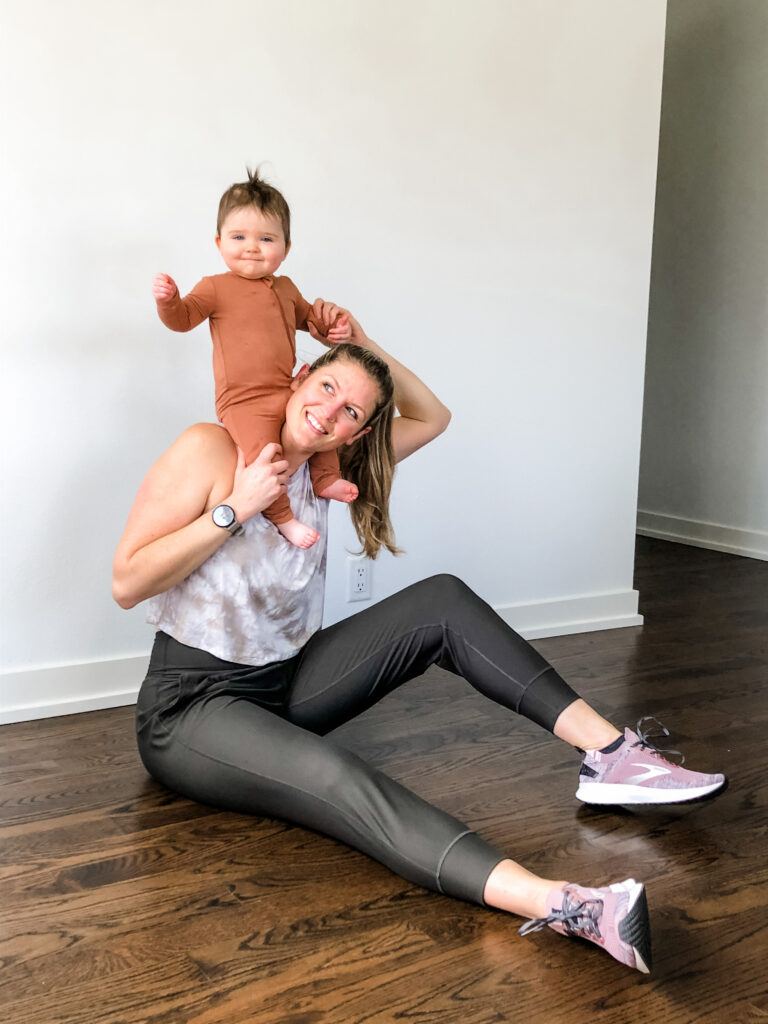
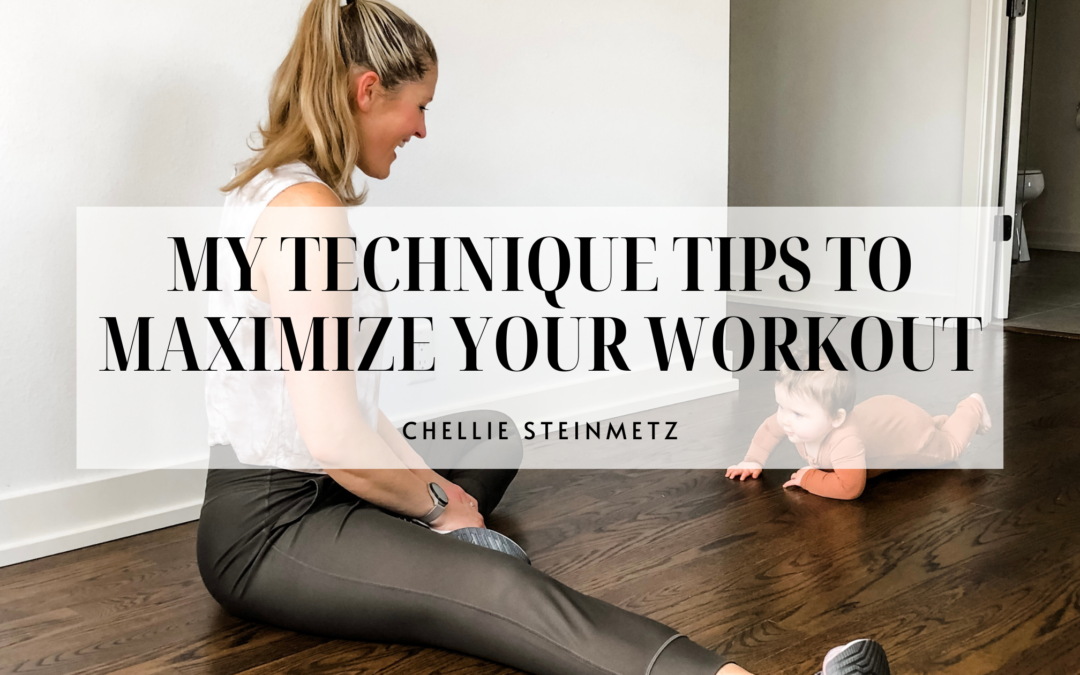
Below I have my top 5 technique tips for you to get the most out of your workouts listed. I am not kidding when I say this is exactly what I think about and it is HOW I coach my clients. Plus I linked all my outfit details and you can see my most motivating workout partner, Freddy 🤍.

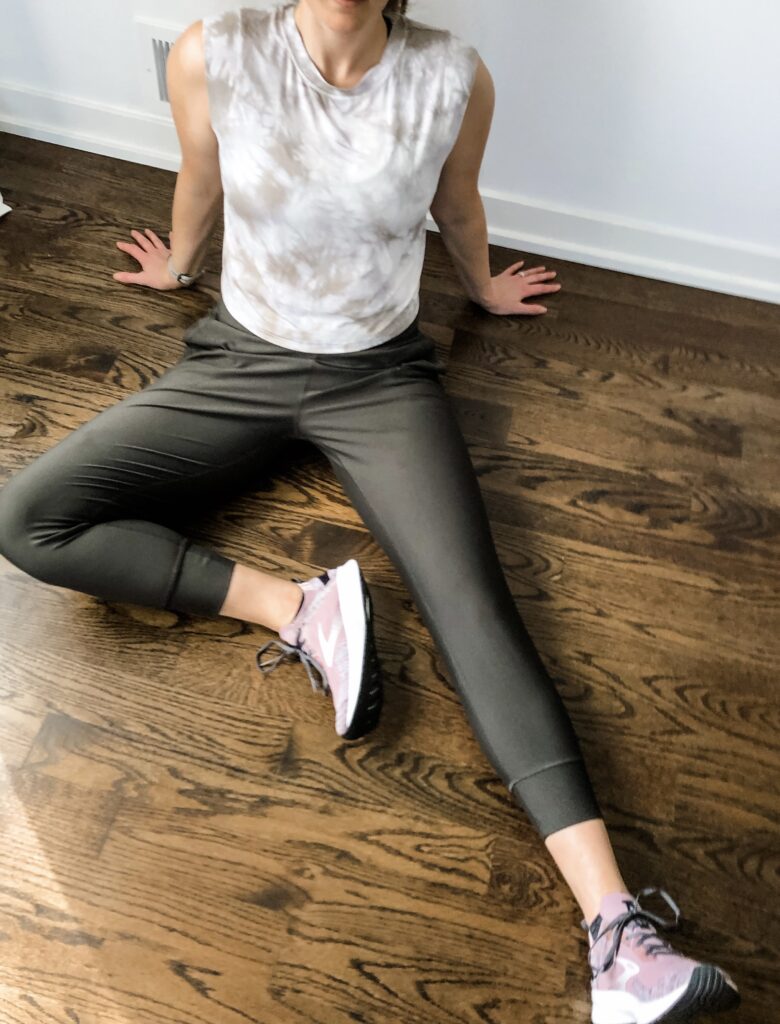
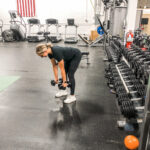
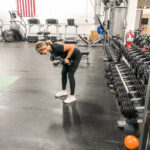
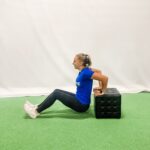
MID FOOT TO HEEL LOAD

Proper weight distribution in your foot is a key to muscle firing patterns in your lower body. And 99.9% of the time the right choice is to keep your weight mid foot to heel.

What does mid foot to heel mean? Imagine a line going through the laces of your sneakers and then making a 90 degree turn back to your heel. Your weight should be even between those points.

Using a proper mid foot to heel load should help you activate your lower body posterior chain – glutes + hamstrings. You will know you are doing this right when you feel the even distribution of weight in your feet and a burn in your glutes and hamstrings.

It is important to note that your toes should be in contact with the ground. I see too many people pulling their toes off the ground to keep their weight in the mid foot – heel. Picking up your toes all the time will have a negative impact on your balance and muscle firing patterns.

You can read more about training your glutes, hamstrings and quads by clicking on each word to find a list of the best exercises for each muscle.

WORKOUT TIPS FROM A PERSONAL TRAINER

SCAPULAR RETRACTION

It is so hard for me to pick just one of these tips as my favorite. They are each important in their own way. And in this case scapular retraction and stability are huge for get the most out of your upper body workouts and improving your posture.

Before you do any upper body movement – bicep curls, pull-ups, front raises, planks, literally any and all of them – you should be considering the involvement of your scapula in performing the movements correctly.

You will likely need to be retracting your scapula to some extent. Now, that could be a neutral position like on a bicep curl or it could be retracting them to a full pinch like at the start of ALL pulling movements.

I like to tell my clients to push their chest to the weight, by pinching their shoulder blades, when doing pulling movements. And to have a proud starting posture even for lower body movements like lunges.

The catch is always to maintain a neutral spine. You do not want to pinch your shoulder blades and arch your lower back. Your core should be engaged to keep a neutral spine position as you move.

Appropriately using scapular retraction and stability while exercising will help to improve your posture, increase strength gains and can even help alleviate some neck, shoulder and back pain.

You can learn more about improving your posture with this article.

More information on relieving low back pain can be found here.

A short list of the best back exercises (scapular retraction) can be found in this article.

personal trainer mequon wisconsin

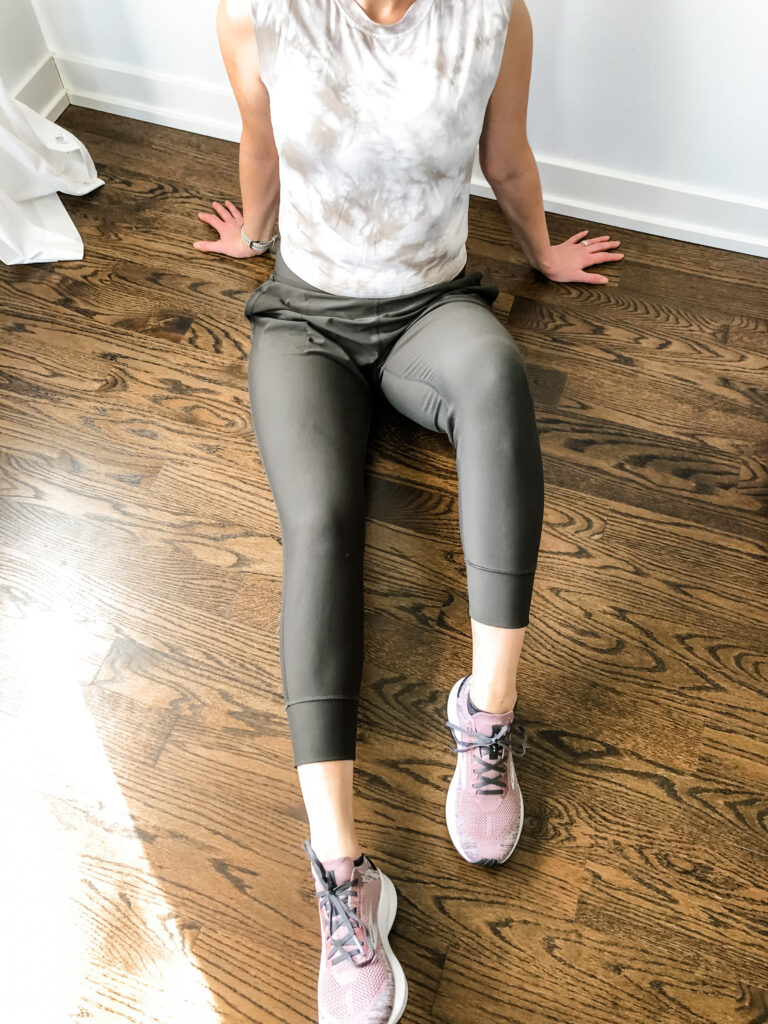
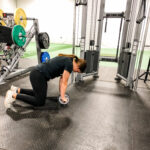
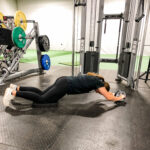
CORE ENGAGEMENT AND BRACING

This might be my broken record phrase and for good reason. Your core is your foundation, it is what provides us the ability to move. Keeping a strong and engaged foundation through all movement will result in better movement.

You will experience better results in the strength department, increase likelihood of using the right muscles and decreased discomfort. All because you kept your core tight.

And to clear up some common misconceptions about engaging your core … I am not talking about sucking in your belly, nor am I talking holding your breath.

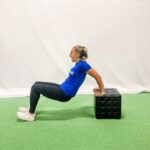
If you have a second lay on your back for a quick example. First I want you to try and just suck your belly. And then try to breath normally and make any movement. Weird and hard right?

Now, try to engage your core and brace into the ground. Use the ground as a resistance you are trying to get your core to work against.

Do you see how they are different? And how much more core work you feel bracing versus sucking in? And it is easier to breath, right?

To round out this (brief) discussion, most muscles, including the abdominals, don’t actually get smaller upon contraction. Rather they get firm and more pronounced. So sucking in your belly to engage your core doesn’t make sense. What other muscles do we suck in?

I recommend my client use a core activation and engagement exercise as part of their warm-ups. But if this is something they really struggle with we practice. We find movements that allow them to keep their core engaged and challenges them to stimulate an adaptation.

If the core bracing exercise above was hard slow add in movement from one limb at a time and get more diverse as weeks go on. I like to start with deadbugs and the many variations that can be created for all clients.

You can read more about our favorite warm-up here. And get more information on training your core the right way in this article.

personal trainer mequon wisconsin

RANGE OF MOTION

My clients come in looking for different results. Athletic performance, weight loss, pain management, slow down the aging process, improve their lifestyle, manage stress … and the list goes on. No matter what their goal is, we put a high priority on range of motion.

The progression for all clients is to improve and establish proper range of motion. At all joints. Then build stability and finish it off with power and strength. That isn’t always linear for every part of the body, but it is the philosophy I apply to all my clients for some pretty great results.

Assuming you do not have any major orthopedic issues or injuries you should be focusing on working in a full range of motion. Quarter squats are a thing that drive me crazy. Yes, an argument can be made for them in some people’s programming. But only if you are 95% of the time using a full squat range of motion.

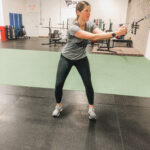
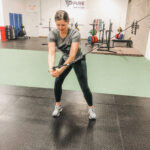
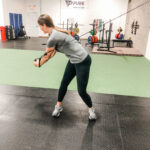
That holds true for all movements – upper, lower and core. We want to be working in a full range of motion as often as possible. For my clients (and myself) I use the TRX as a tool to de-load or assist a movement enough to achieve a full range of motion.

When done correctly, over time, your range of motion will increase, and your muscle firing patterns within that range of motion will improve. This will result in improved stability and strength, decreased chronic pain and discomfort and improved physique.

You can read more about how to use the TRX to increase your range of motion and stability in this article.

If you do have orthopedic issues or injuries, you should consult a professional – physical therapist or personal trainer before trying anything.

TIPS FROM A PERSONAL TRAINER

MIND BODY CONNECTION

Very early in my career I was doing some research on body building and figure competitions. I was fascinated by the training that went into achieving the associated physiques and I wanted to know more.

The best nugget of information was from a coach that essentially told me if you can’t think of a muscle and flex it, then you can’t train it. He went on to explain that he has his clients stand in front of mirrors and practice engaging muscles. That posing practice was more than specific positions.

I was blown away by the simplicity of his statement. He summed it up so well.

Now I don’t expect my clients to stand in front of the bathroom mirror and flex their muscles. But I find this applicable to EVERY point I listed above. Connecting your mind to what your body is doing in exercise will improve your results.

In order to keep the load mid foot to heel during movement and keep your toes down, you need to think about it.

If you are really going to start every pulling motion with scapular retraction and NOT arch your lower back, you need to think about it.

Properly engaging your core and maintaining it throughout movement will require you to think about it.

And working in a full range of motion with the correct muscles firing will require you to think about it.

The good news is the more you practice, the easier it gets. Try not to get caught up in how much harder it is today and think about where you will be in a year from now with consistent practice.

GET THE MOST OUT OF YOUR WORKOUT

Now, PLEASE, take my five tips and start applying them. I promise you will feel the difference. These tips are why I can get as much out of a 10-minute workout as people get out of a 50 minute workout.

Keep in mind – quality over quantity, and long-term over short-term.

OUTFIT DETAILS

Some of the links below are commissionable links. There is no increase price for you and your support is greatly appreciated.

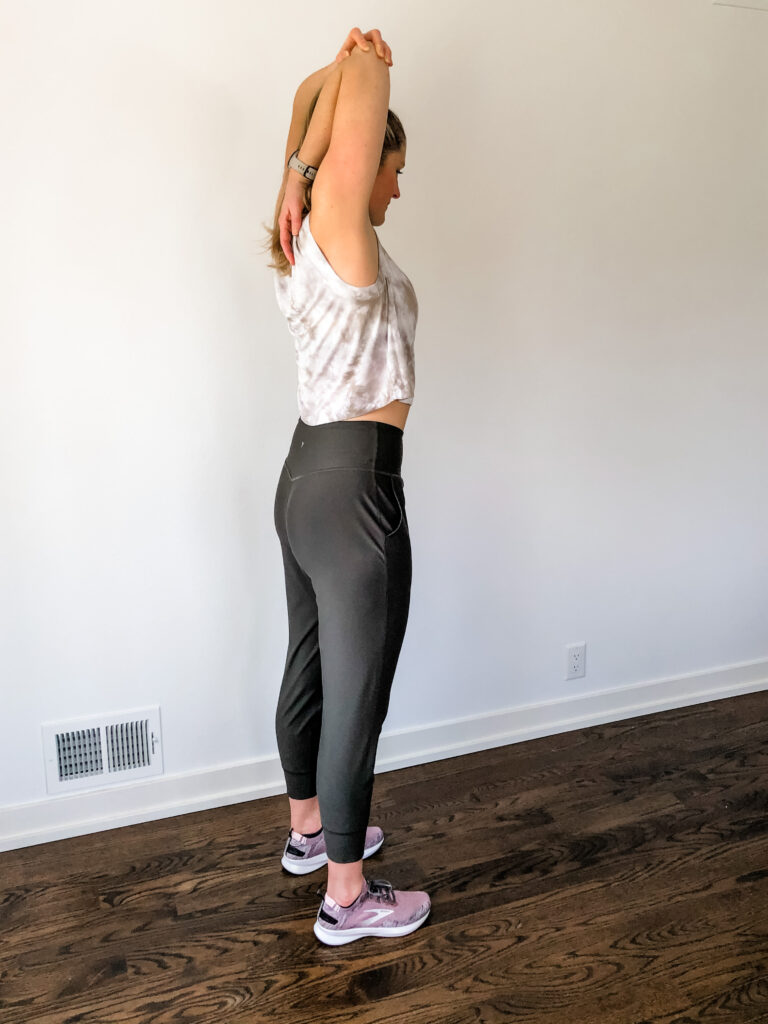
I am loving these Old Navy Joggers – they are incredible soft, high-waisted and breathable. Now, I wouldn’t go for a run in them, but they are perfect for workouts at home or at the gym. And this top is new from Target, love the colors and the cropped fit.

And for all of those who love a good deal, I used Rakuten to shop my whole look and earn cash back. You can earn $20 cash back after your first purchase. Click here to learn more.

Have a great day!

-Chellie

PERSONAL TRAINER

Fit Finds: The Ultimate 2023 Fitness Gift Guide

Fit Finds: The Ultimate 2023 Fitness Gift Guide

Welcome to the world of fitness and wellness gifting! As we gear up for 2023, it's time to start setting goals and looking for resources to help us succeed. Whether you're a fitness fanatic or seeking the perfect gift for one, our Ultimate 2023 Fitness Gift Guide is...

read more
The Power of Social Proof In Personal Training

The Power of Social Proof In Personal Training

In the world of personal training, where trust and credibility play pivotal roles, the concept of social proof functions as an authentic way to connect with your audience. Social proof, the influence created when individuals see others engaging in a particular...

read more
fitness articles
lifestyle articles
nutrition articles
golf articles

SUBSCRIBE

Click to sign-up for weekly information and offers.

DISCLOSURE

We are a participant in the Amazon Services LLC Associates Program, an affiliate advertising program designed to provide a means for us to earn fees by linking to Amazon.com and affiliated sites.

TRAINING YOUR CORE FOR GOLF PERFORMANCE

TRAINING YOUR CORE FOR GOLF PERFORMANCE

In a previous article we discussed training your legs to put power behind your swing and distance on the ball. If we follow along the kinematic sequence of the golf swing we should discuss the importance of training your core for golf performance. I am not talking about crunches and six packs. Rather the transfer of power, range of motion, stability and rotational strength.

WHY TRAIN YOUR CORE FOR GOLF PERFORMANCE

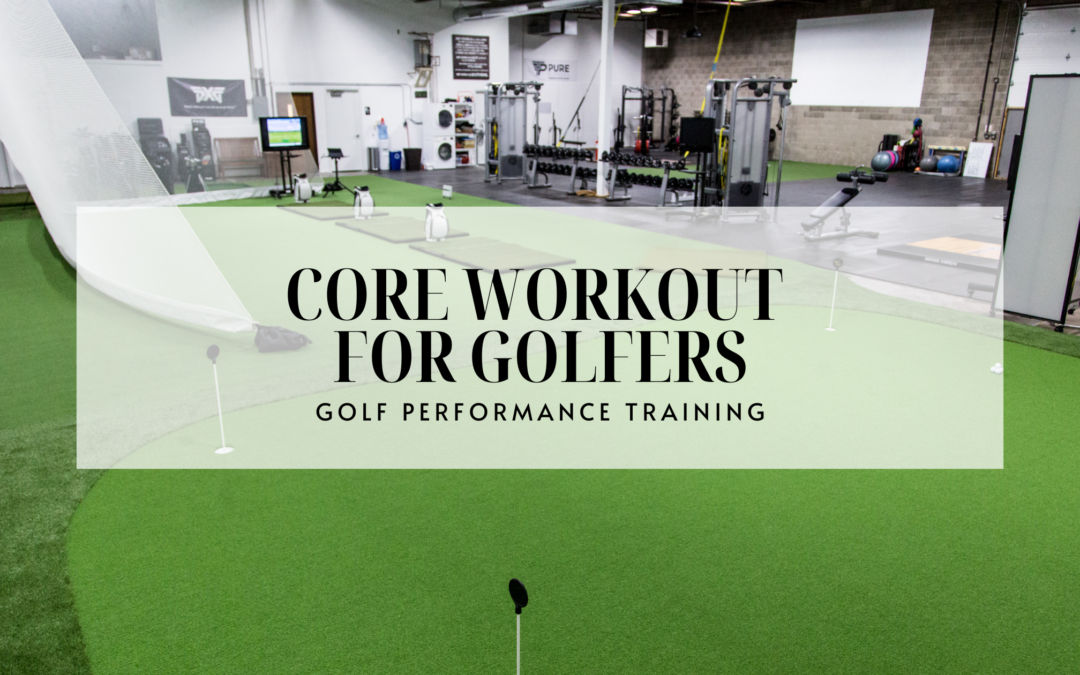
There are two top reasons why if you want to positively impact your golf game you should be training your core. And they are the two most common reasons golfers come to see us. They want to relieve back pain or stiffness that they have before playing golf and worsens as they play, or that starts as soon as they swing a club a few times, or that knocks them out of commission for a few days after playing a round.

The second reason is distance. Golfers always want to add distance on to their swing. Spoiler alert – consistency is the only way to get here. Work a properly developed program with intention discipline and you will see distance. Don’t jump around from new idea to new idea thinking there is a short cut or the next greatest thing will be the answer. Now, lets dive into this a little more.

PROTECT YOUR BACK

One of the most common compensations our bodies make is for the muscles in the low back to turn on and handle a work load that is suppose to be covered by the core. Generally speaking this is a result of a weak core and/or flexibility issue, which could be the result of a chronically weak core or poor posture or prolonged sitting. But back to golf.

Golf is no exception. A weak core or poor flexibility/ range of motion can and will lead to low back pain. Appropriately training your core for range of motion, stability and then strength is essential to relieving back pain and improving your golf performance.

This brings us to the second reason to train your core.

CORE IS THE KEY TO ROTATIONAL STRENGTH

That statement, “core is the key to rotational strength”, can seem a bit obvious because clearly the core has to be strong to have strength. But there is so much more to it. Simply put the muscles used to rotate the body through the mid section will be limited in their strength abilities due to their size, purpose and range of motion. One of their true intentions is to create stability for the rest of our body. To be the foundation on which movement is built.

If we really want to be able to produce a lot of power in a rotational capacity additional muscles are going to be required. That why we discussed the importance of training your legs for golf performance last week. Power is developed from the lower body and transferred through the core. The more stability the core has the more power it can successfully transfer. And the more power transferred the more rotational strength you will have.

Your core, thinking shoulders to hips, really needs to have great range of motion + stability first. We spoke about disassociation in our last article. But it become extremely important in the core, since that is where the movement is occurring. Proper range of motion at your T-spine is needed for rotational strength.

FLEXIBILITY, STABILITY + POWER

kneeling thoracic rotations start position
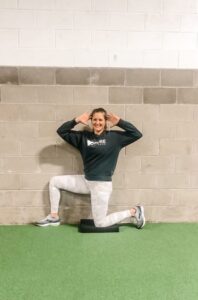
As discussed above golf is a rotational sport, starting from the ground up.  So when we are looking to take power from the very bottom of our body and release it through our upper body there are a lot of transfer points.

Proper flexibility will allow the golfer to get into the ideal range of motion to have the potential to generate maximal power. Ensuring that there is immense stability within that range of motion is essential to successfully transferring power.

The core is the main transfer point between the upper and lower body. Ensuring range of motion (flexibility) and stability here is necessary to get all of the power from your lower body to the club. And you have to consider more than just ab muscles and crunches.

Tight hamstrings will limit your ability to get into your back swing. This will decrease your range of motion and therefor ability to generate power. Poor thoracic rotation, which can be limited by a number of muscles, directly hinders your ability to access rotational strength. Your shoulder mobility will also impact how you swing a club and the demands placed on muscles. We often see low back pain stemming from poor shoulder mobility due to compensation in the swing.

When we put together a periodized program for our golfers we are looking at it from three perspectives – flexibility, stability and power. These are the pillars of our training philosophy. All three work synergistically to get the most out of your performance. A limitation in any one of them is a limitation in all of them..

We covered the basics – flexibility, stability and power – in our Pure Forged Method Series. Take a look at this article, Golf Fitness Training, for a broad overview of the topic and links to specific exercises and programs.

HOW TO TRAIN YOUR CORE FOR GOLF PERFORMANCE

This is no longer a secret, hopefully. We try to hammer it home in everything we write. To properly train for ANYTHING you need to follow the progression of range of motion, stability and then strength. Go read the sections above again and click on some of the links if you aren’t sure you understand.

Now within each of those steps your program should consider training in all planes of movement (sagittal, frontal + transverse) and using all types of muscle contractions (concentric, eccentric + isometric) to access the full potential of the muscular system. As you progress the complexity of movements and physical demands will increase to continue challenging the three pillars.

Take a look at some of our preferred exercises for disassociation and core below. Keep in mind that we like to manipulate these movements to work in various planes of movement and muscle contractions. What is listed below can be considered an outline. You want to be working in a periodized program tailored to your individual needs.

You can find our simple guide to golf performance training in our Pure Forged Method. We break it down into 3 steps mimicking the three pillars. Start here with step 1.

If you aren’t sure where to start with your own program reach out to us using the contact us button. We would love to help.

EXERCISES FOR DISASSOCIATION

Remember that the intention of disassociation drills is to get your upper and lower body to rotate independently of each other. So keep your shoulders still and rotate your hips or vice versa. If you can’t do it standing make establishing that range of motion a priority in your programming.

  • Kneeling Cable Pull to Push
  • Split Stance Straight Arm Core Rotator (BOSU optional)
  • Hanging Side Tucks

Eccentric CORE Exercises

Keep in mind that in order to really maximize this phase of the muscle contraction you want to work slow and controlled on a 5 count during the muscle lengthening phase. 

  • In to Out Core Rotator
  • Negative Decline Sit-Ups
  • 5 Count Out Ab Wheel

Concentric CORE Exercises

You should always be exercising with control and focus. Make sure you are aware of your form and muscle activation to ensure proper muscle loading and firing patterns.

  • Straight Bar Swing Rotation
  • Flexed Hang Kick-Ups or Tucks
  • Cable Pull to Push

Isometric CORE Exercises

A true isometric exercise has no movement at the intended muscle. The contraction is simply being held – no additional lengthening and shortening allowed. 

  • BOSU Plank (feet on)
  • Paloff Press (held in arm extended position)
  • Decline Bench Hold with MB Press
Fit Finds: The Ultimate 2023 Fitness Gift Guide

Fit Finds: The Ultimate 2023 Fitness Gift Guide

Welcome to the world of fitness and wellness gifting! As we gear up for 2023, it's time to start setting goals and looking for resources to help us succeed. Whether you're a fitness fanatic or seeking the perfect gift for one, our Ultimate 2023 Fitness Gift Guide is...

read more
The Power of Social Proof In Personal Training

The Power of Social Proof In Personal Training

In the world of personal training, where trust and credibility play pivotal roles, the concept of social proof functions as an authentic way to connect with your audience. Social proof, the influence created when individuals see others engaging in a particular...

read more
fitness articles
lifestyle articles
nutrition articles
golf articles

SUBSCRIBE

Click to sign-up for weekly information and offers.

DISCLOSURE

We are a participant in the Amazon Services LLC Associates Program, an affiliate advertising program designed to provide a means for us to earn fees by linking to Amazon.com and affiliated sites.