One Month of Gym Workouts

One Month of Gym Workouts

One month of gym workouts with us three 🙂 . We love sharing our workouts and hearing how much you love them. Click each image to go to the workout video and workout with us!

Cheers,

Chellie

Fit Finds: The Ultimate 2023 Fitness Gift Guide

Fit Finds: The Ultimate 2023 Fitness Gift Guide

Welcome to the world of fitness and wellness gifting! As we gear up for 2023, it's time to start setting goals and looking for resources to help us succeed. Whether you're a fitness fanatic or seeking the perfect gift for one, our Ultimate 2023 Fitness Gift Guide is...

read more
The Power of Social Proof In Personal Training

The Power of Social Proof In Personal Training

In the world of personal training, where trust and credibility play pivotal roles, the concept of social proof functions as an authentic way to connect with your audience. Social proof, the influence created when individuals see others engaging in a particular...

read more

SUBSCRIBE

Click to sign-up for weekly information and offers.

DISCLOSURE

We are a participant in the Amazon Services LLC Associates Program, an affiliate advertising program designed to provide a means for us to earn fees by linking to Amazon.com and affiliated sites.

How To Use a BOSU and Swiss Ball

How To Use a BOSU and Swiss Ball

I am going to break down how to use a BOSU ball and a Swiss ball. As a bonus I am going to include a look at how you can use SKLZ sliders, a TRX, and a medicine ball with the BOSU ball.


TABLE OF CONTENTS

  1. How and Why Use a BOSU Ball
  2. How and Why Use a Swiss Ball
  3. BOSU ball with SKLZ Sliders
  4. BOSU Ball with a TRX
  5. BOSU Ball with a Medicine Ball
  6. Downloadable Workouts
  7. Equipment

You can probably seamlessly starting incorporating the BOSU Ball in the routines you are already doing. It is a great way to provide a new stimulation to old exercises. Keep reading as we discuss the function of a BOSU Ball and what you are getting out of your workouts by adding it in.

REASONS TO DO BOSU BALL WORKOUTS

There has to be a reason why you would want to use a BOSU Ball. For those of you that have used it, you are probably thinking “because it makes it harder!” and you would be right. But let’s take a moment to understand why it makes it harder and what you are actually getting out of using the BOSU ball.

BALANCE AND STABILITY

The BOSU Ball challenges your balance and stability because of its half circle shape. The instability increases the demand on your muscles which can stimulate physiological changes and cause muscle fatigue. In addition, when your balance is being challenged your core will turn on. Because your core is the center of balance for your body.

When you take common exercises like a squat or a push-up and do them on a BOSU Ball the demand on the body immediately changes. You will notice physiological responses like shaking and a faster onset of fatigue as your body tries to figure out how to balance on an unstable surface.

CORE STIMULATION

Whenever the conversation turns towards balance the core has to be considered. Core strength and stability are the key to having good balance. Think that through and you will understand that the BOSU Ball is training your core no matter what exercise you are doing on it. Just remember to keep proper core bracing while performing your repetitions!

I bet you are wondering what about doing core specific exercises with the BOSU Ball. Of course you should do that. Doing a plank on a BOSU Ball is going to have a greater demand on your core stability AND your shoulder stability. Given how susceptible our shoulders can be to instability due to, in part, the large range of motion available at the shoulder, training them for stability is a must in any program design.

ADVANCE YOUR EXERCISES

You can add a BOSU Ball into a ton of different exercises to challenge your body in a different way. A common exercise, like a mountain climber, done with either your upper body or lower body on the BOSU Ball will require an increase in your core stability. This WILL make the exercise feel harder.

Lower body exercises like squats, lunges and RDLs also become more challenging because of instability. We won’t dive into it here, but the BOSU Ball provides you with a way to train the lower body in an open chain capacity. Something that can be helpful in injury rehabilitation and that should be present in a well rounded program.

MY FAVORITE EXERCISES TO USE A BOSU BALL FOR

  • Push-Up Variations
  • SL RDL, Curl + Press
  • Plank Variations
  • Lunge Patterns

TIPS FOR DOING A BOSU BALL WORKOUTS

  1. Step on directly in the middle of the BOSU Ball. Try to put the middle of your arch in the center of the BOSU Ball. This will be different if you are using the BOSU Ball with a cable, where you want to offset your foot back to allow for better balance and weight distribution.
  2. Make sure your weight is mid-foot to heel. This helps to engage our glutes and hamstrings.
  3. Don’t completely straighten your knees when you are standing on the BOSU Ball. This allows your muscles to activate and help with balance.
  4. If it’s your first time using a BOSU Ball, take a second to just step on and let your muscles get used to the unstable ground and stay close to a wall or something you can use to help your balance as you get comfortable. Your muscles will feel very shaky, but that is their way of trying to figure out what is going on. Your muscles are rapidly firing to recruit enough fibers to meet the stability demand.
  5. Your muscles are going to have to adjust to the BOSU Ball. When working your lower body start by standing on the BOSU with two feet. Then progress to a  single leg balance on the BOSU. After you are comfortable there you can add dynamic movements.
  6. When you step off the ball, whether its because you are done with your reps or losing your balance, step completely off the BOSU Ball. Don’t try to catch yourself by shifting your feet or putting your other foot on the BOSU Ball. That will just cause you to lose your balance even more and possibly end in an injury.
  7. If your hands are on the BOSU and you are in a high plank position, make sure your shoulders are right above your hands. The BOSU Ball decreases the stability at the shoulder joint in that position, and you do not what to put unnecessary pressure on your shoulder by being too far forward or backwards.

Everyone knows what a Swiss Ball is. But you might not know it by that name. You might call it a yoga ball, a stability ball, a physio ball, a balance ball, or even a birth ball. It has many names because it can be used for so many different things. Expecting mothers use the Swiss Ball to induce labor and manage pain.  It is also just as common to be seen at a desk replacing a traditional chair. But we use it every day in the gym.

REASONS TO DO SWISS BALL WORKOUTS

We use the Swiss Ball because of the numerous benefits and the ability to incorporate it with almost every exercise. Take a squat, add in a Swiss Ball, and it adds a proprioception aspect which allows the individual to be more conscious of their torso. Helping them to make sure their torso is up right, chest is up, shoulders are back and their core engaged. It teaches the client correct form so when the Swiss Ball is removed from the exercise the body knows how to properly load the muscles. 

The Swiss Ball can also add instability in an exercise to make it more difficult. Everyone knows what an elbow plank or a glute bridge is right? They are pretty simple exercises. But add in a Swiss Ball and it takes the exercise up a notch. The instability created by the Swiss Ball requires small muscles to fire to help execute a traditional exercise. So an elbow plank becomes harder as a whole and your core will really feel the burn.

The Swiss Ball is also great to use as a light resistance, especially in core exercises. A Swiss Ball pass over is a great example of this, take a look at the pictures below. With your limbs acting as the levers you only need a light weight to make the exercise challenging.

TIPS FOR DOING A SWISS BALL WORKOUT

  1. Don’t over inflate the Swiss Ball. There is a little leeway around how inflated your Swiss Ball should be. Really it comes down to your preference. But when first inflating your Swiss Ball it may be helpful to remember the size of your Swiss Ball, either 45, 55, 65, or 75 centimeters and blowing it up to that specific size. Also don’t store your Swiss Ball somewhere too cold. Air expands when warm and contracts when cool so you will have to re-inflate your Swiss Ball if it gets to cold.
  2. When using the Swiss Ball against the wall in a squat or lunge position, the Swiss Ball should be positioned somewhere between the middle of your back and low back. If the Swiss Ball is to high it is likely your torso will curve forward, if the Swiss Ball is too low, you won’t be able to drive your hips back properly. 
  3. The Swiss Ball can make an exercises you can perform well a lot more difficult. Be responsible when progressing to a Swiss Ball. Progressing too fast can increase chance of injury. If you are progressing to an elbow plank on the Swiss Ball, start by putting the Swiss Ball up against the wall. This will allow for some instability but not as much which allows you to make sure you can preform the plank with good form before moving forward. When you are ready, take the Swiss Ball off the wall and see how you do.
  4. Check for sharp objects around you when using a Swiss Ball. We don’t want you to be using the Swiss Ball to support yourself and then it complexly fall out from underneath you! Or for you to fall off the Swiss Ball!

WHAT ARE SKLZ SLIDERS?

The SKLZ sliders are a great way to spice up your workout! They are great for a quick, low impact, full body workout where ever you go. And they are small and light weight making them a great travel companion.

Essentially they are a flat object that allows smooth movement across a variety of surfaces. SKLZ is a brand of fitness equipments, who make a slider product. There are numerous other brands on the market and you could even use a towel on hardwood surface or a tupperwear lid on carpeting.

The SKLZ Sliders can be used to decrease the stability at your joint, forcing the muscle around that joint, and your core to engage and do the work. Or the SKLZ Sliders can be used to enhance cardiovascular possibilities of a workout by increasing speed because they can easily slide across most surfaces. They are another great piece to include in your home gym or take with to the gym.

SKLZ + HIIT WORKOUTS

I love to use the SKLZ sliders for high speed and low impact cardio workouts! This makes them perfect to include in HIIT workouts, or high intensity interval training. HIIT workouts are a recent top fitness trend, but most people don’t understand what a HIIT workout really is.

The goal of a HIIT workout is to maximize a person’s aerobic capacity without sacrificing form. HIIT workouts alternate between working sets and recovery periods. They are great because they can be modified to meet anyones fitness level and you still get a great workout, in a short period of time.

Using the SKLZ Sliders with a BOSU is a challenging combination that promises to leave you exhausted in a HIIT workout. Here are a few of my favorite exercises:

  • Mountain Climber Variations
  • Push-up + Plank Complexes
  • Lunge Patterns that use the BOSU as resistance

WHAT IS THE TRX?

The TRX Is a form of suspension training that uses body weight exercises to develop strength, balance, flexibility and core stability. This means that very little equipment is needed to get a great workout and a TRX is very easy to set up. Your TRX can hang off of anything that will hold your weight and not pull over. There are even TRX door anchors that are super helpful if you live in an apartment or don’t wht to do anything permanent. Read more about training with a TRX here.

By combining the BOSU and TRX, you are almost always going to get a great full body workout no matter what you do. If you are doing side to side squat jumps on the BOSU, you are working on lower body plyometrics and aerobic capacity. At the same time you are getting slight upper body activation by pulling yourself out of the hole with the TRX. Or if you are doing a pushup on the BOSU with your feet in the TRX you are working posterior shoulder, biceps and triceps. But your core also needs to stabilize your body to keep your back flat and minimize excess movement.

WORKING OUT WITH A TRX AND A BOSU

I love to talk about balance and stability. It is often under appreciated or overlooked in typical programming. This is one of the reasons I love the BOSU. It will challenge your balance and stability helping you to create a stronger body.

Balance is easy to challenge using the TRX. You can do upper body movements holding on to the TRX handles on a single leg instead of both legs. For example, do single leg inverted rows or do a single leg assisted squat. You can take that a step further and stand on a BOSU ball.

You can also use the TRX on your lower body to create instability. For example, a push-up with your feet in the TRX. Or a Bulgarian split squat with rotation with the elevated foot in the TRX. And again you can advance these exercises by incorporating a BOSU ball.

Between the BOSU Ball and the TRX you are getting a ton of core stimulation. The instability from the BOSU Ball requires full body tension, but most importantly core tension. Your core is just as important in TRX exercises. In a TRX chest press, you need to keep your core engaged to hold the plank position. If you do not engage your core your back will arch causing low back pain and making the chest press more difficult.

Here are a few of my favorite exercises using a TRX and a BOSU ball:

  • Push-up Variations
  • Side Squat Jumps
  • Plank Variations

WHAT IS A MEDICINE BALL?

Medicine balls come in a variety of materials and weight. Some are made to be cushioned and soft, others more reactive and even others compact. When shopping for a medicine ball, take into consideration the weight . I pretty much use a 10 pound med ball for everything. Adjusting the sets and reps to make the exercise easier or more difficult.

Goals and fitness level play a big part in determining the proper weight. I regularly use 6 pound and 15 pound medicine balls with my clients. If you only want one medicine ball at home get one that is between 6-10 pounds. If you have the space, get a vertical rack and fill it up!

There are a few different types of medicine balls. When purchasing a medicine ball be conscious that some are made to bounce back when you do a med ball slam, we will call them hard shell. And others are made to stay on the ground, we will call these soft shell med balls. But that doesn’t mean that you can’t do slams with both kinds. As long as they are well made you can still throw both.

WORKING OUT WITH A MEDICINE BALL AND BOSU BALL

Medicine balls are really great because they can be used for so many different things. From a programming perspective they are great for training stability and power. Balance drills can become more advanced by adding a medicine ball.

For example a single arm shoulder press with a medicine ball will require more stability than with a dumbbell. Or you can hold a medicine ball between your knees to activate your adductors. You can also throw the med ball at the wall or ground to make an upper body plyometric drill.

And remember to use proper form when picking up the med ball form the ground. Core engaged, butt down, back flat. Not using proper form when picking up a medicine ball has to be the most common mistake I see.

Here are a few of my favorite exercises using a medicine ball and BOSU ball:

  • BOSU Side Squat to Single Arm Press
  • BOSU Glute Bridge with Medicine Ball Hold
  • BOSU Reverse Lunge with Rotation

WORKOUTS

There are many workouts for you to download and save. Scroll through them all to find which ones you want to try. 

EQUIPMENT

These are affiliate links. While there is no cost to you when you order through them, I do make a commission. Your support, by ordering through them, is greatly appreciated!

You can find many of these pieces of equipment all over the place. But if you want to support Pure Fitness you can order through the links below on Amazon.

Now for some items you will want to use with your TRX. A high quality exercise mat. My favorite brand is Manduka because it has lasted years, I don’t slip and it is easy to clean. I linked the one I use here.

If you have a space dedicated to a home gym I would get the TRX wall anchor. This way you don’t have to worry about moving your TRX in and out of a doorway every time you want to start and end your workout.

Fit Finds: The Ultimate 2023 Fitness Gift Guide

Fit Finds: The Ultimate 2023 Fitness Gift Guide

Welcome to the world of fitness and wellness gifting! As we gear up for 2023, it's time to start setting goals and looking for resources to help us succeed. Whether you're a fitness fanatic or seeking the perfect gift for one, our Ultimate 2023 Fitness Gift Guide is...

read more
The Power of Social Proof In Personal Training

The Power of Social Proof In Personal Training

In the world of personal training, where trust and credibility play pivotal roles, the concept of social proof functions as an authentic way to connect with your audience. Social proof, the influence created when individuals see others engaging in a particular...

read more
fitness articles
lifestyle articles
nutrition articles
golf articles

SUBSCRIBE

Click to sign-up for weekly information and offers.

DISCLOSURE

We are a participant in the Amazon Services LLC Associates Program, an affiliate advertising program designed to provide a means for us to earn fees by linking to Amazon.com and affiliated sites.

IronMan Strength Training for the Swim

IronMan Strength Training for the Swim

When I signed up for this IronMan race, I knew things would be different. I had just had a baby, we own a business and my husband’s favorite activity is golf. All of those equal time. That means I had to get creative with my training, especially with the swim.

Plain and simple between access and schedule getting into a pool has been very difficult. Thankfully. I have found 1 day a week to get out for an open water swim.

And that was a huge challenge. I needed someone to swim with – buddy system and our week-by-week schedules had to work. Which wasn’t easy when my training partner has 4 kids and a business herself.  Luckily, I have a few other friends that love to swim.

I knew that swimming once a week wasn’t going to be enough. I wouldn’t be able to be confident and comfortable during the race or with my results. I knew I would be left with the feeling of what if I had swum more?

So, I got creative.

I focused on strength training in high reps and focusing on the main muscles in swimming. I combined those with running intervals. And I crushed as many rounds as I could within an hour.

Then because I wasn’t loving my feeling in the water, I did more. I started to add more strength training and this time combined it with biking.

Let me break this down more.

MY IRONMAN STRENGTH TRAINING FOR THE SWIM

2 workouts a week I focus on sprint intervals for either the bike or run. And instead of just walking/resting between intervals I strength train specifically swimming.

How long are your workouts?

1 hour.

Babies, family, and a marriage take time. Running, growing, and supporting a business takes time. Training for an IronMan and playing golf take time.

When I could be at the gym for an undefined amount of time I would have to guess my workouts were never shorter than 2 hours. And looking back on that, it was a mistake.

In retrospect, could call much of that wasted time, or over training. Or just busy work that didn’t mean anything.

What movements do I use?

I follow the same progression for all of my training – range of motion first, stability second, and strength third. Depending where I am in terms of physical shape and in my training cycle I am focusing on one or all three of those steps.

Since I am nearing the end of a training cycle I am starting to feel the build up of all my workouts. I start to really value my mobility work as a way to protect the progress I have made.

Muscularly, I work to maintain stability at my shoulders and core. I heavily target back and triceps and do as much single sided movements as possible. Either within a workout or alternating workouts I would vary the muscle contraction.

There isn’t a strength workout that I do that doesn’t include core. For swimming specifically, I love exercises that focus on stability with limb movement in a variety of body positions and planes of movement.

A few of my most used swim strength training exercises:
  • Side Plank Variations: rotations, forward presses, leg raises, etc.
  • Deadbug variations: varying loads and angles.
  • Rollout Variations: ab wheel, single arm TRX, plank walk outs.

WHY IS STRENGTH TRAINING IMPORTANT FOR THE IRONMAN SWIM

In my opinion, when you are training for an endurance event like an IronMan your strength program should prioritize offsetting the impact of sport-based training.

In the simplest way, that means doing the opposite of what you do most.

Swimming is a huge frontal load on the body. Training my back and entire posterior chain is what helps keep my body balanced. I follow the same approach as I strength train to offset the miles of biking and running.

Thankfully, an argument can be made that training the entire posterior chain should be the number one priority for triathletes. From the perspective of maintaining balance in the body and improving performance.

You can read more about Injury Prevention While Training For An IronMan In 2021 in my recent blog. I chatted with my friend, training partner and physical therapist about the balance between training and health.

CAN STRENGTH TRAINING REPLACE SWIMMING?

Absolutely not. If I could get into the pool 1-2 days a week I would. But my life, right now, doesn’t allow it.

In my workouts I am looking to challenge my lactate threshold. You can read more about that in this article How to Use Interval Training for A Successful IronMan Run.

The biggest thing I am missing is the breathing. I’m serious. Running, biking, lifting I can breathe whenever I want. The air is always accessible. Swimming is different.

Swimming demands that you work to condition your body to become as efficient as possible on a specific amount of air. I may be getting stronger and improving my fitness, but that does not mean I will be conditioned my best for swimming.

I know my results would be best if these strength workouts were combined with increased swimming. But I can feel things starting to fall into place.

MY IRONMAN SWIM STRENGTH WORKOUT

Here is my most recent strength workout:

  • Seated Cable Row 15
  • Hand on top of Hand Pull Down 10/10
  • Side Plank Rotations 15/15
  • ½ mile up tempo run

Repeat 6-8 times

It might look redundant, but what is endurance racing if not redundant?

If you are struggling with your swim training I hope this helps. And remember to take time and recover. I reviewed my 5 Best Exercise Recovery Tools in this blog. Take look at Easy Green Smoothie With Protein To Keep You Full for my go to smoothie recipe. I drink this any time of the day!

Cheers to another week closer to IronMan Indiana!


Fit Finds: The Ultimate 2023 Fitness Gift Guide

Fit Finds: The Ultimate 2023 Fitness Gift Guide

Welcome to the world of fitness and wellness gifting! As we gear up for 2023, it's time to start setting goals and looking for resources to help us succeed. Whether you're a fitness fanatic or seeking the perfect gift for one, our Ultimate 2023 Fitness Gift Guide is...

read more
The Power of Social Proof In Personal Training

The Power of Social Proof In Personal Training

In the world of personal training, where trust and credibility play pivotal roles, the concept of social proof functions as an authentic way to connect with your audience. Social proof, the influence created when individuals see others engaging in a particular...

read more
fitness articles
lifestyle articles
nutrition articles
golf articles

SUBSCRIBE

Click to sign-up for weekly information and offers.

DISCLOSURE

We are a participant in the Amazon Services LLC Associates Program, an affiliate advertising program designed to provide a means for us to earn fees by linking to Amazon.com and affiliated sites.

IronMan Injury Prevention

IronMan Injury Prevention

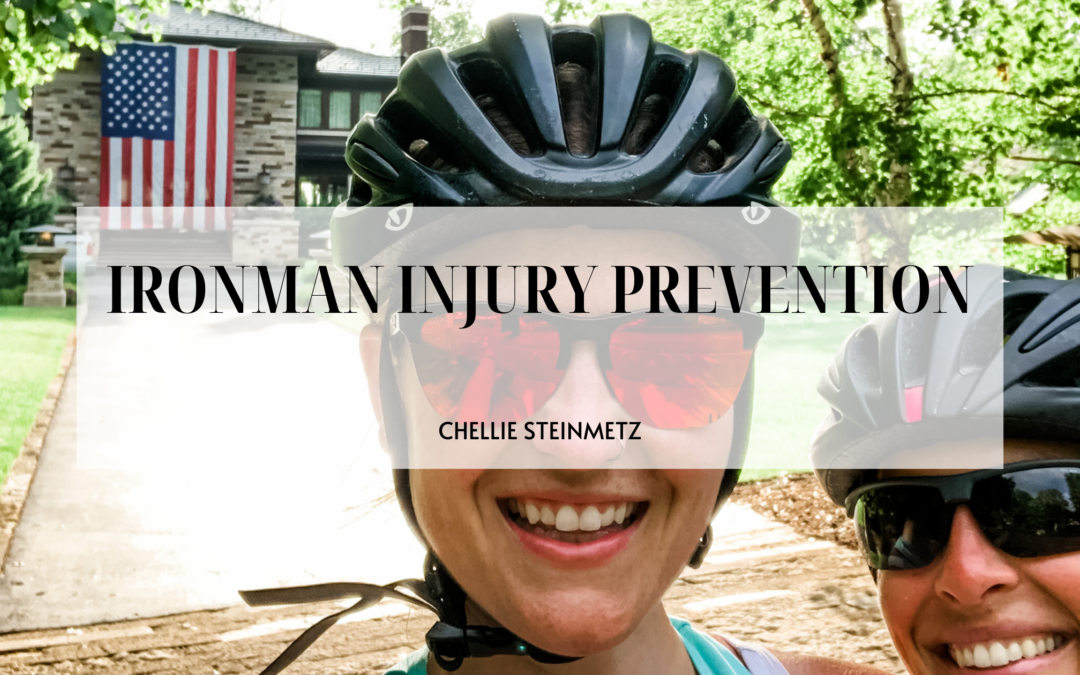
Today guys, we were talking IronMan injury prevention. I would say that one of the most asked questions I get while training for an IronMan is..

“How do you take care of yourself?”

Or perhaps put in a less eloquent way…

“Doesn’t that just trash your body?”

Usually when someone asks me that question I jump into a long-winded explanation. I blab on about how it could and to some extent will take a toll on your body. But with proper training and recovery you should be just fine.

And as a rule, in general I’m trying to no longer be long-winded. If there’s one thing that Mike and his type eight personality has taught me, it is that being long-winded is not always appreciated. Check out more about the Enneagram personalities.

What I want to provide you with today is a synopsis of how to prevent injury while training for an IronMan. For this conversation I’ve brought along with me my training partner friend and physical therapist Kaite Van Laanen.

She is going to give us the expert medical side of injury prevention from a physical therapist point of view. And I’m going give you my perspective as a trainer.

Whether you’ve always wondered how it’s possible for the human body to perform an activity like an IronMan or if you’re training for one yourself what you’re about to read will give you a great understanding of how to successfully train for an IronMan and remain healthy.

Now let me take a step in another direction.

HOW YOUR GEAR CAN PROVIDE INJURY PREVENTION WHILE TRAINING FOR AN IRONMAN

My first endurance event was with MS Run the US in 2015. And boy did I have a huge learning curve. I had never ever ran a marathon before and I was setting out to run six marathons in six days for the charity.

By day three I learned that I should have checked by ego at the door. And that your running shoes are essential to success. I had brought with me one single pair of running shoes.

There should be dramatic background music playing. Like right when a detective figures out who the murderer is. Because the one pair of running shoes was murder on my feet and ankles. Take a look at the picture of my ankle at the end.

I was running in the same pair of shoes day after day for six days straight. If you haven’t done the math yet that is over 150 miles. And I had been training in these shoes prior to the event!

If this doesn’t seem like a big deal, let me tell you two things. One, the average mileage of a shoe is 300-500 miles. Two, shoes need time to recover. The cushioning/support gets worn down through the pounding of running. 48 hours is recommended between wears.

All of this is to say, if you are doing an endurance event find the best gear for you. I swear it will make a difference.

Please don’t get that confused with “you need all the bells and whistles”.

What you need is equipment that is fit to your body, that will allow you to perform your best during training and racing. If you are a mom, check out my stroller running essentials.

Now let’s talk about how to train to prevent an injury.

INJURY PREVENTION WHILE TRAINING FOR AN IRONMAN FROM A PHYSICAL THERAPIST

If you have been reading my other articles, Training for An IronMan As a New Mom with less time in 2021 and How To Use Interval Training For A Successful IronMan Run,  then you know I am giving a HUGE amount of focus on running for my upcoming IronMan race. And training for any running endurance event comes with unique challenges from an injury prevention perspective.

As a personal trainer I most commonly I see chronic knee pain, plantar fasciitis and shin splint style pain in my clients. Frequently these pains are associated to bad footwear, over training/ bad programming or poor recovery.

If I can’t help a client with adjusting their programming, targeting their recovery or changing their footwear I always refer to a physical therapist. As my friend Kaite said to me, “nothing will compare to the hands of a good PT”.

COMMON RUNNING INJURIES SEEN IN ENDURANCE ATHLETES

  • Posterior tibial tendonitis
  • Plantar fasciitis
  • Hamstring strain/pain
  • Piriformis pain
  • Chronic knee pain

The trick here is to prevent a running related injury before it starts. Kaite recommends a four tier approach.

4 STEPS TO PREVENT A RUNNING RELATED INJURY BEFORE IT STARTS

First, use a dynamic warm-up before starting any run. You want to simulate what you are going to do at a slower speed and intensity. The more specific you can be to the movements you are going to perform, the better the warm-up. And the intention is to increase blood flow to muscles and activate the supporting musculature to prevent pain and injury during a workout.

Second, stretch AFTER you run and make sure you are doing it correctly.

According to Kaite, a runner should address the following as part of cool down stretching.

  • Hip flexors/quads
  • Hamstrings
  • IT band
  • Piriformis
  • Calves

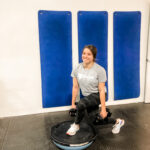
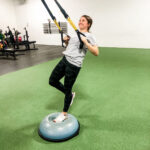
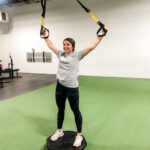
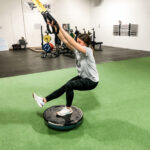
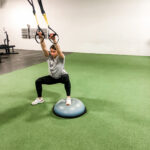
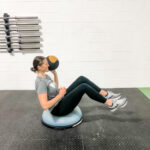
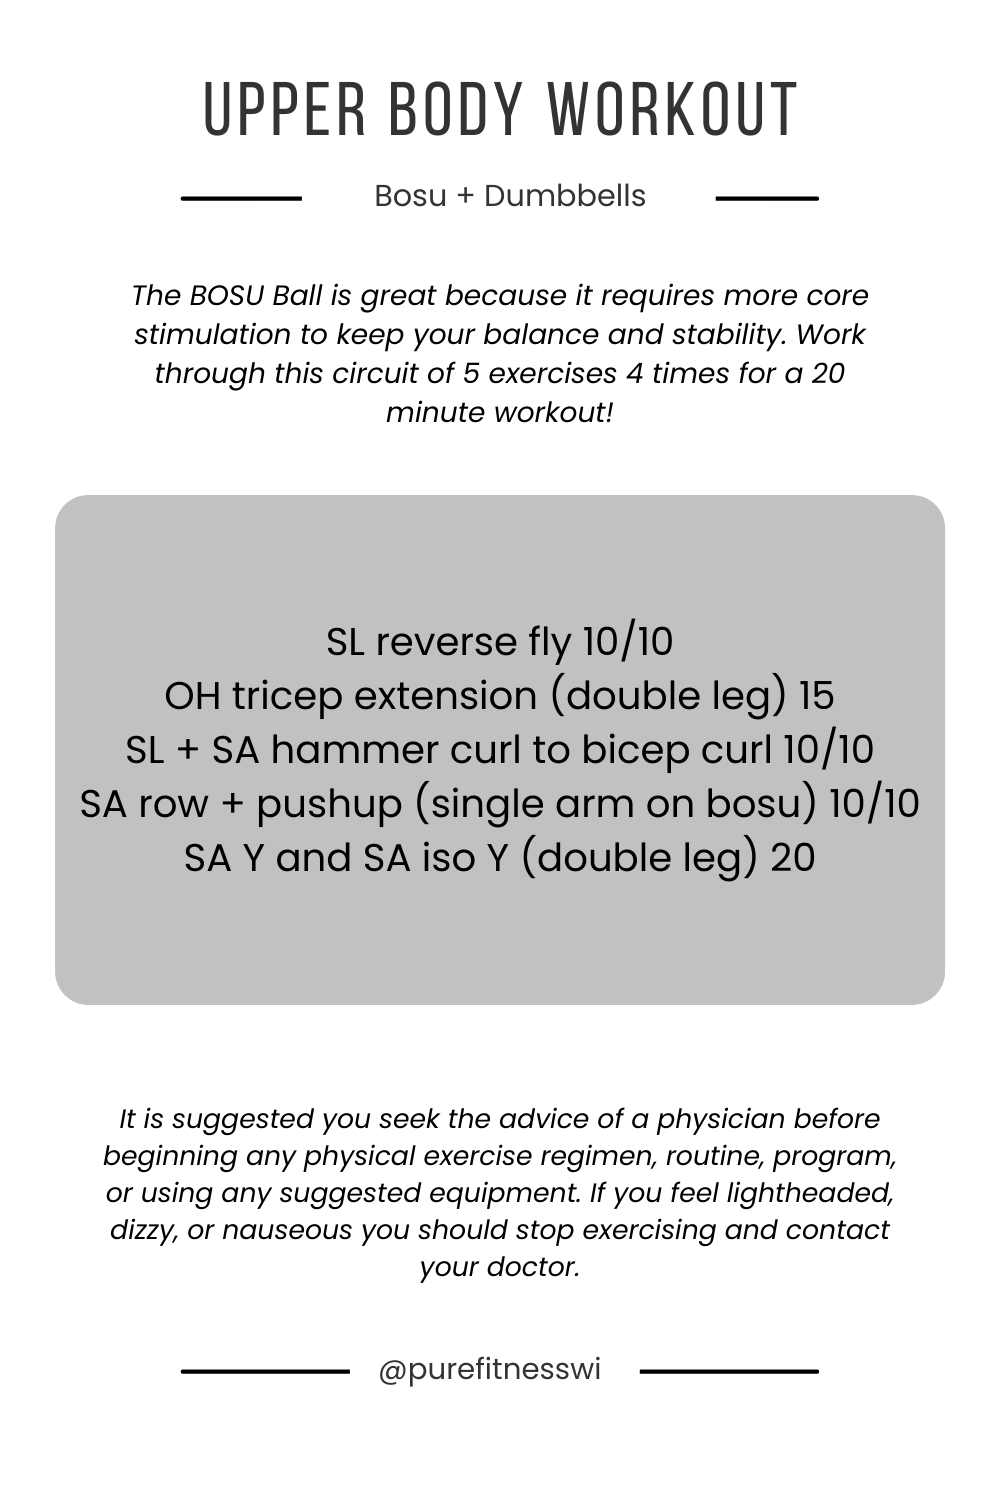
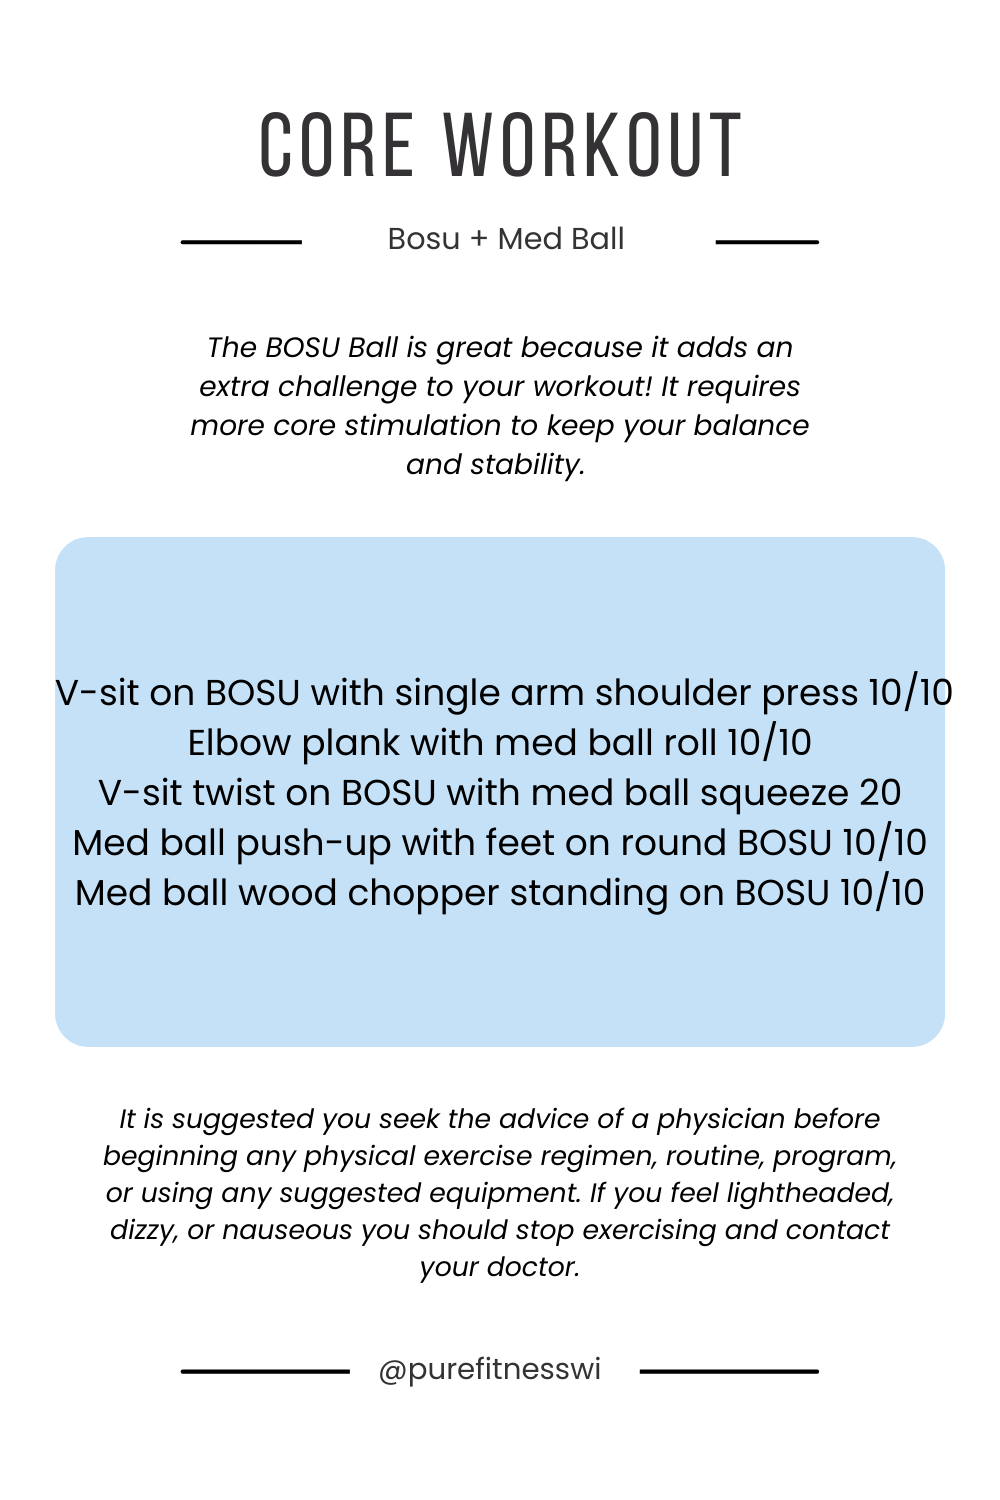
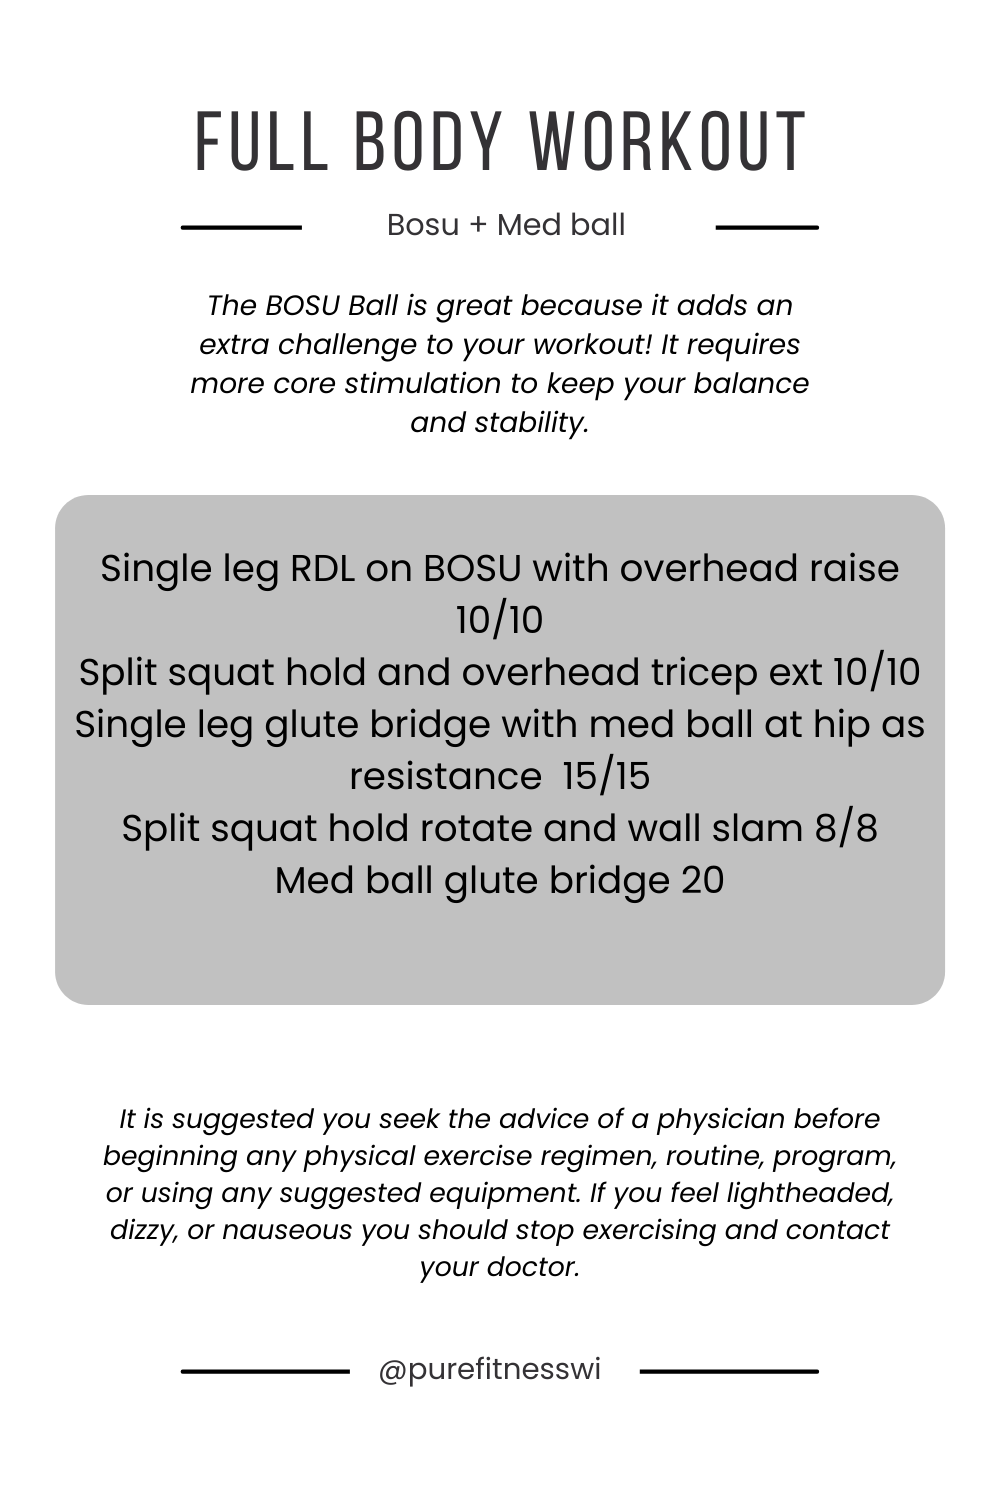
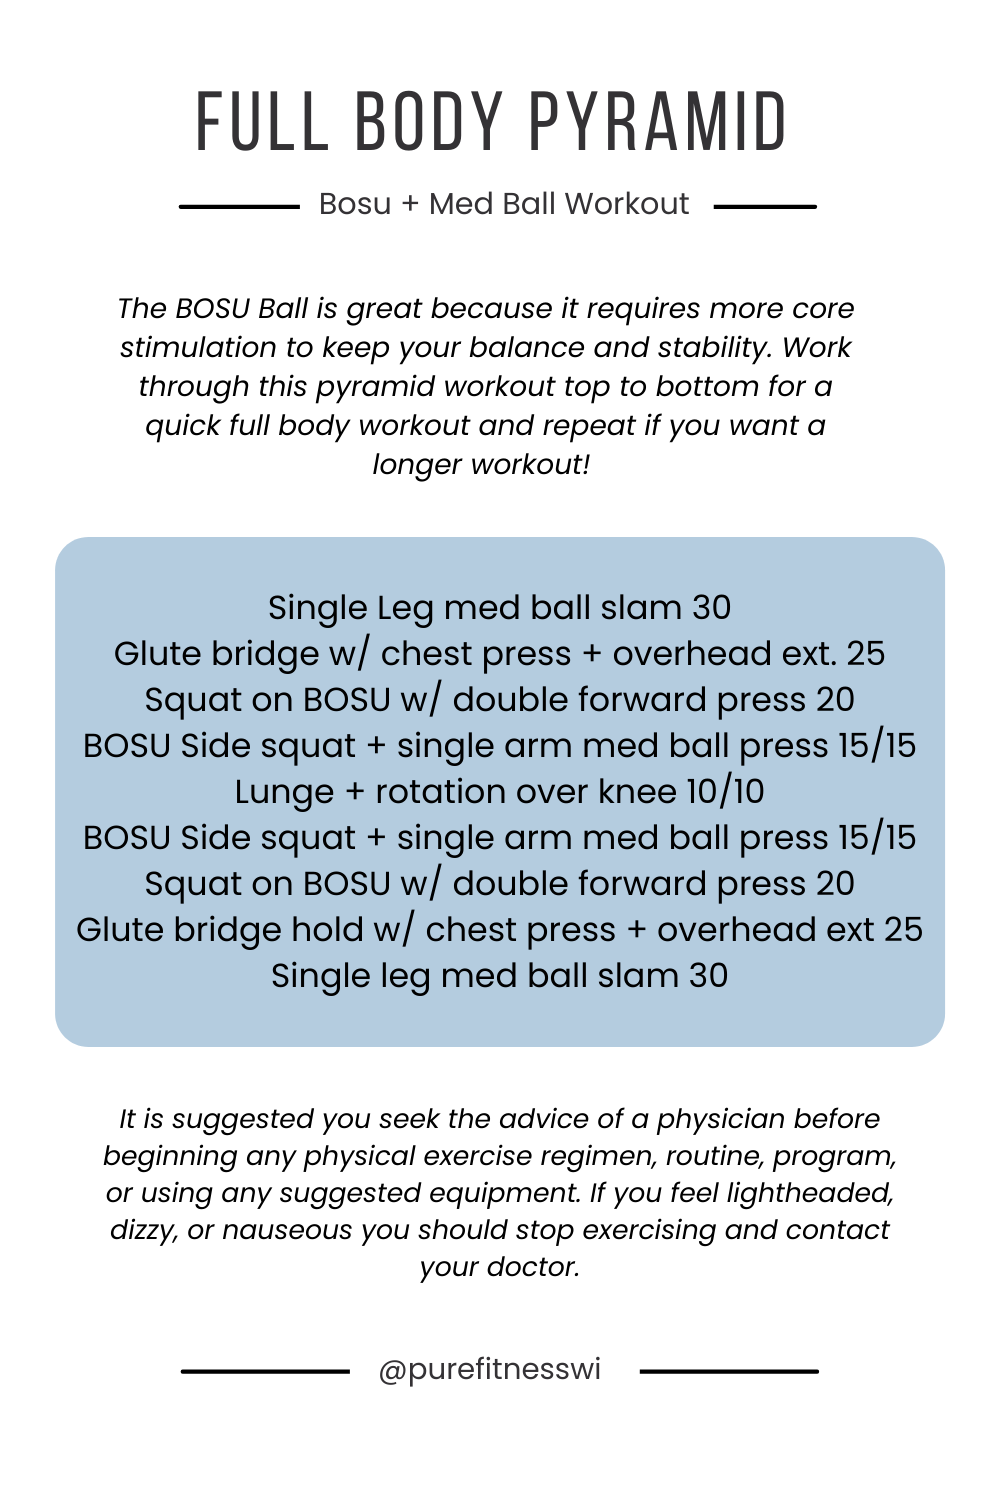
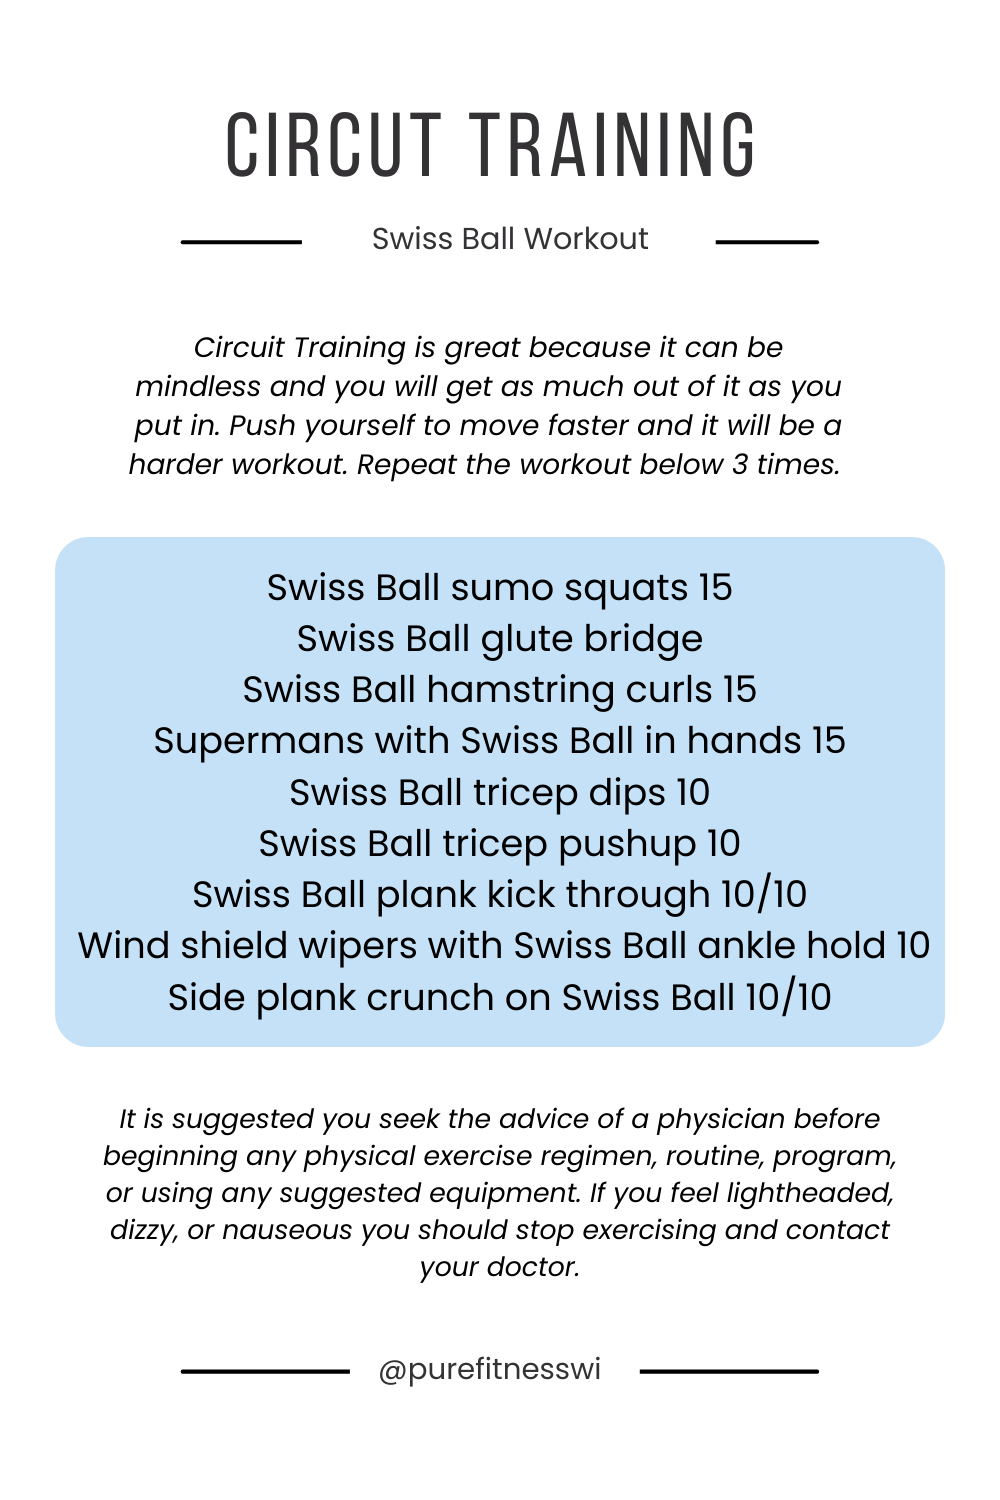
Third, consistently strength train, with a focus on balance, for the smaller supporting muscles of the lower extremities. And of course, don’t forget core strengthening.

I have more details on this below. Keep reading!

Fourth, use a PT to find areas of the body that have the potential to contribute to mechanical dysfunction and cause pain.

Kaite’s advice for IronMan athletes, “With this intensity and length of a training program, athletes are bound to have things pop up.  Deal with pain as soon as it arises. Don’t try to just train through it”.

She also encourages athletes to use a PT even before pain occurs to prevent injury. Having assessments on strength and flexibility to be proactive about your entire training program.

INJURY PREVENTION WHILE TRAINING FOR AN IRONMAN FROM A PERSONAL TRAINER

I have two words for you. Strength. Training.

For a while there was some debate on how strength training should fit into an endurance athlete’s program. The good news is that we know it is needed. But that doesn’t mean it is given the time it needs.

Strength training should be used throughout the entire training cycle. Deloading as you come near race day to hit your performance peak.

TOP AREAS TO STRENGTHEN FOR RUNNERS

A properly developed program should focus on both restoring balance from the volume of training (opposing muscles) and strengthening/building endurance in the necessary muscles.

I would argue that posterior chain is extraordinarily important for runners. I pay special attention to glutes, hamstrings and back/posterior shoulder muscles to improve muscular balance.

The initial focus is on full range of motion, followed by stability. Only then can we truly load an athlete for performance.

And you can never underestimate the necessity of core strengthening in your program. Your core is your foundation for movement. The better your foundation the better your movement will be. That be injury prevention, running faster, or simply feeling better.

Additionally, would encourage athletes to focus on training their lactate threshold for improving their overall performance. Read this blog for more information on how to train your lactate threshold for running.

The better periodized your program is, the better results you will get and you will be able to avoid training related injuries with ease.

MANAGING PAIN WHILE TRAINING FOR AN IRONMAN

If you are currently dealing with an injury or chronic pain/discomfort I am sure you feel torn on what to do. It is easy to get caught in limbo. Thinking, how can I race if I don’t train – and – how can I train if I am always in pain.

I can’t give you a clear answer. Simply because I don’t know you. What I can do is be the good angel sitting on your shoulder. Sometimes rest will save you time.

I often see athletes who could take 1-2 weeks of rest and recover without and impact to their end goal. However, they elect not to rest and carry a nagging injury with them to race day. That is the kiss of death.

I will leave you with this one last thought.

Your mind is your most powerful tool.

In training and in racing.

Before you show up on race day you have determined your fate to finish or to not. Your mind decided how disciplined you would be during training. And you have already decided to seek the best help possible to ensure your success.

Respect your mind and use its power.

I shared more about How To Have Discipline For An IronMan Race and Mental Challenges of Training for An IronMan As A Mom in these blogs. They are worth a read if you are struggling or wondering if you should take the leap and sign-up!

Cheers to IronMan training!

Fit Finds: The Ultimate 2023 Fitness Gift Guide

Fit Finds: The Ultimate 2023 Fitness Gift Guide

Welcome to the world of fitness and wellness gifting! As we gear up for 2023, it's time to start setting goals and looking for resources to help us succeed. Whether you're a fitness fanatic or seeking the perfect gift for one, our Ultimate 2023 Fitness Gift Guide is...

read more
The Power of Social Proof In Personal Training

The Power of Social Proof In Personal Training

In the world of personal training, where trust and credibility play pivotal roles, the concept of social proof functions as an authentic way to connect with your audience. Social proof, the influence created when individuals see others engaging in a particular...

read more

SUBSCRIBE

Click to sign-up for weekly information and offers.

DISCLOSURE

We are a participant in the Amazon Services LLC Associates Program, an affiliate advertising program designed to provide a means for us to earn fees by linking to Amazon.com and affiliated sites.

TRAINING WITH A TRX

TRAINING WITH A TRX

Let’s do a simple breakdown on training with a TRX. I want to offer some perspective on how you can use the TRX for range of motion, stability and strength. Making it a great addition to any home gym or workout program.  And I also want to give you a place to start. So I have a few workouts for you to try at the end.


TABLE OF CONTENTS

  1. How a TRX Works
  2. Why You Should Use A TRX
  3. Strength Training
  4. Mobility Training
  5. Tips for Using the TRX
  6. Workouts to Download
  7. Equipment

HOW A TRX WORKS

In my mind, I put the TRX into two categories. One, is that you use the TRX to increase the intensity of an exercise by making it more challenging. Two, is that you use the TRX to de-load an exercise to successfully achieve proper muscle activation and/or range of motion. The results are improved flexibility/range of motion, increased stability/balance and growth in strength/power.

This is not to say that 1 and 2 can’t happen at the same time. They work synergistically. A great example would be a plyometric exercise like a squat jump. With the TRX we can increase range of motion in the squat portion which can allow us to develop more strength. You can also ensure that you can perform a quality explosive rep within that full range of motion by having the assistance of your arms. After all a squat jump with your hips going past parallel is a huge increase in difficulty.

This is also true of a more simple exercise like a squat. But for someone who’s own body weight is too much to control down and up in a squat pattern (making it a challenging exercise for THAT individual) the TRX becomes an avenue to de-load the movement while allowing them to work within the necessary range of motion.

Let’s not forget to touch on stability/balance. If you have used a TRX before you know this.  The straps can move in all directions giving the exerciser a challenge to their balance. A good example is a push-up. If your hands are holding on to the straps and your feet are on the ground there will be a lot of instability at your upper body. You will have to work very hard to keep your form as you perform the push-up. Which will cause stabilizing muscles around your shoulders and upper body to kick on and it will really fire your core.

Isn’t that interesting? Something simple as straps hanging can have such an impact on stimulating physiological adaptations?

WHY SHOULD YOU BE TRAINING WITH A TRX

I love the TRX because it can train strength, balance, flexibility and stability. But it also can help the user scale the exercise to fit their needs. Making it a top piece of equipment even for a home gym.

The TRX website clearly states why you want to use a TRX, “… to develop strength, balance, flexibility and core stability.” Let’s discuss flexibility and range of motion, stability and strength.

FLEXIBILITY AND RANGE OF MOTION

When we talk about flexibility we are talking about muscle lengthening to improve range of motion. The TRX can be used to help us move into a greater range of motion than we would be able to on our own. Why? Because you can use the TRX as a support system, de-load the exercise and ultimately increase range of motion.

And range of motion is directly correlated to power, which is the result of strength training. But how can range of motion be correlated to power? Let me explain.

Stored elastic energy is what allows us to be explosive and powerful, whether that be for running, jumping or swinging a club. This elastic energy is stored in your muscles and you can think of your muscles as rubber bands. We want them (your muscles) to lengthen like a rubber band and then “snap back” explosively. The more you pull/stretch the rubber band the more speed it snaps back with. So the more range of motion you can access in exercise, with proper stability, allows you to have the potential for greater stored elastic energy and therefore more power.

For the lower body that support comes in the form of holding on to the foam handles with your hands. Take a side lunge, for example. If you hold the handles in your hands you will be able to use your upper body to help you control the decent (lowering) and pull yourself back up. This support or de-loading will allow you to “sit into” a deeper range of motion. If done correctly, it can also help you use the proper muscles throughout the entire movement pattern.

If you put your foot into the loop and perform a side lunge the exercise will feel entirely different. That is because you are no longer supporting yourself to achieve a greater range of motion. You are now challenging your balance, stability and strength. I consider the foot in side lunge to be an advanced variation, and I would not recommend starting here for beginners.

It is worth saying that there should never be pain when working to improve your flexibility. If you have a previous or current injury pushing yourself into a new range of motion may make things worse. You should consult a professional before trying.

STABILITY

How a TRX is designed demands you have stability in order to perform the exercises. The more challenging the exercise the more stability is required as you use the straps while moving. Including variations like single leg, single arm and adding resistance like a dumbbell will all increase the stability demand of the movement.

The TRX can also be supportive. For someone who is unsteady or recovering from an injury the TRX can be used to give them more support to remain stable through their range of motion. A great example is the squat. If you struggle to sit down to a chair without “plopping” or using your hands, the TRX can help you gain the stability to control the movement. 

Improved core stability is another advantage of training with a TRX. You can use the TRX to challenge your core stability in exercises you are already doing, like a plank or mountain climbers. Or you can more advanced exercises like a fall out or complexes that include multiple movement patterns to really tap into your core stability and muscular endurance.

As a side note, in order to have good core stability you need ALL of your core muscles to be operating effectively AND synergistically. And your core stability is important because it helps transfer force from the lower to upper body (and back), and to keep your spine healthy (and keep good posture) and prevent injuries. 

STRENGTH

And of course the TRX can help increase your overall strength. Now, used by itself you aren’t going to build large muscles or an immense amount of strength because you are using your bodyweight as the resistance.

You can add additional resistance if needed. Holding on to one handle will doing just about any movement and holding a dumbbell in the other hand is an easy way to add resistance. Think of doing a side lunge, in the large range of motion you get from holding on to the handle, but adding more resistance by holding a weight in the other hand. Another example, this time for the upper body, would be a single arm row with a weight held at the chest. This will really challenge your core strength (anti-rotation) and your back muscles.


TRX STRENGTH TRAINING


Upper Body Strength Exercises

  • Row on two feet, single foot or single arm (two feet and two arms shown)
  • Push-up with feet in or hands in (hands in shown)
  • Tricep extension or tricep dip (extension shown)
  • Squat and curl at top or bottom (top shown)

Lower Body Strength Exercises

Here are five great exercises for the TRX at various difficulty levels. If you want to take these for a test drive I would recommend starting with the glute bridge or the shrimp. Why? Well, they are the “easiest” of the five.

  • Shrimp
  • Hamstring Curl
  • Pistol Squat
  • Side Lunge
  • Glute Bridge

Core Strength Exercises

I think most people are familiar with using the TRX with feet in the straps to train your core. It’s challenging. It looks cool. But I would bet there are a few on this list that you haven’t seen before.

  • Y Sit-Ups
  • Standing Fall Out
  • Leg Supported Crunch Variations
  • Shifting Plank
  • Supported Hallow Hold
  • Mountain Climber Variations
  • Pikes and Single Leg Variations
  • Plank Kick Through
  • Plank Tucks


TRX MOBILITY

We talk a lot about mobility. It has become increasingly important in our sedentary world. Our joints can become so tight when we sit for long periods of time or do the same motions over and over. Most commonly we see individuals with tight anterior upper bodies (chest) and tight hips/hamstrings.

One of the main ways we can alleviate some of these aches and pains is by restoring balance at the joint through flexibility/mobility and strengthening. And these need to happen in a cooperative way because you need to have range of motion at a joint, then stability and then power. Which is why mobility training should be a part of your week!

In the exercises below we are going to use the TRX to help provide traction as we reach the end of a range of motion or to help support our body weight to increase our range of motion.

For upper body mobility we are going to target opening up the chest, releasing the lats, and working on upper back rotational mobility. The combination of these three is going to help release a lot of that tension built up from sitting, driving & everyday life. And it will feel great at the end of your workout.

When we talk about lower body mobility we are mostly talking about mobility in and around the hips. Yes, you are going to gain some mobility in the range of motion at the knee joint, but since it is a uniaxial joint that only goes in one direction it will not see as much improvement as the hip will. Since the hip is a multiaxial joint, we have to work for range of motion in multiple directions and you will feel exactly what I’m talk about when you try these exercises.

Upper Body Mobility Exercises

  • Chest Openers
  • Thoracic Rotations
  • “Wall Slides”
  • Erector Spinae/Lat Rotations
  • Lat Stretch

CHEST OPENERS

Start by having the TRX straps comfortably in hand and facing away from the anchor. Proceed with the mobility exercise by stepping forward and letting the straps gently pull your arms behind you. This will create a traction stretch within your anterior shoulder and chest. Alternate each foot you are stepping with and see if with a couple reps you can improve your range of motion.

THORACIC ROTATIONS

This is a favorite to do in our gym on the wall, but we love being able to use the TRX for an added stretch at the end. I would not recommend this until you are able to do half-kneeling thoracic rotations on the wall as seen in the PureForged Method (great for you golfers out there!).

Starting kneeling with the outside knee up and TRX straps in hand on the side. Begin by rotation away from the anchor. Keep your arms straight as you let your upper back (thoracic spine) rotate and your chest open up at the end. Keep your lower body as still as possible.

“WALL SLIDES”

Start with the TRX straps out to the side of your body as pictured above. You are going to slowly move your arms toward the ceiling while keeping your arms wide. This will allow you to work on shoulder mobility through the entire range of motion while getting some traction stretch in your shoulders toward the end.

ERECTOR SPINAE/LAT ROTATIONS

This next one is going to feel great on the lattisimus dorsi muscle (your lats) and your erector spinae muscle which runs through the middle of your back to your glutes. You are going start facing away from the anchor. Walk your feet back so that you are leaning into the straps and having a slight forward bend. Keeping your arms straight rotate from side to side to get a great traction stretch in both these muscles.

LAT STRETCH

Starting half kneeling with your knee closest to the TRX up, have the straps together as one. Grab onto the one handle with both hands and swing your arms up overhead and lean the outside hip away. This will create a great stretch down the side and through your lats.

Lower Body Mobility Exercises

  • Squat for Depth
  • Side Lunge/Squat for Depth
  • Figure 4 Stretch
  • Hip Flexor Stretch

Squat for Depth

Starting with your hands in the handles with elbows bent at your side, take a comfortable squat stance. You may want to take your feet a bit wider to allow for greater mobility. Proceed as you would with a normal squat, sitting back with weight mid-foot to heel. Come back up using your legs with assistance from the TRX.

Side Lunge/Squat for Depth

Similar to the squat, the use of the TRX here is going to allow for greater depth in that side squat/lunge. Often times people are limited moving laterally because they feel like their hip stops them. The use of the TRX is going to allow your hip to go deep, almost deeper than the knee. This is going to create a glute stretch.

Figure 4 Stretch

This is another great glute stretch that is going to allow your lower back to release as well. Start standing with the TRX straps in hand with your elbows at your side and standing on one leg. Take the other leg and cross it over so that your ankle is over the other knee. Squat normally by sitting back into your glute. You should feel a great stretch in your glutes.

Hip Flexor Stretch

This one is one of our go-tos because it is great to open up the hip flexor. You are going to start in a half-kneeling position with your back foot inside the TRX. This is going to create traction for the hip flexor to help it open up. To create a great mobility stretch, have your hips go forward by squeezing your glutes and shifting your weight forward. This will also start to work in a quad stretch. Your body will stretch what it needs to, so whichever is tighter will feel the greatest difference.

TIPS FOR USING THE TRX

  1. Keep tension on the straps. The whole point is to use the TRX for exercise. A helpful tip is to find the end point of your range of motion when you are training with a TRX. Make sure there is tension and you are in the proper stance or position.
  2. Remember the intention of the movement. I see a lot of people going crazy when they use a TRX. This results in sawing of the handles, or them sliding back and forth. It also causes a lot of sagging in the low back when doing core work.
  3. The TRX also shouldn’t rub against your arms. If that is happening you need to adjust your positioning.
  4. Make the adjustments. If the three above didn’t hammer it home let me be clear. You can make easy adjustments while using the TRX. If your angle is too hard or steep, change it and finish your reps don’t quit. If you can’t keep tension on the straps, stop adjust your positioning and resume your reps. Oh, you can’t control your hips from sagging, or the straps from swinging, or the rubbing on your arms? Stop and adjust. As always with exercise quality comes first.

TRX WORKOUTS

There are various workouts for mobility, upper, lower and core. One of my favorite things to do is mix in cardio intervals after every round. When I am doing a strength workout this breaks up the strength sets and increase my stamina. And when I am doing mobility it helps to keep variation in the workout and keep my body temperature and blood flow to muscles high.

EQUIPMENT – WHERE TO BUY A TRX

These are affiliate links. While there is no cost to you when you order through them, I do make a commission. Your support, by ordering through them, is greatly appreciated!

You can find a TRX all over the place. But if you want to support me and the Pure Fitness team you can order through this link on Amazon 😃

Now for some items you will want to use with your TRX. A high quality exercise mat. My favorite brand is Manduka because it has lasted years, I don’t slip and it is easy to clean. I linked the one I use here.

If you have a space dedicated to a home gym I would get the TRX wall anchor. This way you don’t have to worry about moving your TRX in and out of a doorway every time you want to start and end your workout.

Fit Finds: The Ultimate 2023 Fitness Gift Guide

Fit Finds: The Ultimate 2023 Fitness Gift Guide

Welcome to the world of fitness and wellness gifting! As we gear up for 2023, it's time to start setting goals and looking for resources to help us succeed. Whether you're a fitness fanatic or seeking the perfect gift for one, our Ultimate 2023 Fitness Gift Guide is...

read more
The Power of Social Proof In Personal Training

The Power of Social Proof In Personal Training

In the world of personal training, where trust and credibility play pivotal roles, the concept of social proof functions as an authentic way to connect with your audience. Social proof, the influence created when individuals see others engaging in a particular...

read more
fitness articles
lifestyle articles
nutrition articles
golf articles

SUBSCRIBE

Click to sign-up for weekly information and offers.

DISCLOSURE

We are a participant in the Amazon Services LLC Associates Program, an affiliate advertising program designed to provide a means for us to earn fees by linking to Amazon.com and affiliated sites.